Sourdough Discard Pita Bread (Easy & Fast Flatbread Recipe)
This post may contain affiliate links. Please read our disclosure policy.
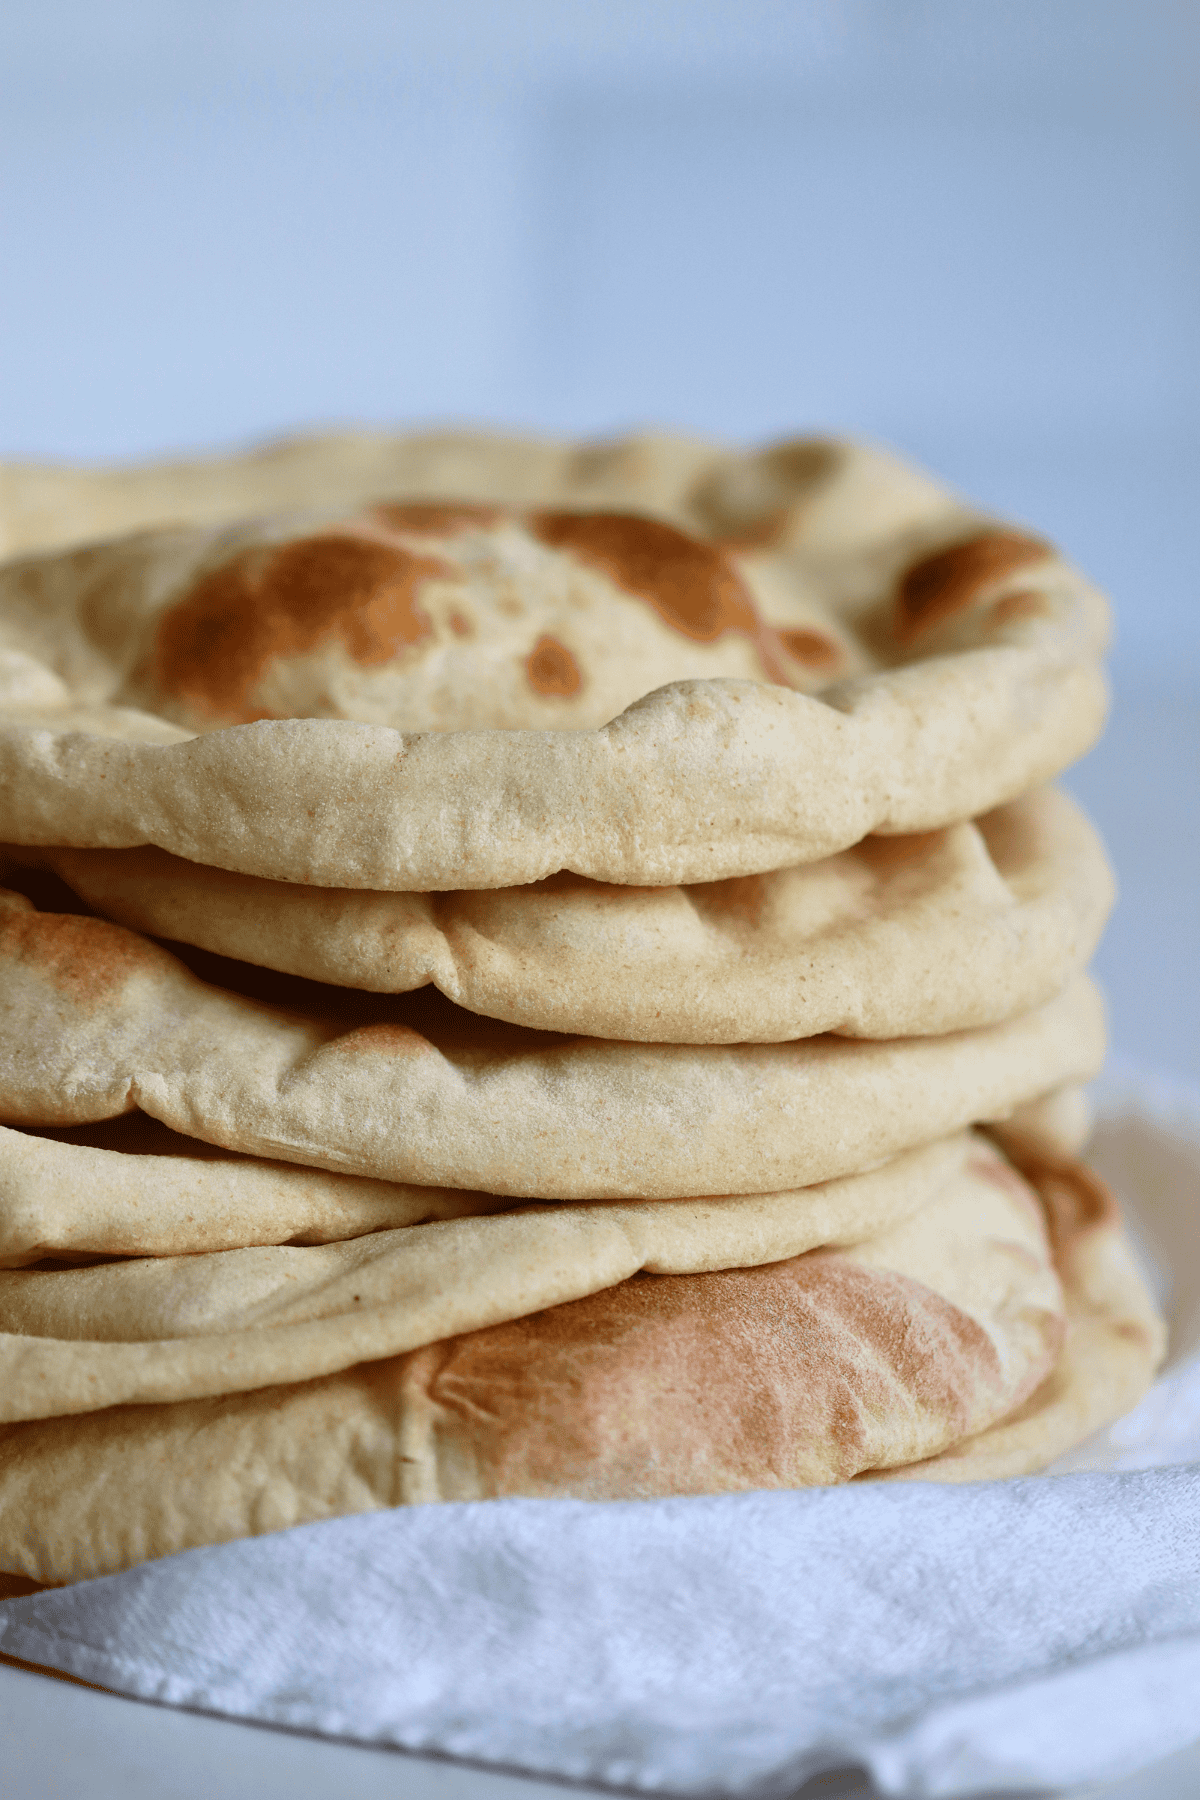
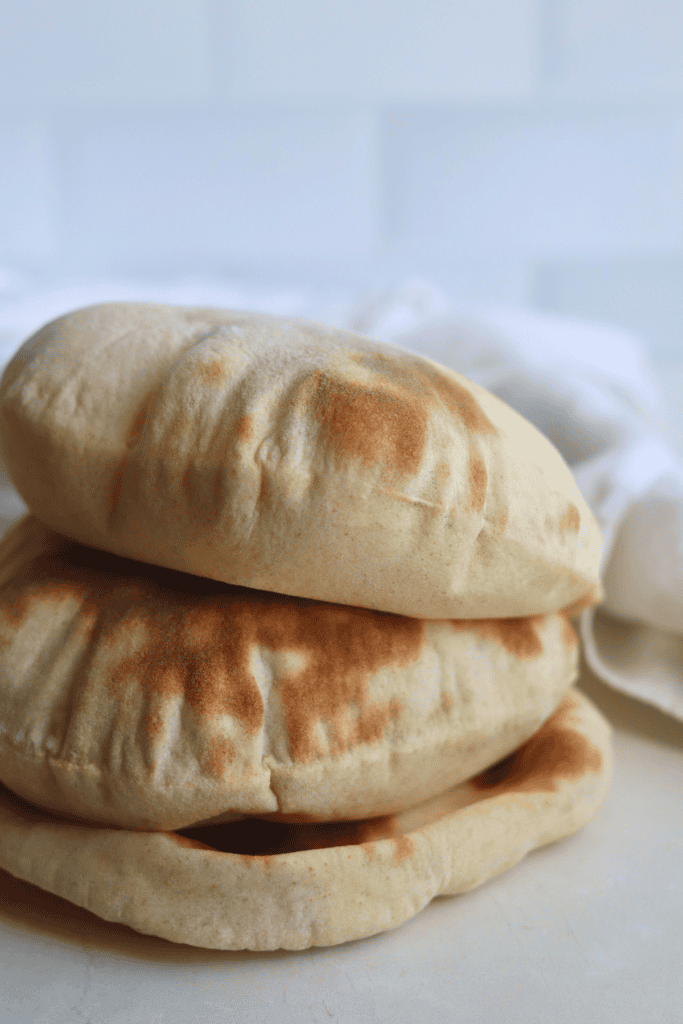
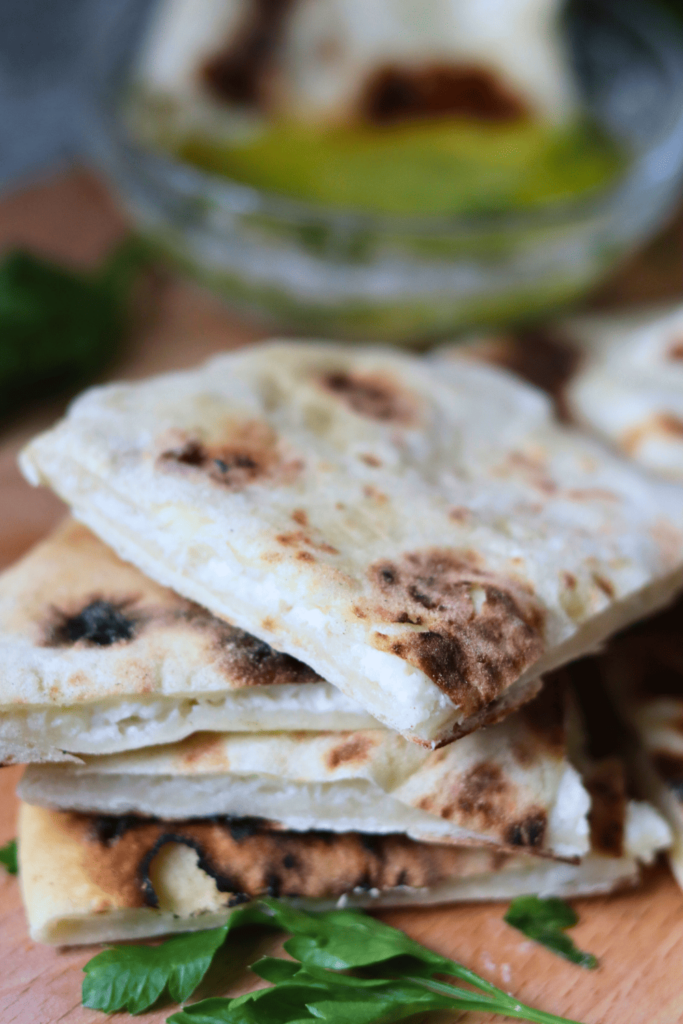
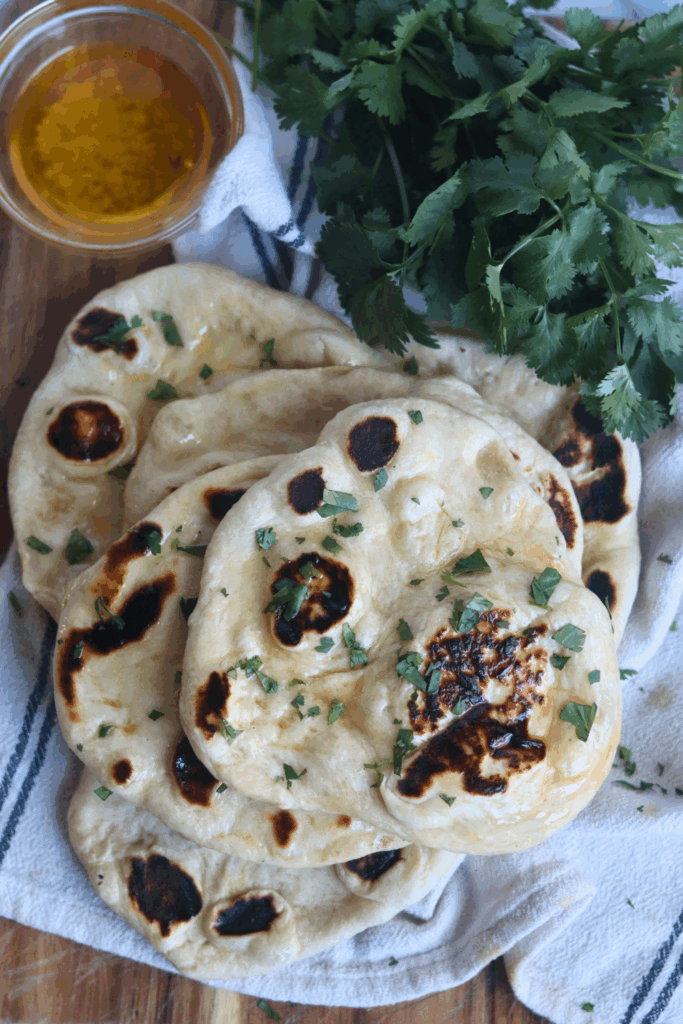
This Sourdough Pita Bread is one of my favorite ways to use up extra sourdough discard because it’s quick, easy, and so much better than store-bought. The pitas bake up soft and fluffy with perfect pockets for stuffing with your favorite fillings, and the dough comes together in about an hour.
Whether you’re making wraps, sandwiches, or serving them alongside dips, these homemade pitas are always a hit. And if you love making flatbreads from scratch, my Sourdough Flatbread and Sourdough Naan are two more simple recipes that belong in your baking rotation.
Quick Look: Sourdough Discard Pita Bread
- Prep Time:
- Cook Time: 2–2.5 minutes per batch
- Total Time: 1 hour
- Servings: 8 pitas
- Calories: ~122 kcals per serving (based on nutrition panel)
- Cook Method: Baked on a pizza stone or cast-iron skillet
- Flavor Profile: Soft, chewy, and lightly nutty with a subtle tang from sourdough discard. Puffs up beautifully with a perfect pocket for stuffing with your favorite fillings.
- Difficulty: Easy — Simple ingredients, beginner-friendly steps, and on the table in just over an hour!
SUMMARIZE & SAVE THIS CONTENT ON
Why You’ll Love Sourdough Discard Pita Bread
- Fast —This simple flatbread is on the table in just over an hour from start to finish, which is remarkably quick for a homemade bread. These Sourdough Discard Tortillas are just as fast and just as good.
- Soft and chewy — I love soft flatbreads, and these pitas come out really soft on the inside with a nice chew on the outside. And because they puff up in the oven, you get a pocket you can stuff with just about anything. Try this Stuffed Cheese Sourdough Flatbread next.
- Beginner-friendly — The steps are simple, the shaping easy, and the instant yeast makes the rise predictable every time, so this is a great recipe to start with if you’ve never made homemade bread before. When you’re ready for your next challenge, this Easy Sourdough Bread for Beginners is a natural next step.
- Versatile — Use these pitas to scoop up hummus, stuff them with your favorite fillings, or wrap them around grilled chicken or veggies. And if you have any left over, turn them into these Sourdough Flatbread Chips so nothing goes to waste.
Ingredients & Substitutions
* To find precise measurements, scroll to the bottom of this post to find the recipe card*
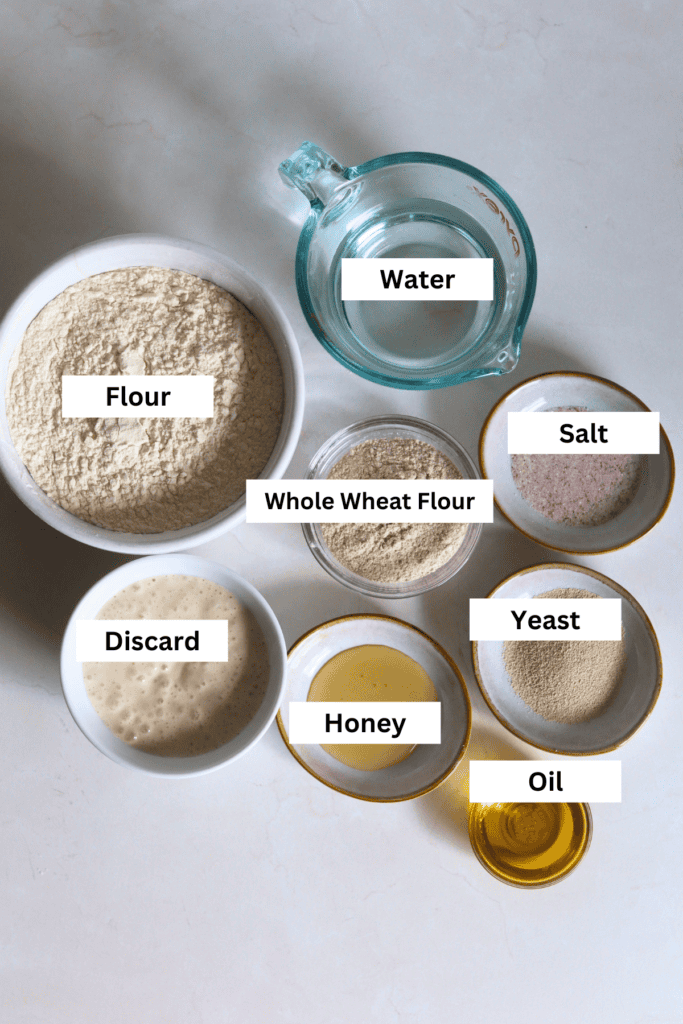
- Flour: I used a combination of all-purpose bread flour and whole wheat flour. I love the nutty flavor that the whole wheat flour brings to the sourdough pita bread, but you can make this recipe with just all-purpose flour.
- Oil: Olive oil adds a delicious flavor while also making this fluffy sourdough pita bread extra tender. You can substitute with any neutral oil, like avocado oil.
- Honey: Helps the pita brown nicely in the oven or skillet. You can swap it with the same amount of sugar (by grams) if needed.
- Sourdough Discard: I used fresh, room temperature sourdough discard. Older discard will give the pita bread a much more tangy flavor. If using discard straight from the fridge, know that it’ll slow down the rise time. You can swap in the same amount of active sourdough starter (grams).
- Salt: I add in a little fine sea salt for flavor and minerals.
- Instant yeast: I used commercial yeast for this recipe because it can be added directly to the dry ingredients and helps the dough rise quickly. Active dry yeast will also work, but it needs to be bloomed in the warm water and honey first before adding the remaining ingredients since it takes longer to activate and rise the dough.
Baking Time For Sourdough Discard Pita Bread
|
Time |
Process |
|---|---|
|
4:00 PM |
Mix dough and First Rise |
|
4:45 PM |
Shape and Second Rise |
|
5:00 PM |
Bake |
How to Make Sourdough Discard Pita Bread
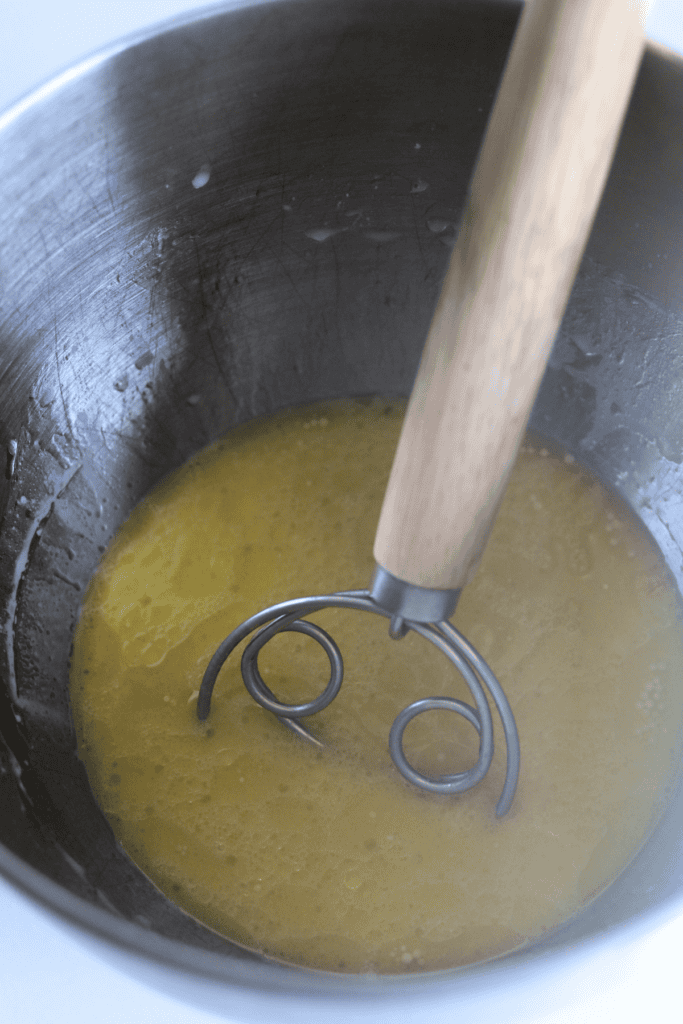
- In the bowl of a stand mixer, add the warm water, sourdough discard, olive oil, and honey. Using a Danish dough whisk, mix until you have a milky liquid.
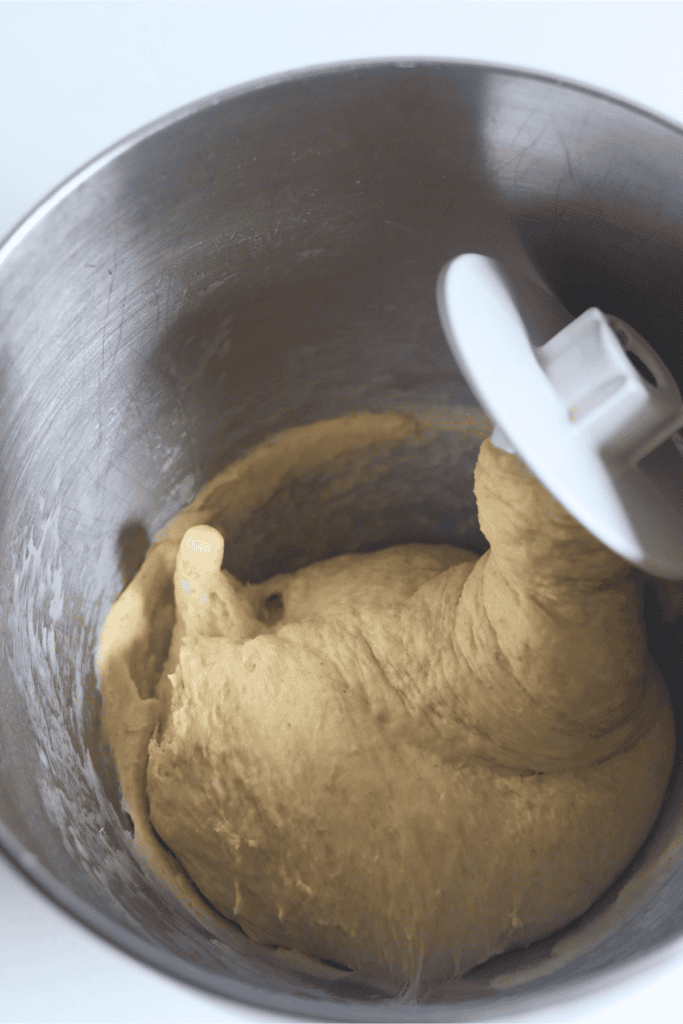
- Add the flours, instant yeast, and salt. With a dough hook attachment, mix on low for 2 minutes, or until all the ingredients are combined. Then knead for 5 to 7 minutes on medium-low speed.
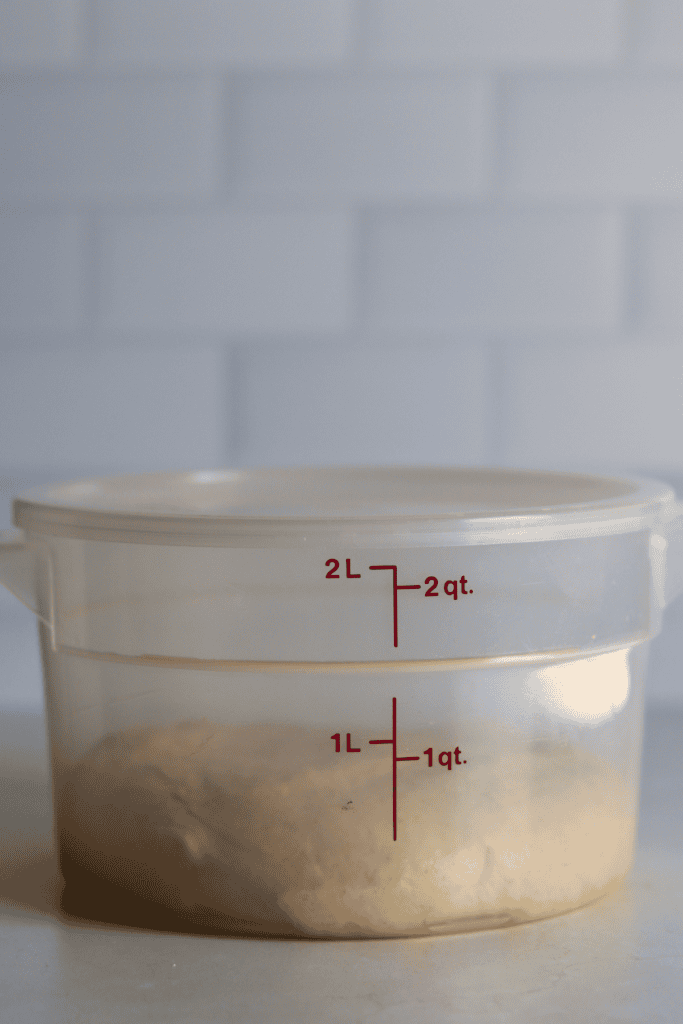
- Place the dough in a lightly greased bowl. Cover the bowl and let the dough rise until double in size.
- Once the dough has doubled, divide it into 8 even pieces, then roll each piece into a smooth dough ball.
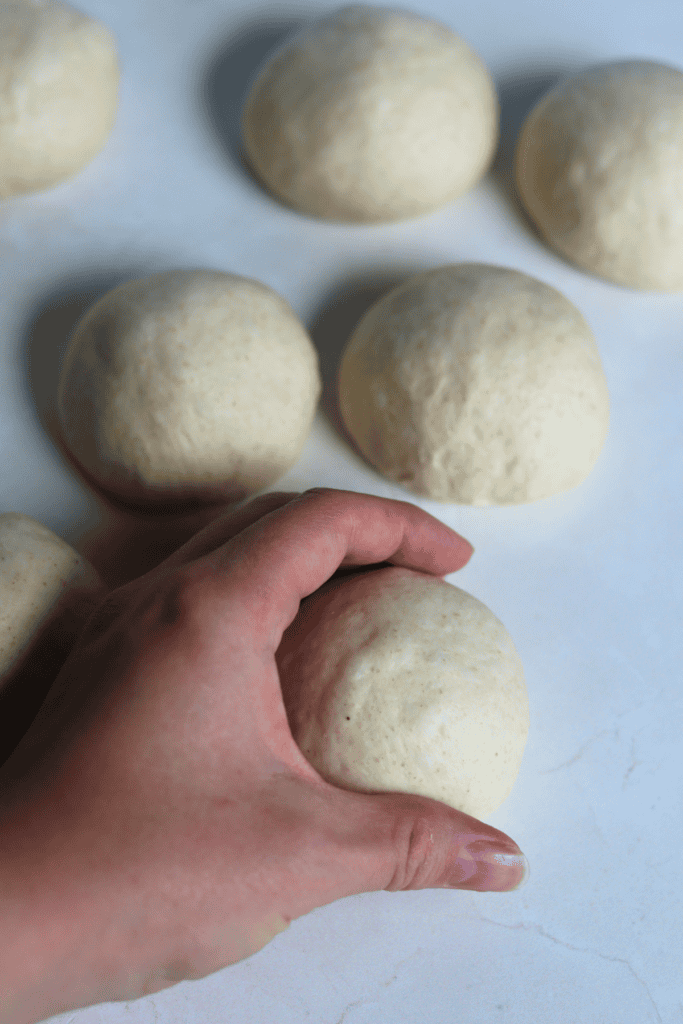
- Cover the balls of dough with a clean tea towel and let them rest for 15 minutes. Place a pizza stone on the middle rack of the oven and preheat to 500°F.
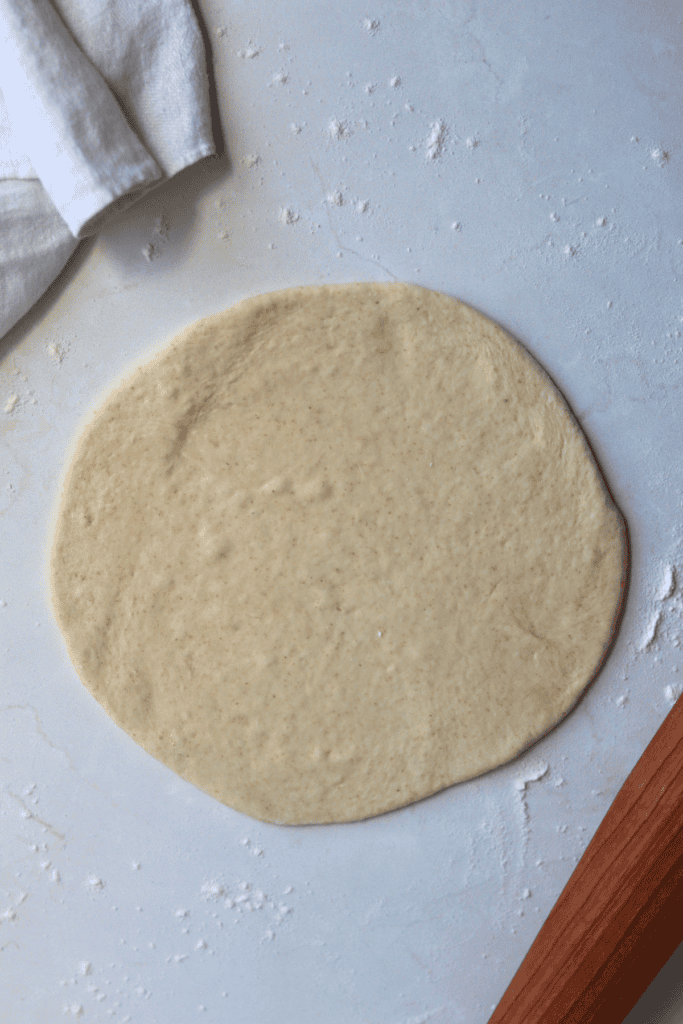
- On a lightly floured work surface, roll out each dough ball to 6 to 7 inches wide.
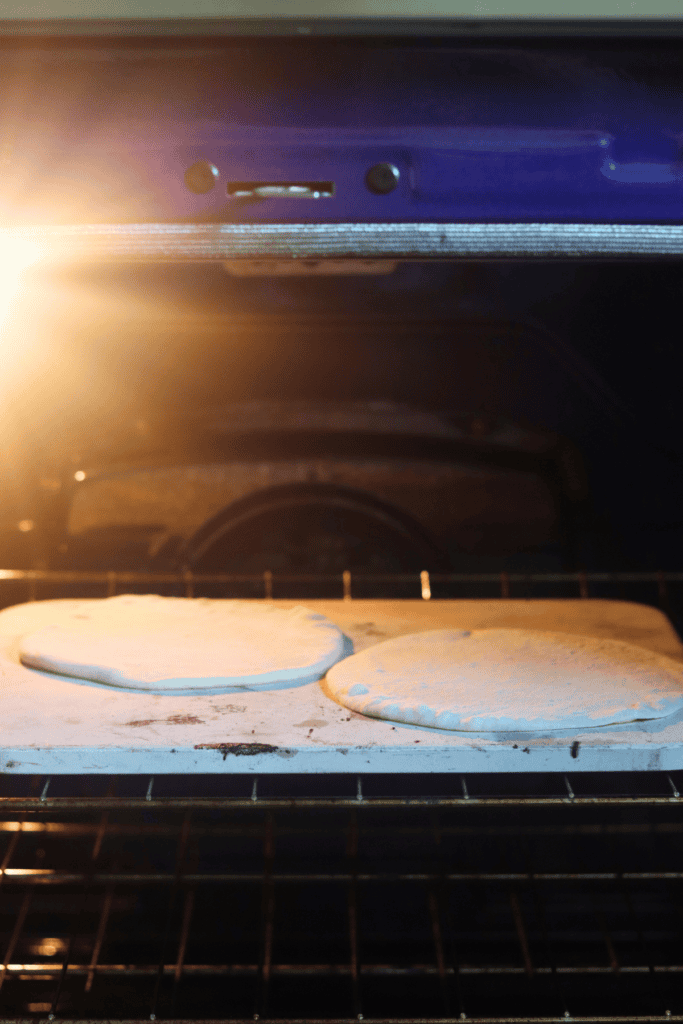
- Two at a time, place the pitas on the hot pizza stone and cook for 2 to 2½ minutes.
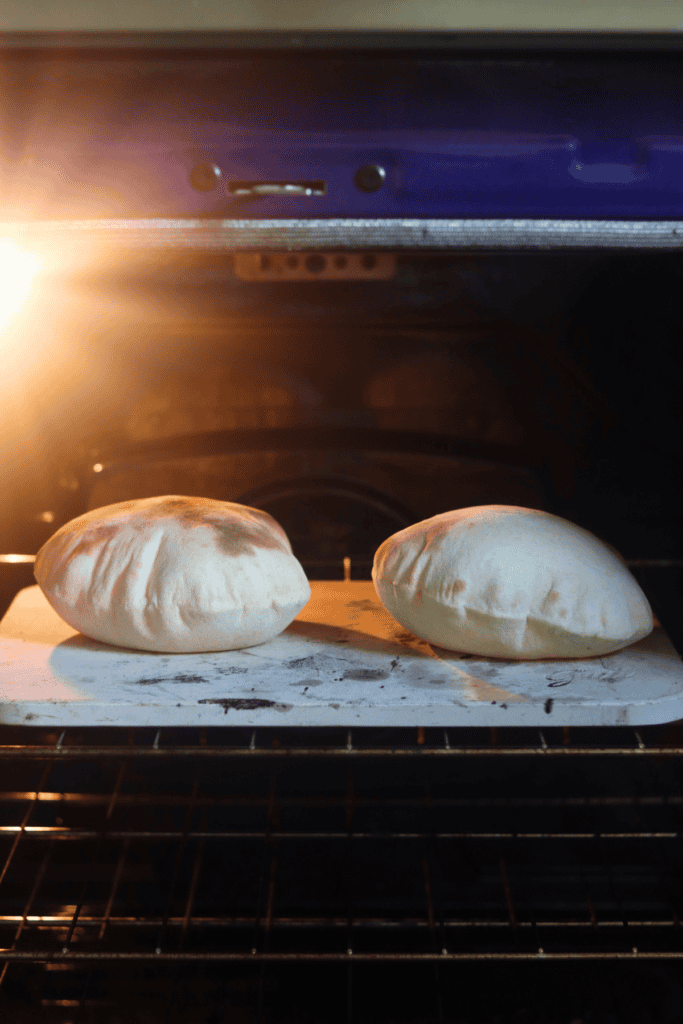
- They should puff up and lightly brown on the edges.
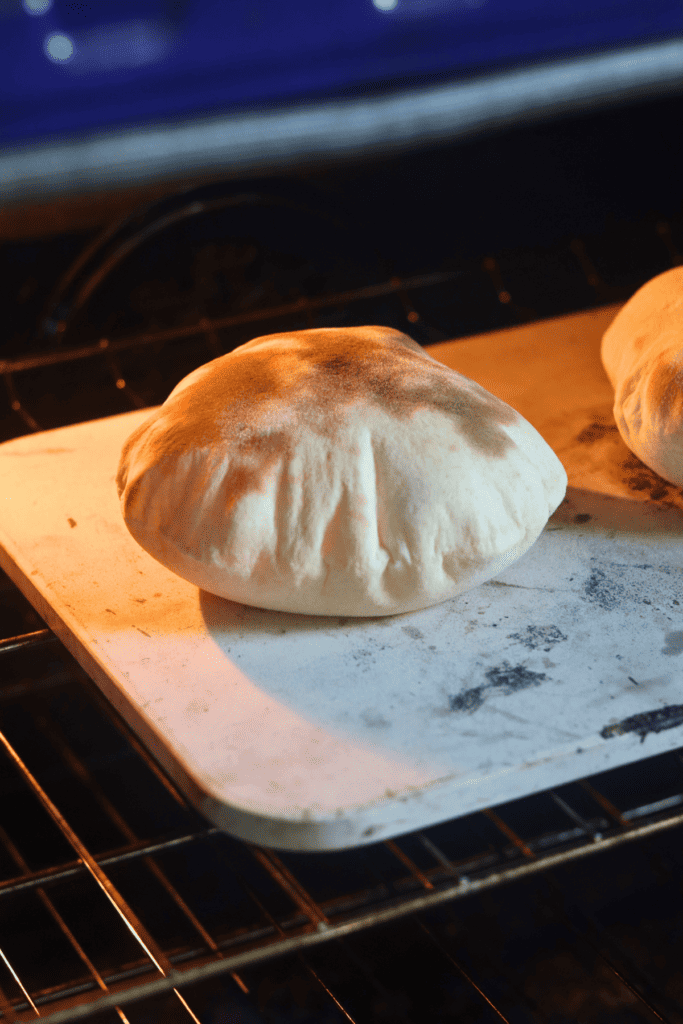
- Carefully remove the cooked sourdough pitas and place them in a clean tea towel. Repeat with the remaining pitas.
- Serve warm and enjoy!
McKenna’s Helpful Tips
- Don’t roll the dough too thin or have any holes. If the dough is too thin or has holes in it, it won’t puff up the way it should and can come out too crunchy instead of soft. Take your time rolling and keep the thickness even.
- If you don’t have a pizza stone, use a cast-iron skillet. Preheat your skillet over medium-high heat and grease it with a little olive oil. Cook the first side for about 2 minutes, then cook the other side for the same amount of time. Keep a close eye on the pita so it doesn’t burn.
- You can knead this dough by hand. If you don’t have a stand mixer, no problem. Knead the dough by hand until it’s tacky to the touch and you’re good to go.
How to Store
These pitas are best eaten right off the stone while they’re still warm. If you have leftovers, stack them in an airtight bag and leave them on the counter for up to 2 days. I love that they freeze so well too.
Let the pitas cool, tuck a piece of parchment between each one so they don’t stick, and pop them in a freezer bag for up to 3 months. When you’re ready for one, wrap it in a damp paper towel and give it 20 to 30 seconds in the microwave. Or warm it up in a dry skillet for about a minute on each side.

Sourdough Discard Pita Bread FAQs
No, you don’t need a pizza stone to make discard pita bread. A cast iron skillet works just as well. Heat it up over medium-high, brush it with a little olive oil, and lay the pita down for about 30 seconds. When you see it start to bubble, flip it and give it a minute on each side
You absolutely can make this flat bread with just all-purpose flour. I personally love adding whole wheat flour because it gives the pita a nutty flavor, but it’s not required.
Yes, you can prep the discard pita dough in advance. Once the dough has doubled, punch it down, cover it tightly, and refrigerate for up to 24 hours. When you’re ready, divide, shape, and bake as directed. You can also freeze the shaped dough balls on a baking sheet, then transfer to a freezer bag for up to 3 months. Thaw in the fridge overnight, bring to room temperature, roll out, and bake.
Sourdough pita is a flatbread leavened with yeast, which causes it to puff up when it bakes and form a pocket in the center. It’s a lighter bread compared to sourdough flatbread, which is chewier and thicker in texture. Sourdough naan is typically made with yogurt, giving it a softer, more pillowy texture.


If you tried this Sourdough Discard Pita Bread recipe or any other recipe on my blog, please leave a 🌟 star rating and let me know how it went in the📝 comments below. Thanks for visiting!

Sourdough Discard Pita Bread Recipe
Enter your email below, and we’ll send it straight to your inbox! Plus, you’ll get my newest sourdough recipes and best tips every week!
Ingredients
- 180 grams warm water 3/4 cup
- 120 grams sourdough discard, room temperature 1/2 cup
- 30 grams olive oil 2 Tablespoons
- 10 grams honey 1 teaspoon
- 290 grams All-purpose flour 2 cups + 1 Tablespoon
- 35 grams Whole Wheat flour 1/4 cup
- 7 grams instant yeast 2 teaspoons
- 6 grams salt 1 teaspoon
Instructions
- In a bowl of a stand mixer add the warm water (90 degrees F), sourdough discard, olive oil and honey. Using a Danish dough whisk, mix until a milky liquid. My water was 110 degrees F. You can also knead this dough by hand, just increase the knead time by about 5-7 minutes.30 grams olive oil, 120 grams sourdough discard, room temperature, 180 grams warm water, 10 grams honey
- Next, add the flours, instant yeast and salt. With a dough hook, mix on low for 2 minutes, or until all of the ingredients are combined. Then increase the speed to medium-low and knead for 5-7 minutes. The dough should be pulling away from the bowl and tacky to the touch, not sticking to your hands.7 grams instant yeast, 35 grams Whole Wheat flour, 290 grams All-purpose flour, 6 grams salt
- Place the dough in a lightly greased straight-edge bowl, cover and leave to double in size. This took about 45 minutes in my 70 degree F kitchen. I love this straight-edge bowl because it allows me to clearly see when the dough has doubled in size.
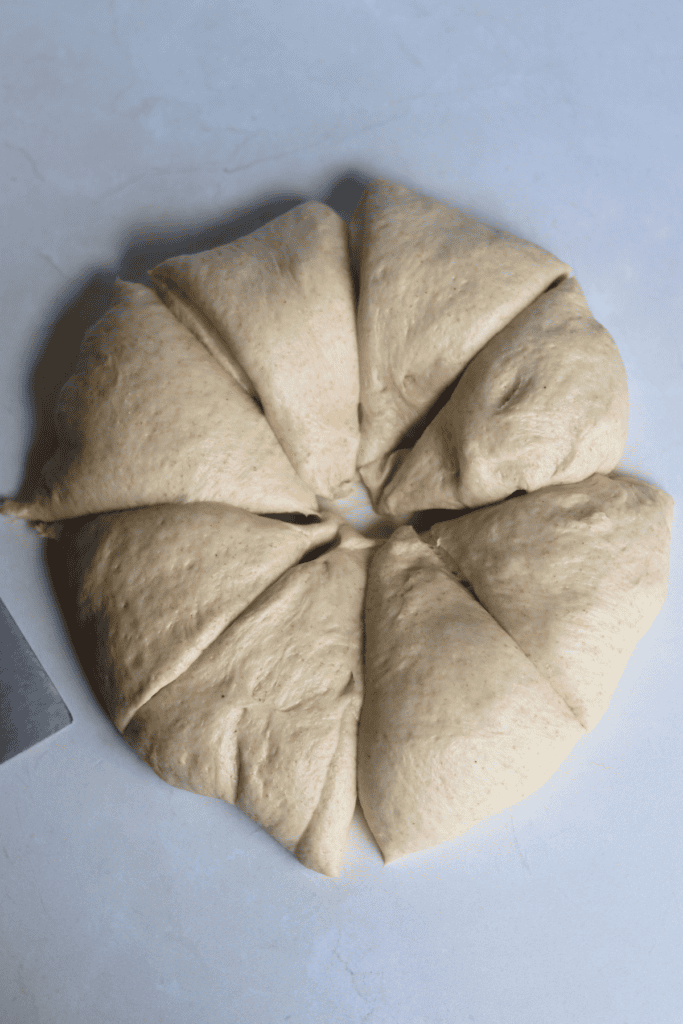
- Once the dough has doubled in size, punch the top of the dough to remove all the air bubbles. Then, place the dough on a clean work surface.
- With a bench scraper, divide the dough into 8 equal pieces (about 83 grams each).
- Pull the corners of the dough towards the center, flip, and then roll each piece of dough into a round, tight ball. Repeat with the remaining dough.
- Cover the doughballs with a clean tea towel and leave to rest for 15 minutes. This allows the gluten to rest, making it easier to roll.
- While the pita dough completes its second rise, place a pizza stone on the middle rack and preheat your oven to 500 degrees F. The pizza stone will need to preheat for at least 20 minutes before baking the sourdough pita bread.Don’t have a pizza stone? Find stovetop directions in the notes below!
- Once the dough has rested, lightly flour your work surface and rolling pin, then roll out each dough ball to be about 6-7 inches wide and less than ¼ inch thick. Be careful not to roll any dough out too thin or create any holes. This can cause the dough to crisp up while baking or prevent the dough from puffing up. Continue to flour your work surface so the dough doesn’t stick.
- Two at a time, place the sourdough pita on the preheated pizza stone and cook for 2-2 ½ minutes. It should puff up and lightly brown on the edges.
- Carefully remove and place the cooked sourdough pita in a clean tea towel to prevent them from drying out, then repeat the same cooking process with the remaining pita dough.
- Serve warm and enjoy!
Notes
Stovetop Directions
Preheat cast iron skillet over medium/high heat and brush lightly with olive oil. Lay pita on the hot skillet for 30 seconds. Once you see bubbling, flip the pitta and cook for 1 minute – it will puff, then flip and cook another minute.Ingredients & Substitutions
- Flour: I used a combination of all-purpose bread flour and whole wheat flour. I love the nutty flavor that the whole wheat flour brings to the sourdough pita bread, but you can make this recipe with just all-purpose flour.
- Oil: Olive oil adds a delicious flavor while also making this fluffy sourdough pita bread extra tender. You can substitute with any neutral oil, like avocado oil.
- Honey: Helps the pita brown nicely in the oven or skillet. You can swap it with the same amount of sugar (by grams) if needed.
- Sourdough Discard: I used fresh, room temperature sourdough discard. Older discard will give the pita bread a much more tangy flavor. If using discard straight from the fridge, know that it’ll slow down the rise time. You can swap in the same amount of active sourdough starter (grams).
- Salt: I add in a little fine sea salt for flavor and minerals.
- Instant yeast: I used commercial yeast for this recipe because it can be added directly to the dry ingredients and helps the dough rise quickly. Active dry yeast will also work, but it needs to be bloomed in the warm water and honey first before adding the remaining ingredients since it takes longer to activate and rise the dough.
Tips for Success
- Be sure not to roll out the dough too thinly or create holes in the dough. This can prevent the sourdough pita bread from puffing up while baking and becoming crunchy instead of soft and tender.
- I love freezing these and having them on hand for a quick lunch! Stuff them with all of your favorite meats, cheeses and veggies and you are set.
- You can prep this dough ahead of time. Let the dough double in size, then punch the dough to remove the air bubbles. Cover it and place it in the fridge until the next day. The 2nd rise will take a little longer since the dough will be cold from the fridge.
