

Easy Sourdough Bread for Beginners
This post may contain affiliate links. Please read our disclosure policy.
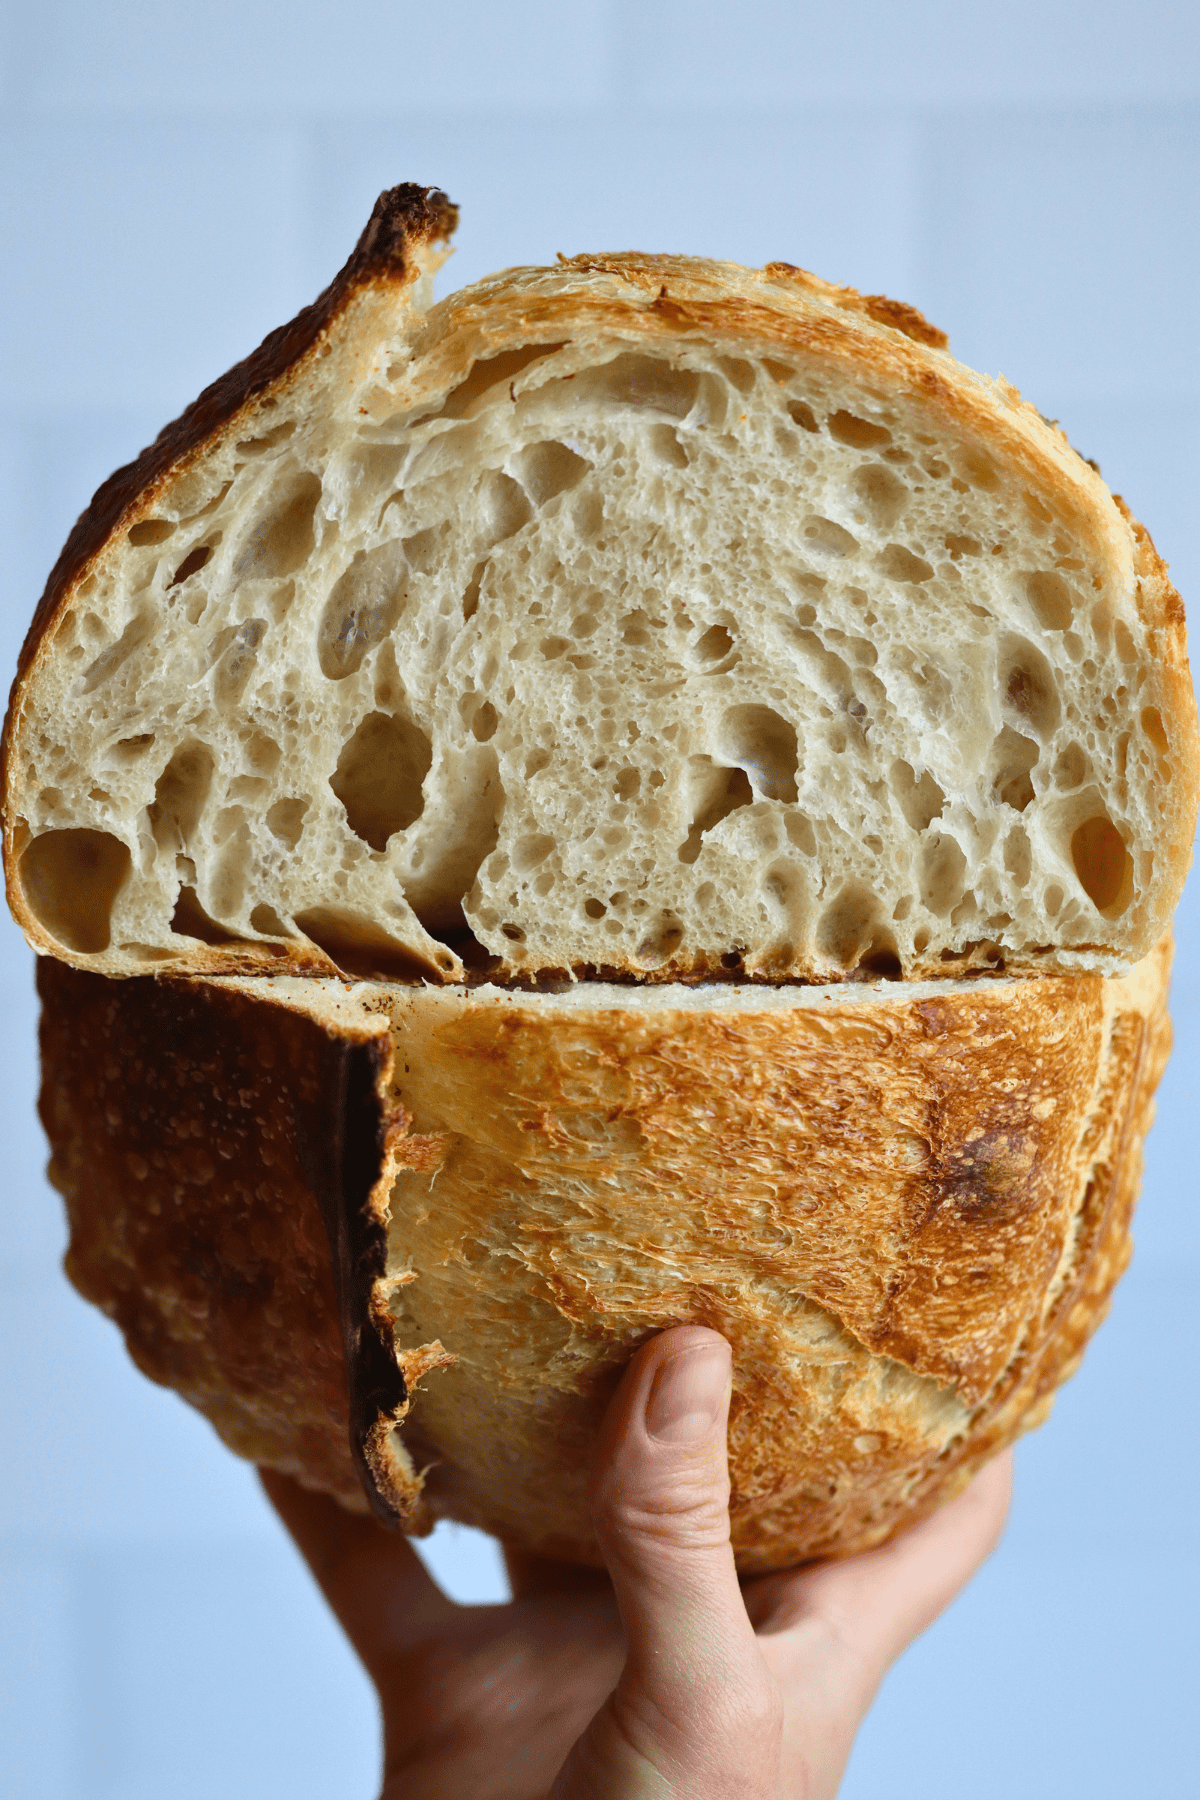
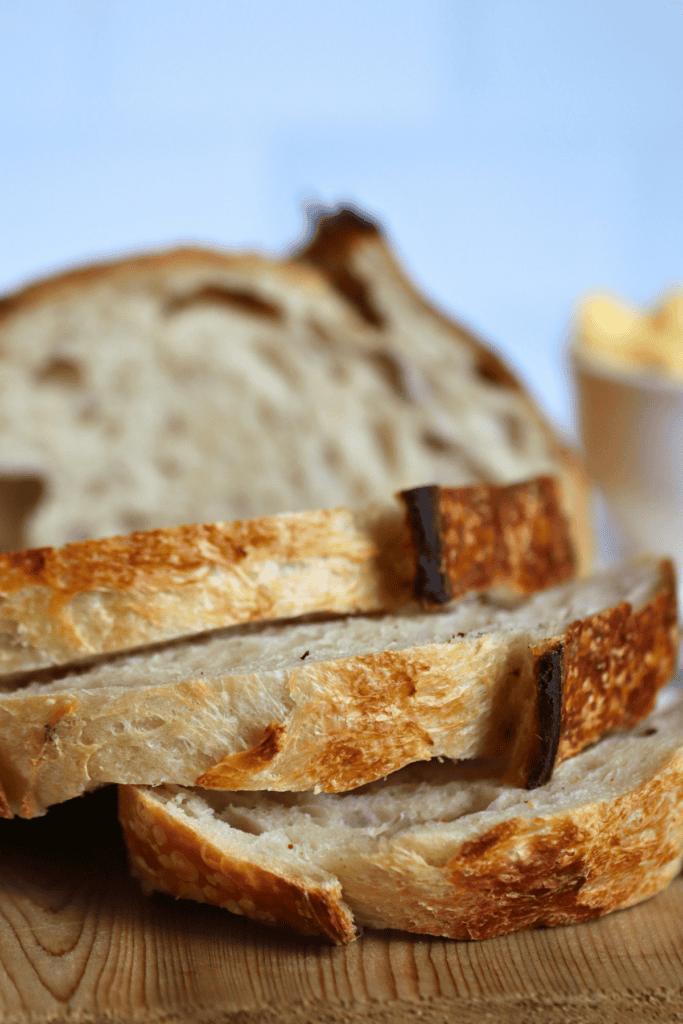
This Easy Sourdough Bread for Beginners is the perfect sourdough bread recipe for your first loaf, using just four simple ingredients, an active sourdough starter, and a digital scale to create fresh sourdough bread with a crunchy crust and airy crumb.
Whether you received your own starter from a friend or made a homemade sourdough starter from scratch, this forgiving sourdough recipe will give you best results every time. Once you taste homemade sourdough bread, you can explore endless variations like Caramelized Onion Sourdough Bread or Honey Oat Sourdough Bread.
Quick Look: Sourdough Bread
- Prep Time: 10 minutes
- Rise Time: 20 hours
- Cook Time: 1 hour
- Total Time: 21 hours 10 minutes
- Servings: 1 loaf
- Calories: 1,851 kcals for the whole loaf (based on nutrition panel)
- Cook Method: Baked in a Dutch oven
- Flavor Profile: Classic, crusty sourdough with a chewy, open crumb and a deeply golden crust. Just 4 ingredients and most of the work is done overnight!
- Difficulty: Intermediate — A multi-day sourdough loaf with stretch and folds, shaping, and cold proofing, but beginner-friendly with mostly hands-off time!
SUMMARIZE & SAVE THIS CONTENT ON
Why You’ll Love This Easy Sourdough Bread for Beginners
- Only four ingredients needed: All you need is bread flour, filtered warm water, salt, and an active starter to bake a beautiful loaf of sourdough bread with no commercial yeast required. The wild yeast in your starter does all the work through bulk fermentation. If you love simple bread baking, my Sourdough French Bread is another easy option.
- Flexible and forgiving schedule: The fermentation process works around your life. You can let the bread dough go through its dough rest overnight at room temperature and shape it the following morning. Stretch and folds happen every half hour to 60 minutes, so there is plenty of flexibility built in for beginners.
- Crusty exterior with a soft, open crumb: This recipe produces homemade bread with a classic crunchy crust and a soft, airy crumb that rivals any bakery loaf. Once you master this base recipe, try adding sourdough inclusions like herbs, cheese, or dried fruit for endless flavor combinations.
Ingredients & Substitutions
* To find precise measurements, scroll to the bottom of this post to find the recipe card*
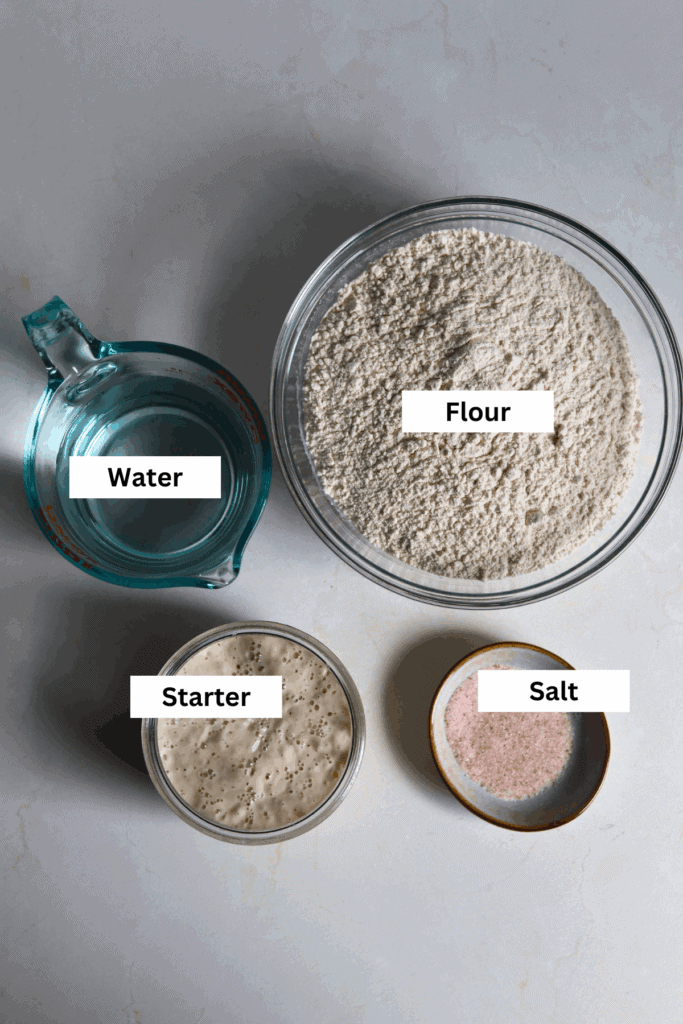
- Bread flour – Bread flour is what gives this loaf its structure. If you only have all-purpose flour, you can still use it 1:1, but the loaf may come out slightly shorter with a tighter crumb.
- Filtered water – Filtered water is recommended for mixing into your dough and starter. If using tap water, let it sit out for a bit before using.
- Sourdough starter – Your starter is what leavens this bread — no commercial yeast needed! Make sure it’s active and bubbly, fed within the last 4–12 hours, and at peak activity before mixing it in.
- Salt – Salt seasons the dough and plays a role in fermentation. Avoid adding it directly on top of your starter when mixing, as it can interfere with the starter’s activity.
- Rice flour (optional) – Rice flour is used for dusting your banneton or proofing basket to prevent the dough from sticking. Regular all-purpose flour works as a substitute if that’s what you have on hand.
Day 1 Baking Schedule
|
Time |
Process |
|---|---|
|
4:30 PM |
Feed your sourdough starter |
|
8:30 PM |
Make the dough |
|
9:00 PM |
1st stretch and fold |
|
9:30 PM |
2nd stretch and fold |
|
10:00 PM |
3rd stretch and fold |
|
Overnight |
Bulk fermentation |
Day 2 Baking Schedule
|
Time |
Process |
|---|---|
|
6:30 AM |
Shape the dough |
|
6:30 AM – 4:30 PM |
Second rise in the fridge (8–12 hours) |
|
4:30 PM |
Score and bake at 450°F for 50 minutes covered, then 5 minutes uncovered |
|
5:35 PM |
Cool on a rack for at least 1 hour before slicing |
How to Make Easy Sourdough Bread
- Feed your starter 4–12 hours before mixing your dough. You’ll know it’s ready when it has doubled in size, is full of bubbles, and smells pleasantly yeasty. If your house runs cooler, you may want to feed it earlier in the day.
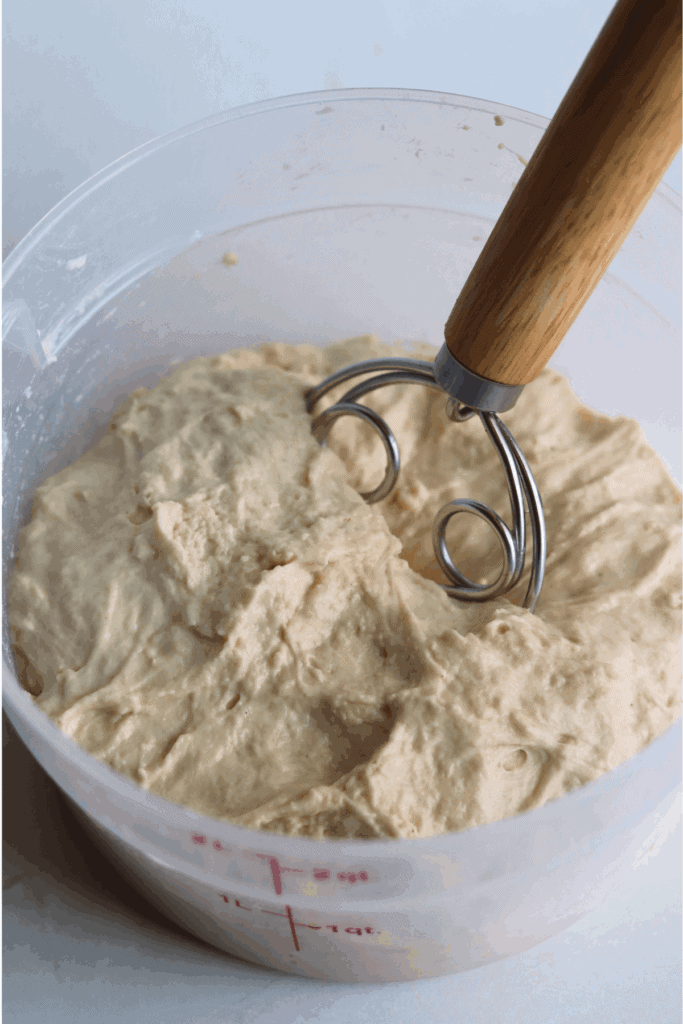
- Turn on digital scale and place large bowl on top. Set scale to zero. First mix together the active sourdough starter and filtered water with a Danish Dough Whisk or your hand until it looks like a milky liquid. Then add flour and salt. Again, mix with whisk or by hand. Be sure to mix until all of the flour is incorporated. The dough will look shaggy, not like a uniform dough ball. Let the dough rest at least a half hour before you move on to the next step.
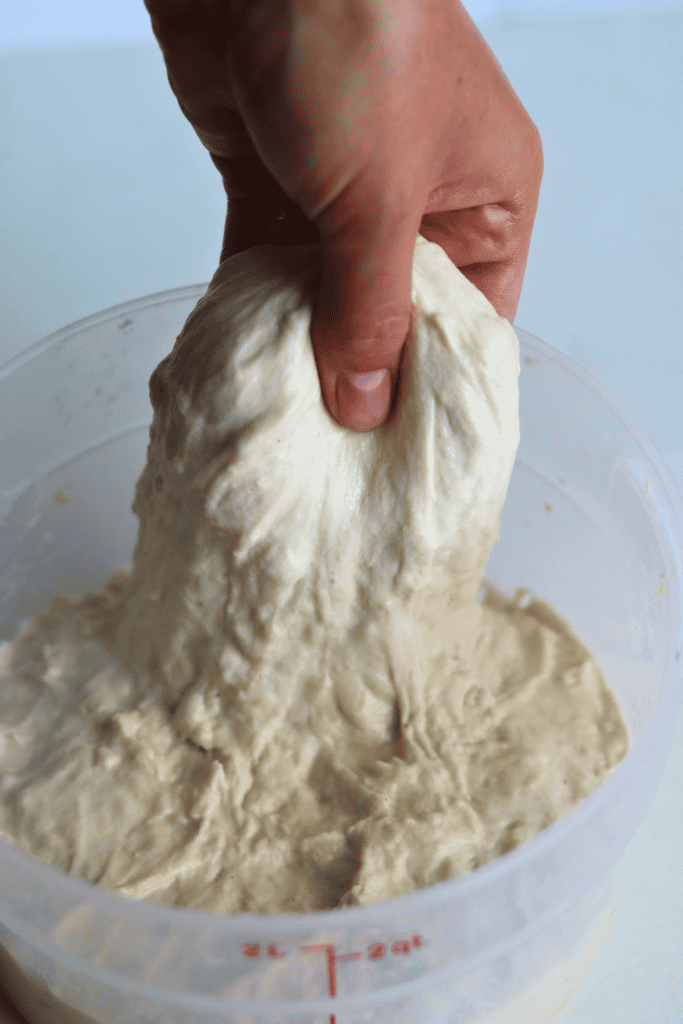
- With wet hands, scrap the dough away from the bowl. Now grab a section and stretch the bread dough above your bowl. Then fold over on top of the dough. Rotate your bowl clockwise a quarter of the way and repeat identical stretch and fold. Repeat process until you come full circle. You will notice the dough will start to look much smoother than before. Let rest for another 30 minutes. (Now this is super flexible – you don’t have to stretch every 30 minutes on the dot, but every 30 – 60 minutes will do just fine. Like I said, it’s flexible).
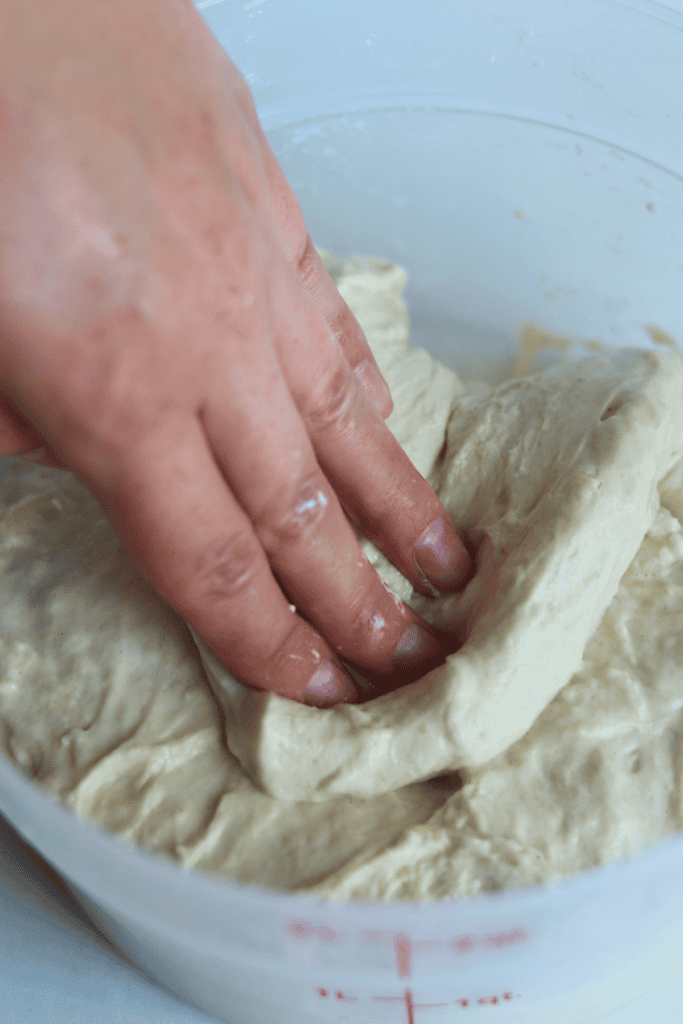
- At 9:30 pm, perform the 2nd stretch and fold. Repeat same exact steps from above. Let rest for another 30 minutes.
- At 10:00 pm – 3rd stretch and fold.
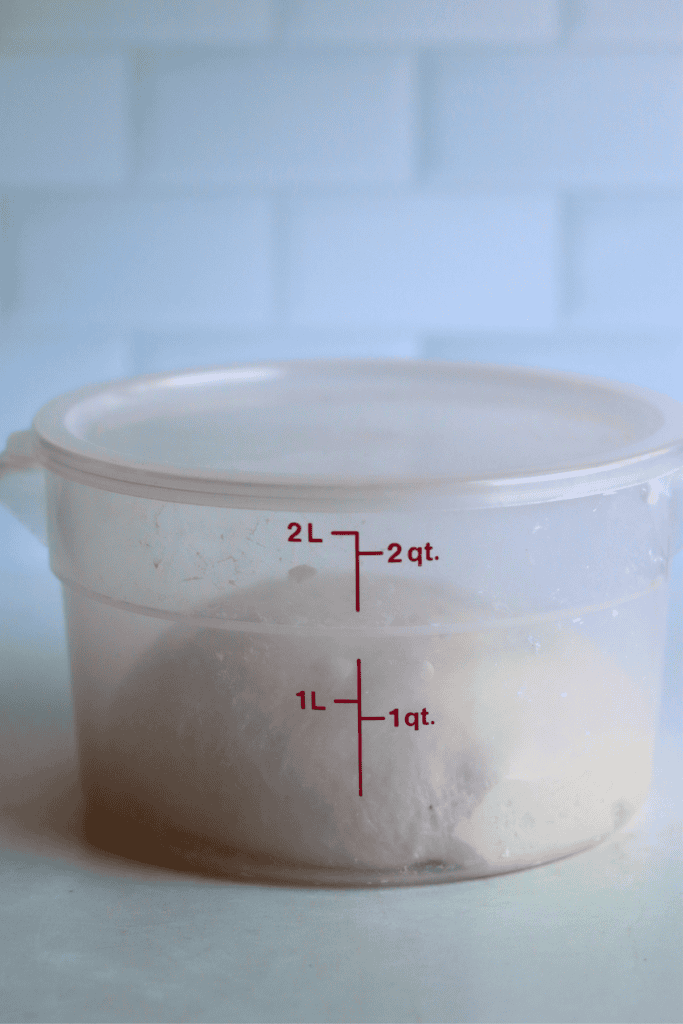
- Overnight – Bulk Fermentation: This is where your sourdough starter has a party feasting on the flour! Overnight it will ferment which will result in lovely air pockets to make that desirable crumb.
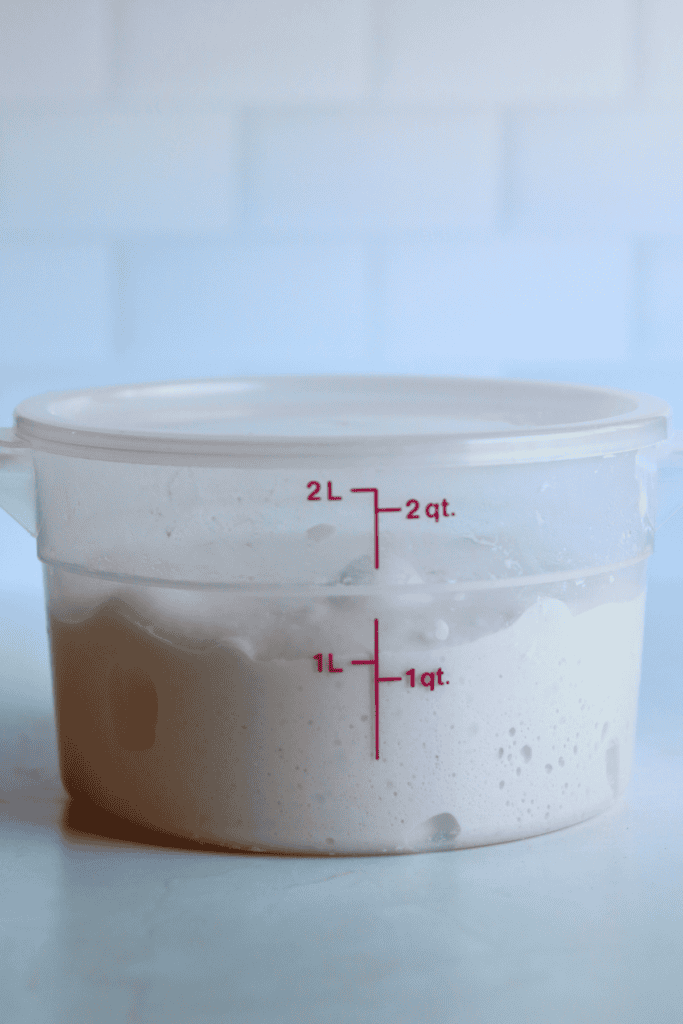
- Shape: Your first peek! Now the dough should have doubled in size and shouldn’t look dense. One of my favorite sights is seeing bubbles on top. If you have a clear glass bowl, check out all the action happening underneath!
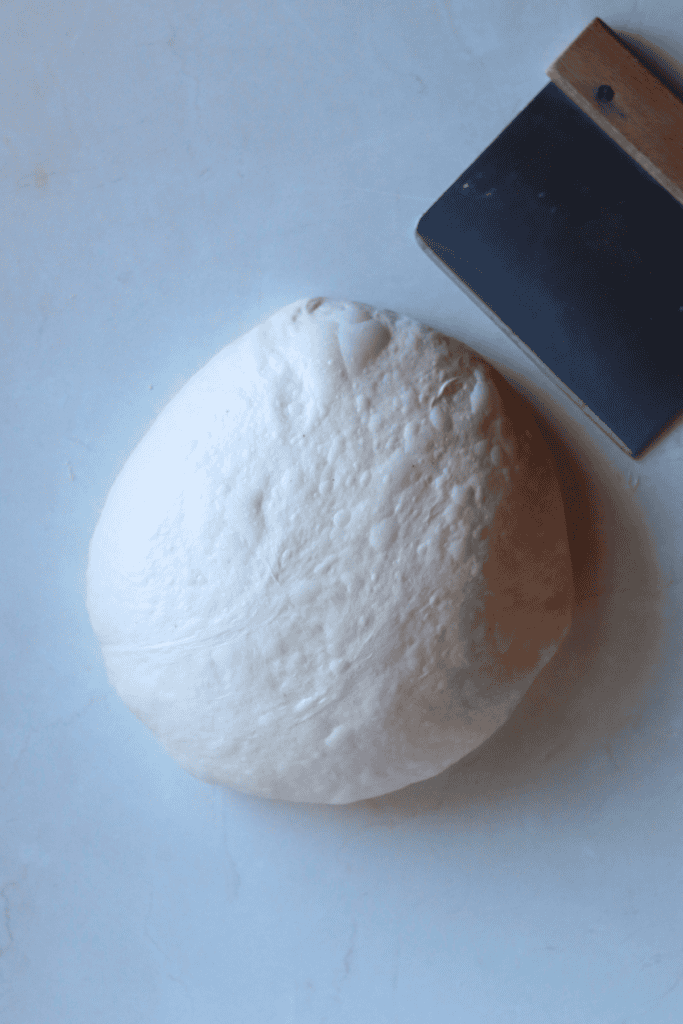
- With slightly wet fingers or a dough scraper, gently remove dough from the sides of the bowl. Be careful not to pop all of those lovely bubbles! Tilt bowl and left gravity do the work to move the dough on the counter. Your work surface should not need any additional flour, but if concerned, you may give it a very light dusting. Shape the dough by doing another round of stretch and folds until you have gone full circle.
- While you are waiting for the dough to rest, prepare your proofing basket. This can either be a banneton or a small mixing bowl lined with a tea towel. The purpose of this proofing basket is to keep the tight shape that you just created, so make sure if you are using a standard bowl that is small enough to help keep the shape. Dust the banneton or the tea towel with flour (most will say to use rice flour, but I have used just regular all-purpose flour) to prevent sticking.
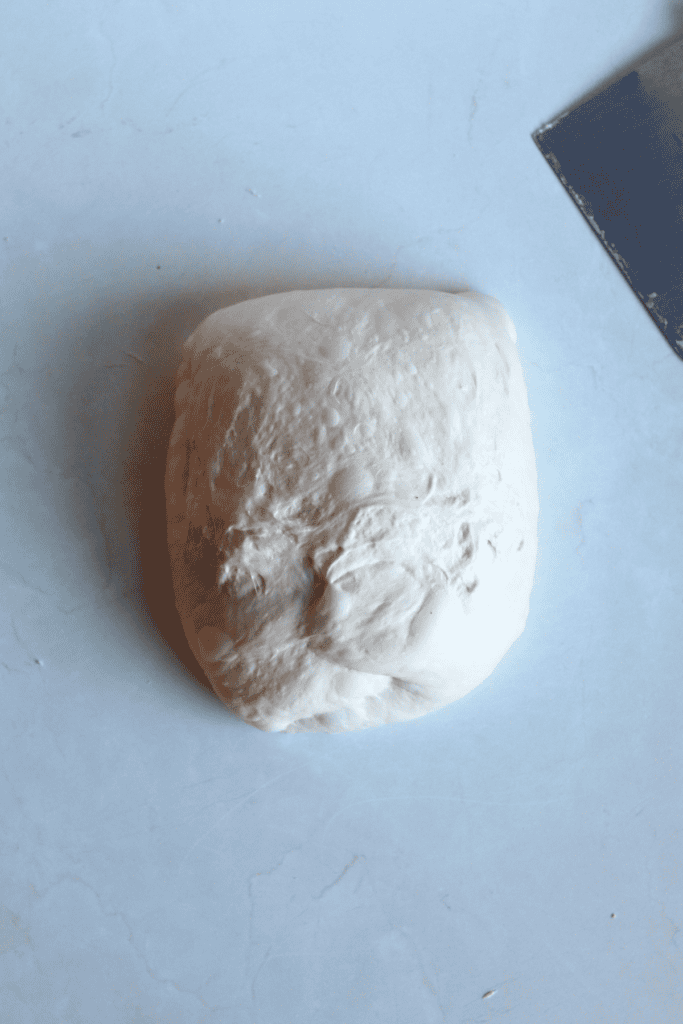
- After the 5-10 minutes of rest, gently cup your hands around the dough ball. Turn the ball in a clockwise motion about a quarter turn and then pull the dough slightly towards you. Do this repeatedly until you see the dough form a tighter and more round shape.
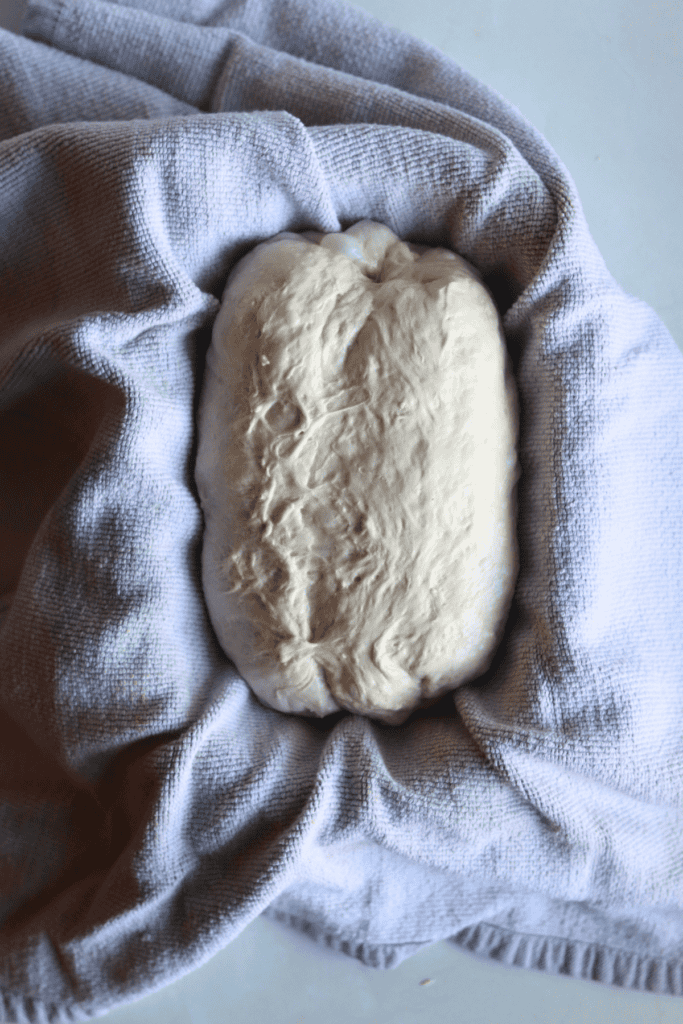
- With a bench scraper or just your hands, carefully scope up the dough and lay it upside down (smooth side down) in your floured proofing basket and cover with cling wrap or a shower cap.
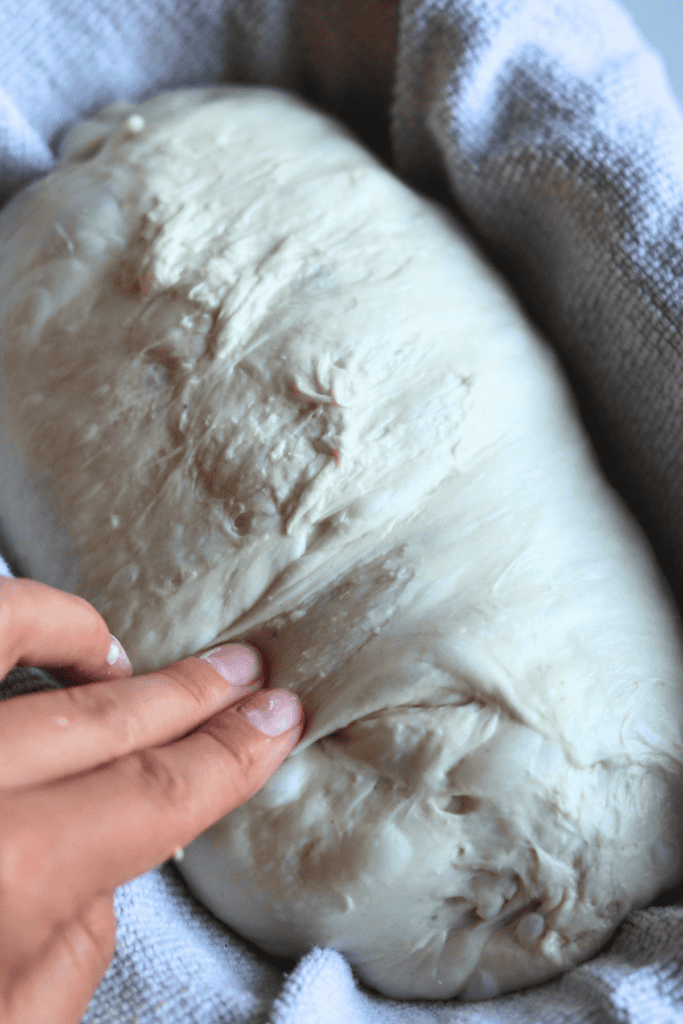
- With a bench scraper or just your hands, carefully scope up the dough and lay it upside down (smooth side down) in your floured proofing basket and cover with cling wrap or a shower cap.
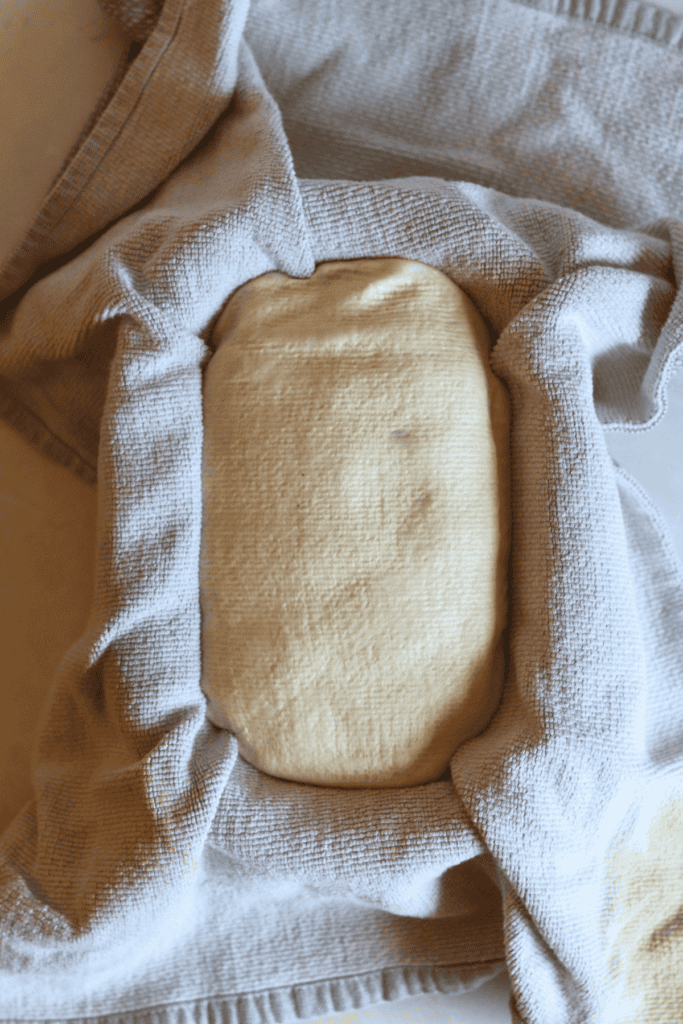
- Place your proofing basket in the fridge. The second rise should last for at least 1 hour, but I would recommend 8-12 hours. But don’t wait too long! If left in the fridge for too long, your dough will over-ferment, causing the dough to not be able to rise.
- Remove sourdough from the fridge. Cut a piece of parchment paper that is big enough for your dough to be completely surrounded on the bottom and on its edges.
- Place parchment paper on your work space and gently flip the banneton upside down over the parchment paper. Since you dusted the banneton, your dough should slowly release and fall onto the parchment paper, landing in the middle with the floured side facing up.
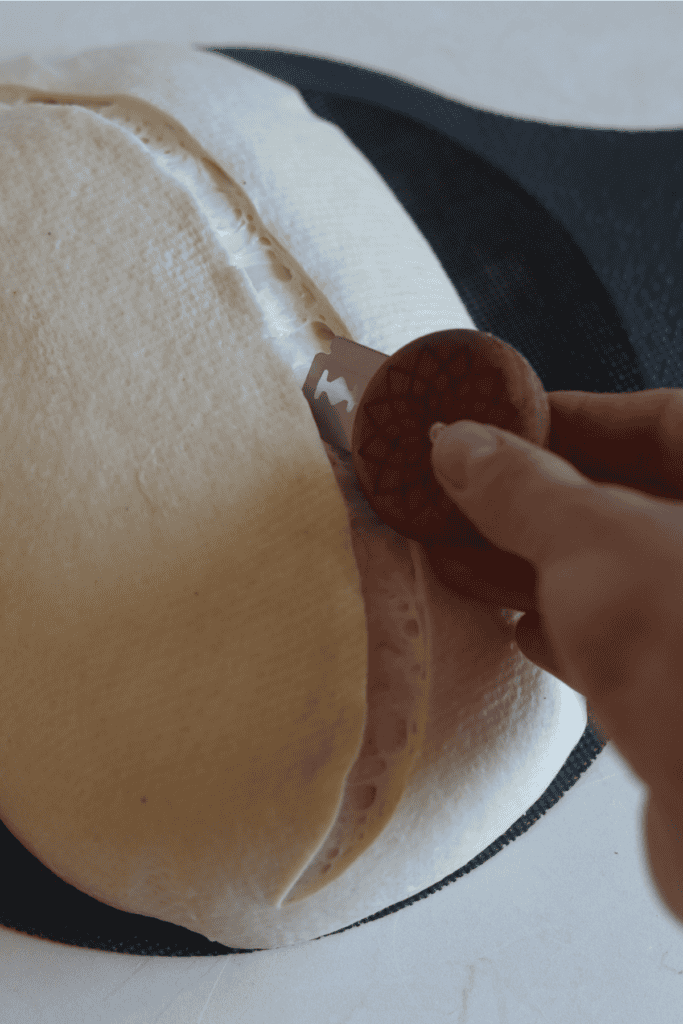
- With a lame / razor blade or sharp knife, score a crescent moon shape. This is necessary for your bread to be able to expand while baking.
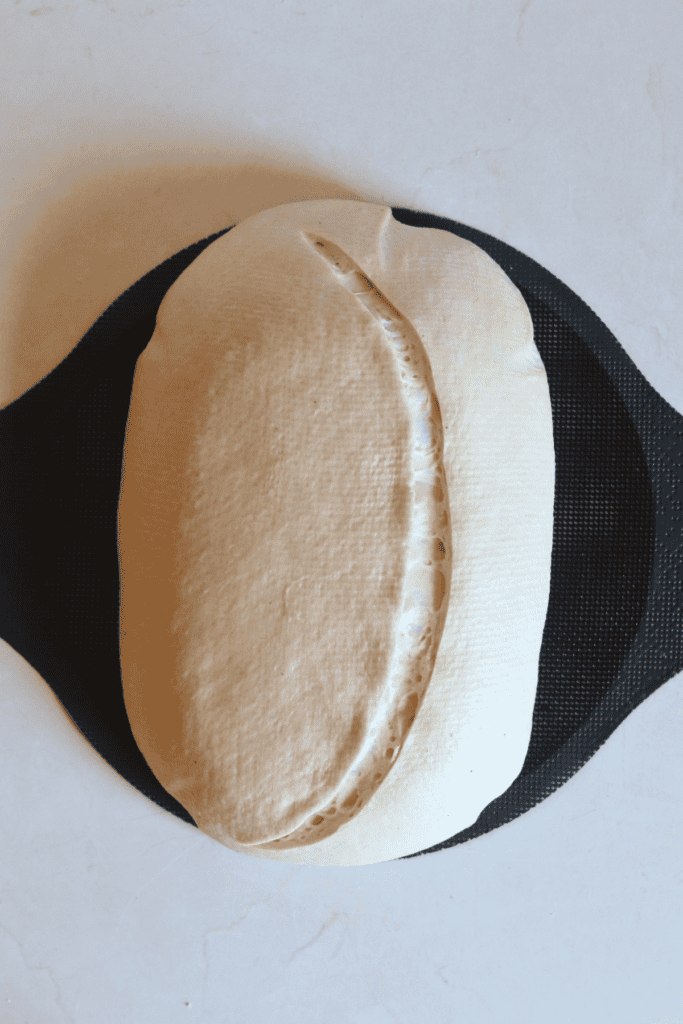
- Grab the corners of the parchment paper and place into your Dutch Oven.
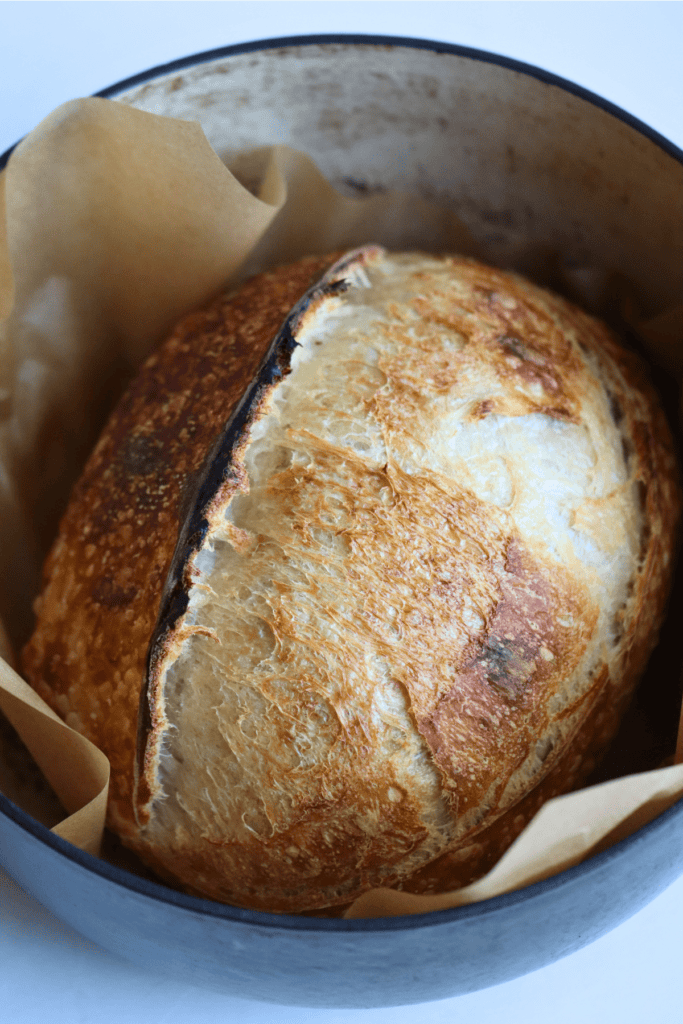
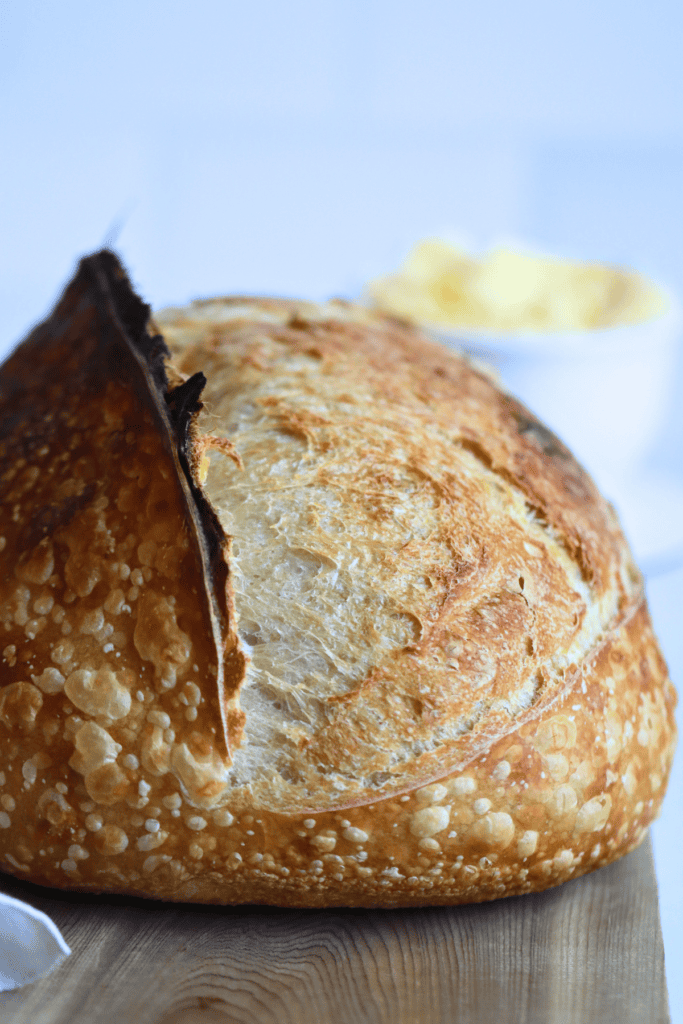
- With its lid on, place your Dutch Oven on a cookie sheet – this helps prevent the bottom of your loaf from burning and getting too hard. Slide the cookie sheet and Dutch Oven into the cold oven and preheat it to 450 degrees. Bake for 50 minutes.
- After 50 minutes, remove the lid and bake for an additional 5 minutes, or until golden brown.
- Immediately remove the Dutch Oven from your oven. Using the corners of the parchment paper, lift the sourdough bread and place it onto a cooling rack to cool.
- Allow your homemade bread to cool for at 1 hour before cutting into it. (I know!! How can you possibly wait when it looks and smells so good?! But trust me, if you cut in too soon, your masterpiece will turn our mushy and gummy.) In the meantime, listen to your loaf “sing” its little tune to you with ever crinkle and crack.
- Once the hour is up, slice into your work of art and slather on some butter and VOILA! You have baked your very own sourdough bread! Congratulations, now ENJOY!
McKenna’s Helpful Tips
- Use a kitchen scale for accuracy. Measuring by weight rather than volume ensures consistent hydration every time you bake. Place your large bowl on the digital scale, zero it out, and add each ingredient directly. Precise measurements also make a big difference in recipes like my Sourdough Focaccia.
- Keep your hands wet during stretch and folds. Using wet hands prevents the bread dough from sticking to your fingers. Grab a section, stretch it up, and fold it over the top of the dough, then give the bowl a quarter turn and repeat. For another recipe where this technique is key, try my Sourdough Pizza Dough.
- Track your starter’s rise with a rubber band around the outside of the jar. This makes it easy to see when it has doubled and is ready to use. You can also try the float test by dropping a spoonful into lukewarm water. If you want to put extra starter to good use, browse my Sourdough Discard Recipes.
- Use a bench scraper to handle the dough gently during shaping. It helps you lift and turn the dough without deflating those precious air bubbles. After shaping, place the dough seam-side up in a floured proofing basket and cover with plastic wrap before the cold proof. For a softer loaf that skips the Dutch Oven, try my Sourdough Discard Sandwich Bread.
- Score your loaf on a piece of parchment paper right before baking. A confident slash allows the bread to expand evenly in the oven. If your loaf is not opening up during the bake, check out my guide on Identifying Underproofed Sourdough Bread to troubleshoot.
How to Store
Store Easy Sourdough Bread for Beginners at room temperature in a paper or linen bread bag for up to three days to maintain its crust. Avoid plastic, as it traps moisture and makes the bread soggy.
For longer storage, freeze the sliced or whole loaf by wrapping it in plastic wrap and placing it in a freezer bag for up to three months. Thaw at room temperature or reheat in a toaster or oven.
*Refrigeration is not recommended, as it dries out the bread and affects texture.
Sourdough Bread FAQs
Absolutely! Inclusions are such a fun next step once you have mastered this base recipe. I recommend adding inclusions like cheese, herbs, or dried fruit during your final set of stretch and folds so they get evenly distributed without deflating the dough. I share all about when and how to add inclusions in my Sourdough Inclusions guide. Some of my favorite inclusion breads include Cinnamon Raisin Sourdough Bread and Garlic Sourdough Bread.
Yes, you can skip the cold proof if you are short on time. Instead, shape your loaf and allow it to go through a second rise at room temperature until it looks puffy and relaxed. The cold proof does help develop a more complex flavor and makes scoring easier, but the bulk fermentation alone can still produce a lovely rise. If you want a faster bake day, my Sourdough Discard French Bread is ready in about two hours.
Getting a more pronounced sour flavor comes down to the fermentation process, temperature, and starter maturity. Try extending your cold proof in the fridge to 12 to 24 hours to let those tangy flavors develop. Older, more mature starters also tend to produce a stronger sourness. Using a portion of whole wheat flour can also boost the tang since the wild yeast feeds more actively on whole grains.
Yes! Humidity absolutely affects your dough and can make it overly sticky. If you live in a humid climate, I recommend reducing the warm water by 25 to 50 grams and seeing how that changes the texture. You want the dough to feel tacky but manageable after your stretch and folds. Using wet hands and a bench scraper also helps when working with higher-hydration doughs. For best results, adjust based on the temperature of your kitchen and how the dough feels.
I recommend using bread flour for the best results because its higher protein content creates stronger gluten, which helps the dough hold its shape and rise higher during baking. If you only have all-purpose flour, you can still bake with it, but the loaf may be slightly shorter with a tighter crumb. For a softer sandwich-style loaf of sourdough bread that works well with all-purpose flour, try my Sourdough Discard Sandwich Bread.


If you tried this Sourdough Bread recipe or any other recipe on my blog, please leave a 🌟 star rating and let me know how it went in the📝 comments below. Thanks for visiting!

Sourdough Bread Recipe for Beginners
Enter your email below, and we’ll send it straight to your inbox! Plus, you’ll get my newest sourdough recipes and best tips every week!
Equipment
Ingredients
- 50 grams active sourdough starter 1/4 cup
- 350 grams water, room temperature 1 1/2 cups
- 500 grams bread flour 3 1/2 cups + 1 teaspoon
- 10 grams salt 1 1/2 teaspoons
Instructions
Make the Dough:
- Mix together the active, bubbly sourdough starter and the room temperature water in a straight-edge mixing bowl until it looks like a milky liquid. I love using my Danish dough whisk for this step. I prefer using a straight edge bowl so I can clearly see when my dough has rise by 75%.50 grams active sourdough starter, 350 grams water, room temperature
- Next, add the bread flour and salt. Be sure to mix until all of the flour is incorporated. The dough will look rough and shaggy, not like a uniform dough ball.500 grams bread flour, 10 grams salt
- Cover the dough with plastic wrap or a reusable shower cap, and let the dough rest for at least 30 minutes before you move onto the next step.
Stretch and folds :
- With slightly wet fingers, grab a section of the dough and stretch the bread dough above your bowl. Then fold it over on top of the dough.
- Rotate your bowl clockwise a quarter of the way and repeat identical stretch and fold. Repeat the process until you come full circle, about 6 stretch and folds in total. You will notice the dough will start to look much smoother than before. Doing stretch and folds develops gluten in your dough, which is what allows your bread to rise beautifully while it bakes.
- Cover the dough and let rest for another 30 minutes.
- Repeat the identical stretch and fold process three more times (for a total of 4 different rounds), waiting at least 30 minutes between each stretch and fold.
- Cover the dough after each stretch and fold.
Bulk Fermentation :
- Now this is the most finicky part of sourdough. There isn’t a set time for your bulk ferment. It is greatly dependent on the temperature of your environment and dough. The warmer it is, the faster your dough will ferment. The opposite is true for cooler temperatures.
- Bulk fermentation begins the moment you mix your dough and continues until you shape your dough.
- In an environment of 70 degrees, doughs will typically bulk ferment for a total of 12 hours, but again, you will have to look for the signs that your dough is done fermenting, rather than the clock. Warm temperatures will be faster, while cooler will be slower.
Here’s what to look for:
- The dough should have increased in size by 75%The dough looks light, airy and jiggles when shaken.The dough should easily pull away from the bowl.There should be visible bubbles on top of the dough.The dough doesn’t tear when you do a windowpane test.
Pre-Shape :
- Once your dough has completed its bulk fermentation, it's time to shape! With slightly wet fingers, gently release the dough from the sides of the bowl. Be careful not to pop all of those lovely bubbles!
- Tilt the bowl and leave gravity to do the work to move the dough on the counter.
- Shape the dough by doing another round of stretch and folds until you have gone full circle.
- With a bench scraper or your hands, turn the dough upside down, so the seam is now on the counter. Lightly dust the top with some flour.
- over the dough with your mixing bowl and let it rest for 30 minutes. This pre-shape helps to create extra tension, just before shaping which helps for a beautiful rise.
Prep Banneton :
- While you are waiting for the dough to rest, prepare your proofing basket. This can either be a banneton or a small mixing bowl lined with a tea towel.
- Dust the banneton or the tea towel with flour to prevent sticking.
Final Shaping (Boule/Round) :
- After 30 minutes of rest, flip the dough, with the floured side down.
- To shape into a round boule, gently pull the bottom of the dough towards you, then fold it towards the center of the dough. Pull the right side of the dough out and fold towards the center. Repeat with the left side. Finally, stretch the top of the dough away from you and fold towards the center of the dough.
- Flip the dough over again, seam side down. Gently cup your hands around the dough ball. Turn the ball in a clockwise motion about a quarter turn and then softly pull the dough towards you. Do this repeatedly until you see the dough form a tighter and more round shape. Stop if the dough starts to tear.
- With a bench scraper or just your hands, carefully scope up the dough and lay it upside down (smooth side down) into your floured proofing basket and cover it with plastic wrap or a reusable shower cap.
Second Rise :
- Place your proofing basket in the fridge for cold proof for 8-72 hours.Placing your dough in the fridge slows down the fermentation process, which deepens the flavors of your loaf. It also gives you flexibility in when you want to bake your bread. But don’t wait too long! If left in the fridge for too long, your dough will over-ferment, causing the dough to not be able to rise.
Score :
- Pro-tip: 30 minutes before baking, place your dough in the freezer. This tightens the dough. which makes for easier scoring.
- After 30 minutes, remove sourdough from the fridge or freezer.
- Cut a piece of parchment paper that is big enough for your dough to be surrounded on the bottom and its edges.
- Place parchment paper on your workspace and gently flip the banneton upside down over the parchment paper. Since you dusted the banneton, your dough should slowly release and fall onto the parchment paper, landing in the middle with the floured side facing up.
- With a lame / razor blade or sharp knife, score a crescent moon shape or any other fancy design you might find on Pinterest that you are dying to try!
- Grab the corners of the parchment paper and place it into your COLD Dutch Oven.
Bake:
- **This recipe can be baked in a HOT Dutch oven, if you prefer. Refer to the Notes below for step-by-step directions.**
- With its lid on, place a 6 QT Dutch oven on a cookie sheet – this helps prevent the bottom of your loaf from burning and getting too hard. Slide the cookie sheet and Dutch oven into the COLD oven and preheat it to 450 degrees F. Bake for 50 minutes total, this includes the preheat time.
- After 50 minutes, remove the lid and bake for an additional 5-15 minutes, or until the crust is perfectly golden brown and the internal temperature is between 205 – 210 degrees F.
- Immediately remove the Dutch Oven from your oven. Using the corners of the parchment paper, lift the sourdough bread and place it onto a cooling rack to cool.
- Allow your homemade bread to cool for 1 hour before cutting into it. (I know!! How can you possibly wait when it looks and smells so good?! But trust me, if you cut in too soon, your masterpiece will turn mushy and gummy.) In the meantime, listen to your loaf "sing" its little tune to you with every crinkle and crack.
- Once the hour is up, slice into your work of art, slather on some butter, and VOILA! You have baked your very own sourdough bread! Congratulations, now ENJOY!
Notes
Bake Your Loaf in a Hot Oven
- To do so, preheat the Dutch oven in a 500 degree F oven for 30 minutes while your dough is in the freezer.
- Just before baking, lower the oven temperature to 450 degrees F.
- Carefully place the dough in the HOT Dutch oven and cover with the lid.
- Bake the loaf for 27 minutes covered.
- Remove the lid, lower the temperature to 425 degrees F, and continue to bake for an additional 10-15 minutes uncovered, depending on how dark/crispy you like the crust or until the internal temperature has reached 205 – 210 degrees F.
- For a softer crust, keep the lid on longer, an additional 5-10 minutes. Remove the lid, lower the temperature, and bake for 5-10 minutes more.

The best sourdough recipe I have tried and the one I always use. I also love that I can fit the process around my work week and make it fit to my schedule. I have made it multiple times and it is getting even better every time, I am well and truly hooked on making sourdough 😋
I have been trying sourdough for 2 years and could not make a good sourdough bread until I tried this recipe. It was beautiful and tasted light a sourdough bread should.
Oh wow — this truly means so much. After two years of trying, I’m so honored this was the recipe that finally clicked for you! That’s such a big win. Thank you for sharing that with me — and happy baking!
Absolutely love this recipe! Have successfully used it several times but I am curious – if I’m trying to save time (or just messed up in planning) is it okay to skip the cold proof process? Is the first bulk fermentation enough to get a good rise in the oven? Or is the cold proof pretty essential for that? Thanks!!
So glad you’re loving this recipe — thank you for baking it multiple times!
Yes, you can skip the cold proof if you’re short on time or your schedule changes. Instead of the cold proof, simply shape the loaf and allow it to go through a second rise at room temperature until it looks puffy, relaxed, and passes the gentle poke test.
I tried this recipe and it is great! I have some questions though, and I am hoping that some of you seasoned professionals in the sourdough world can help me 😉 I have been trying everything to get my bread more sour, and I just can’t seem to do it. I have altered my starter, and tried multiple recipes. My bread turns out great, but it is not sour! Does anyone have any tips and tricks for me?
So glad you enjoyed the recipe! Getting a stronger “sour” flavor can take a little experimenting — it often comes down to fermentation time, temperature, and starter maturity. A few tips: try giving your dough a long, cold proof in the fridge (12–24 hours) to let those tangy flavors develop. Also, older starters tend to produce a more pronounced sourness. Hope this helps!
Thank you for the wonderful instructions and pictures.This has been a great experience and my sourdough bread came out perfect. Do you have a recipe for Gluten free as I would like to try to make a loaf for a friend.
Thank you
Hi Janet! I’m so glad you found this recipe to be helpful! Unfortunately, I do not have a gluten free sourdough recipe at the moment.
This recipe DID NOT work. What a mess and waste of alot of flour. Definitely using a different recipe next time.
Hi Sarah. I’m so sorry to hear the recipe didn’t work out for you! Sourdough can be tricky, especially in the beginning, and sometimes small factors like flour type, hydration, or fermentation time can make a big difference. If you’d like to troubleshoot, I’d be happy to help figure out what might have gone wrong!
This was my first crusty loaf recipe and it came out perfect (or what I would consider perfect!)
My question now, can I use this recipe for inclusions? At what step would I add those?
Thank you!!
Hi Marissa! I am so thrilled to hear about your perfect loaf! Inclusions are such a fun next-step in sourdough baking. I share all about when and how to add inclusions here – https://simplicityandastarter.com/sourdough-inclusions-what-to-add-to-your-bread-and-when/. Enjoy!
Hi! My dough feels sticky even after all the stretch and folds and no matter how long i leave it to bulk ferment it won’t come out the bowl clean and not stuck everywhere. Can it be because I live near the sea and it’s really humid here? Should I add less water and if so how much less? Thank you!
Hi Laura! You are correct! Humidity does affect your dough and can cause it to be overly sticky.I would reduce the water by 25-50 grams and see the difference that makes in your dough. Hope this helps!