Easy Sourdough Crescent Rolls Recipe
This post may contain affiliate links. Please read our disclosure policy.
Growing up, my mom wasn’t much of a baker, but whenever she wanted to make dinner feel a bit more special, she’d make Pillsbury Crescent Rolls. Those buttery, slightly sweet rolls were a favorite, and we couldn’t get enough. Now in my own kitchen, I’m recreating those classics from scratch with a sourdough spin, made with the same soft, enriched dough as my Sourdough Dinner Rolls.
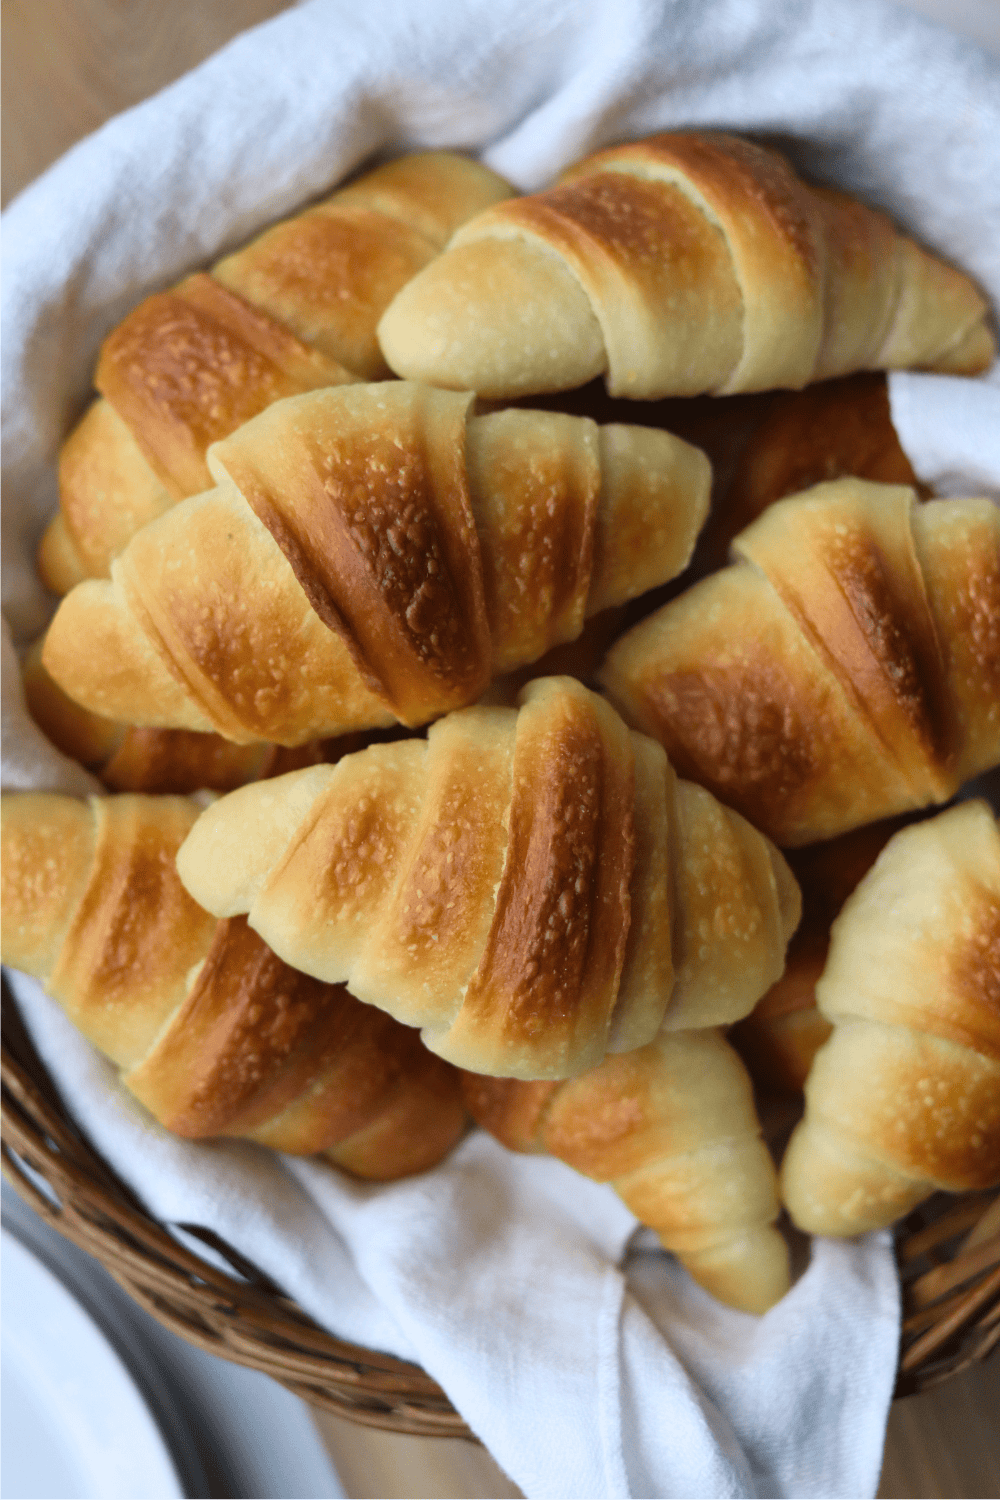
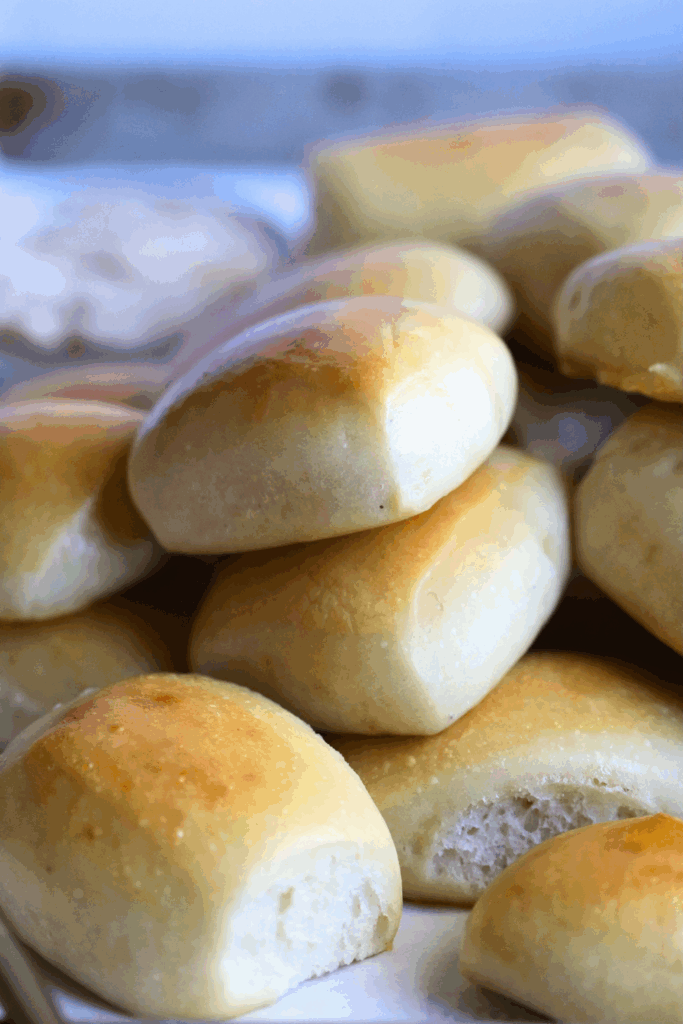
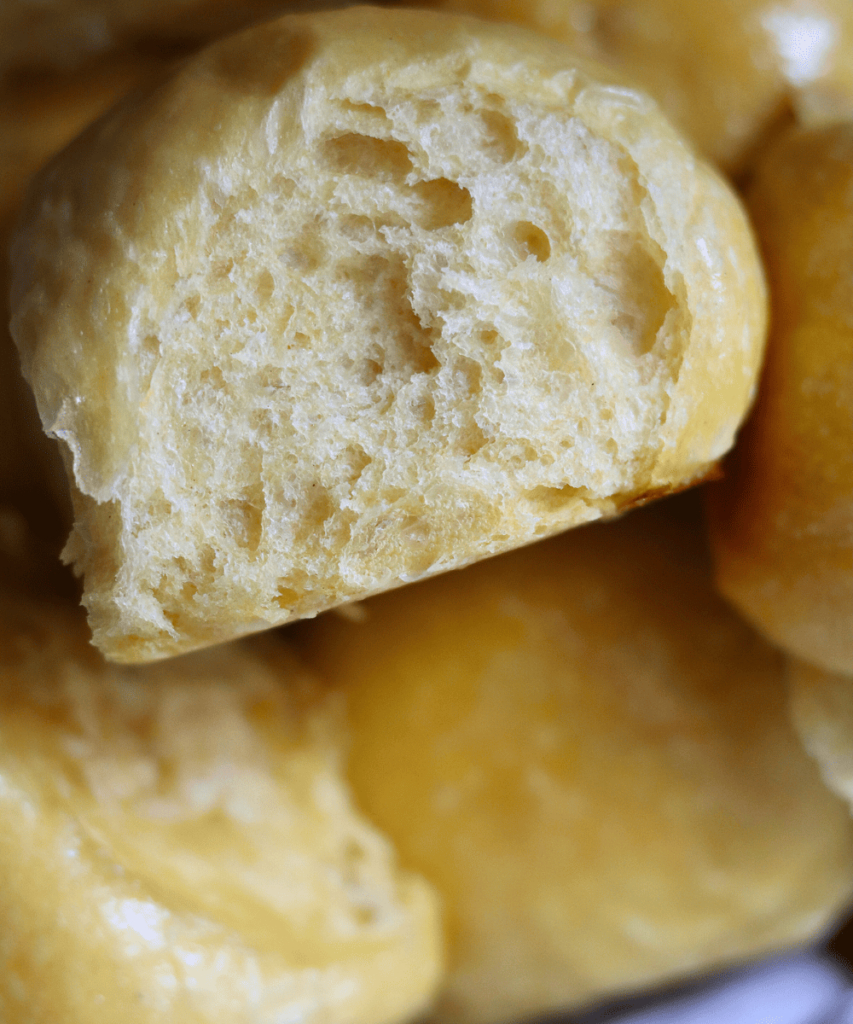
Baked until golden brown, these homemade rolls have a lightly crisp and flaky outside (not puff pastry flaky, though), similar to sourdough croissants, but the center is much softer and fluffier. Brushed with melted butter, they’re rich, tender, and just a little sweet inside. I love that you can make them all in one day, but there’s also a flexible two-day option with an overnight rest to fit your schedule. So long, Pillsbury-you’ve officially been replaced!
MY LATEST VIDEO
Why You’ll Love This Recipe
- Tastier than store-bought-Once you make these right in your kitchen, you’ll never go back to the Pillsbury can. These rolls are flaky, buttery, and have a real sourdough flavor with just the right amount of sweetness. For another rich, buttery sourdough bake that blows store-bought out of the water, try my Sourdough Brioche.
- Easy-You don’t need any special skills to pull these ones off. Use your stand mixer to knead the dough, a pizza cutter to slice it into wedges, and roll them up into that classic crescent shape. Baking them on a parchment paper-lined sheet pan means barely any cleanup, so you can spend more time eating and less time scrubbing. My Sweet Potato Dinner Rolls are another beginner friendly bake worth trying.
- Soft on the Inside, Crispy on the Outside-The outside bakes up golden brown with a slight crisp, while the inside stays soft and pillowy thanks to the layers of butter and dough you build when rolling them into that crescent shape. Brush them with melted butter straight out of the oven to give them a beautiful, shiny finish. My Texas Roadhouse Dinner Rolls give you that same irresistible soft center, and they’re not a challenging bake.
- Same-day recipe-As long as you have an active sourdough starter and a few free hours, you can mix, shape, and bake these crescent rolls in a day. No overnight wait required. I’ve included two flexible baking schedules to help you fit this recipe into your day. If you want another quick sourdough bake, my Sourdough discard dinner rolls come together just as fast, if not faster.
Ingredients & Substitutions
* To find precise measurements, scroll to the bottom of this post to find the recipe card*
- Milk-Gives the dough a softer, more tender crumb.
- Butter-Melted and unsalted. If you only have salted butter, just leave out ¼ teaspoon of salt from the recipe.
- Sourdough Starter- Make sure it’s active and bubbly because that’s what gets this dough to rise.
- Sugar: You need just enough of it to add a little sweetness. Cane sugar or honey work well for this recipe. Use the same amount in grams.
- Egg: Gives the dough structure and keeps it soft.
- Bread Flour: It gives you the best rise, so I really do recommend bread flour. But if all you have is all-purpose flour, it’s an OK 1:1 swap.
- Salt: Use just enough to balance everything out.
Same-Day Bake
|
Time |
Process |
|---|---|
|
9:00 AM |
Make dough |
|
9:30 AM |
Knead Dough |
|
9:45 AM |
Bulk Fermentation |
|
1:45 PM |
Shape |
|
2:00 PM |
Second Rise |
|
4: 00 PM |
Bake |
Two-Day Bake
|
Time |
Process |
|---|---|
|
4: 00 PM |
Make dough |
|
4:30 AM |
Knead Dough |
|
5:45 AM |
Bulk Fermentation |
|
9:45 PM |
Shape & Keep in Fridge Overnight |
|
Next Day |
|
|
2:00 PM |
Second Rise |
|
6:00 PM |
Bake |
How to Make Sourdough Crescent Rolls
Make the Dough
- Heat the butter and milk in a small saucepan on the stove or in a small bowl in the microwave until warm, but no warmer than 110°F. Anything hotter than 120°F can kill your sourdough starter and the dough will not rise.
- Add the bubbly sourdough starter, egg, and sugar to the bowl of a stand mixer fitted with the paddle attachment. Mix on low until combined, then slowly pour in the warm milk and melted butter. You can also do this by hand.
- Add the flour and salt and mix on low. Stop to scrape down the sides of the bowl so everything gets incorporated, then keep mixing on low for 1 to 2 minutes.
- The dough will look thick and sticky, kind of like a cake batter. Cover it with plastic wrap, a tea towel, or a reusable shower cap and let it rest for 30 minutes. This gives the gluten time to relax before you knead it.
Knead
- After 30 minutes, swap to the dough hook and knead on medium speed for 15 minutes. You can also do this by hand for the same amount of time, or until the dough passes the windowpane test.
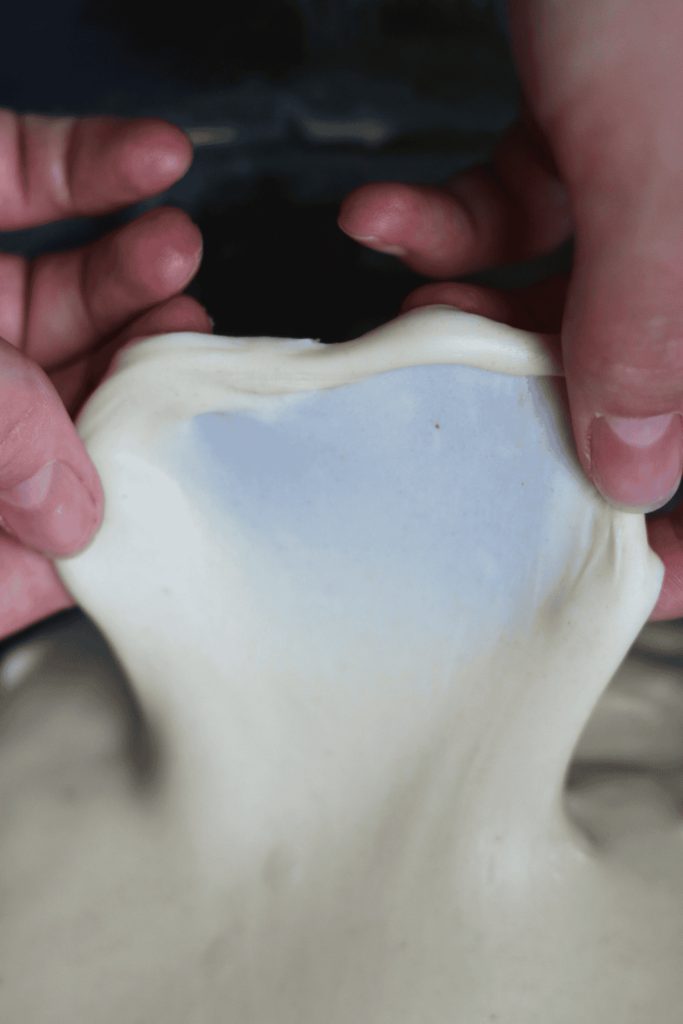
- The dough is ready when it is smooth and shiny and pulling completely away from the sides of the bowl.
- Baking Tip: To check if your dough is ready, pull off a small piece and stretch it into a thin film. If light passes through without it tearing, you are good to go.
- Transfer the dough to a lightly greased bowl using butter or olive oil and cover it back up.
Bulk Fermentation
- Set the dough somewhere warm in your kitchen. In a 70°F kitchen, the first rise takes about 3 to 4 hours. Good warm spots include the top of your refrigerator, a cabinet, or an oven that is turned off but has the light on.
- Keep in mind that the temperature of your kitchen makes a big difference here. A colder kitchen means a longer rise and a warmer kitchen means a shorter one.
Shape
- Once the dough has doubled in size, punch it down to release all the air bubbles, then move it to a lightly floured work surface. Divide it equally in half and shape each half into a round dough ball.
- Cover both balls with a clean tea towel and let them rest for 10 minutes. This lets the gluten relax so the dough is easier to roll out.
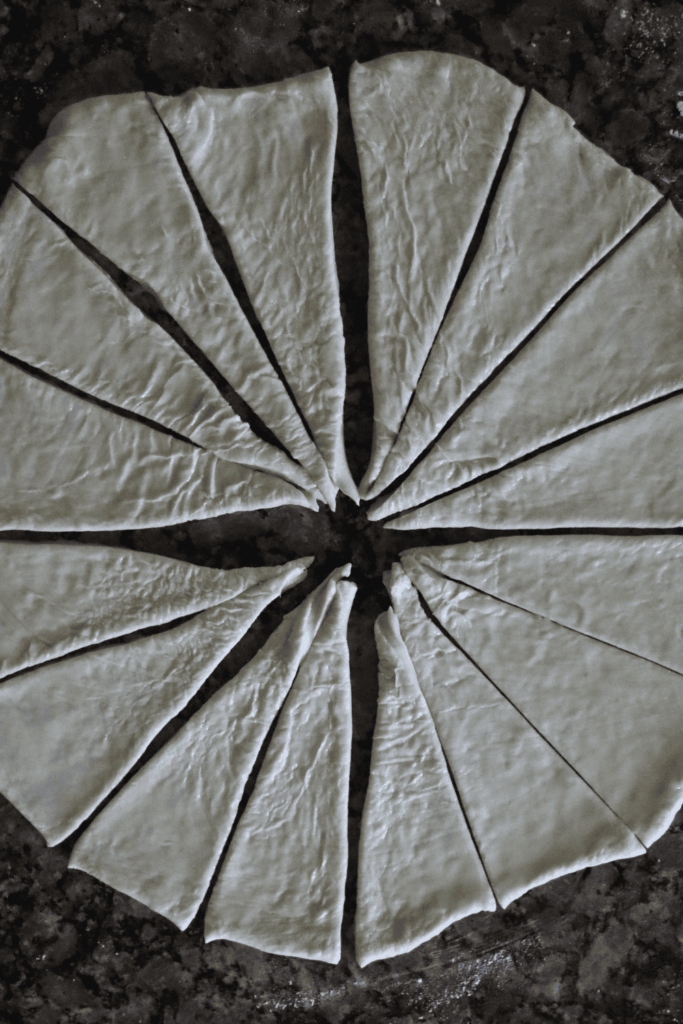
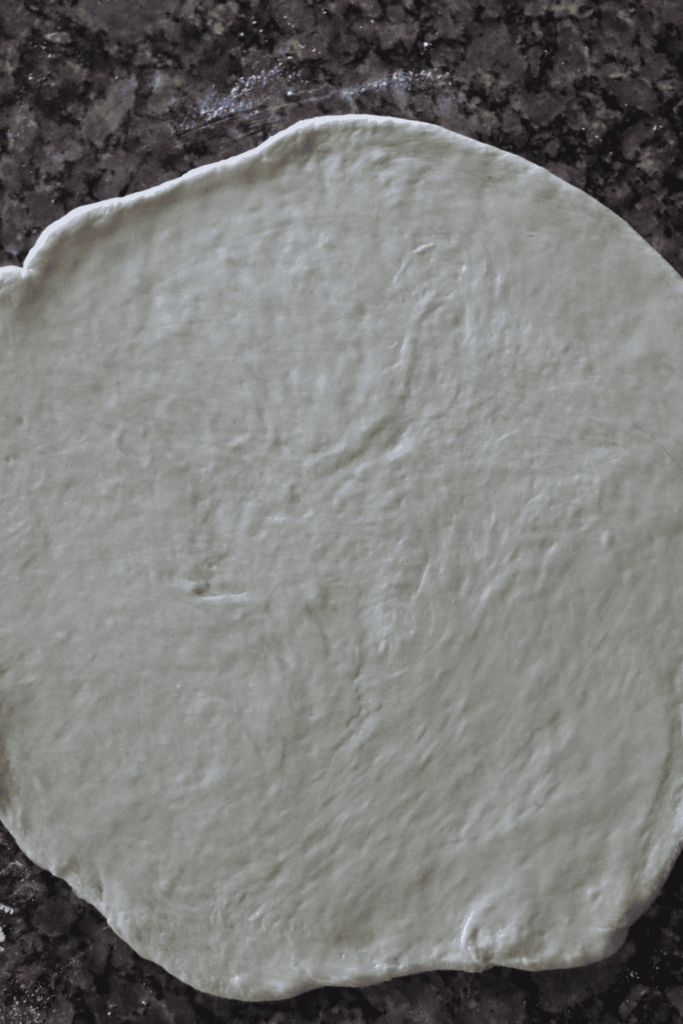
- On a floured surface, roll one dough ball out into a 15-inch circle. Use a pastry brush to brush melted butter all over the top, then use a pizza cutter or sharp knife to cut the dough into 16 even wedges.
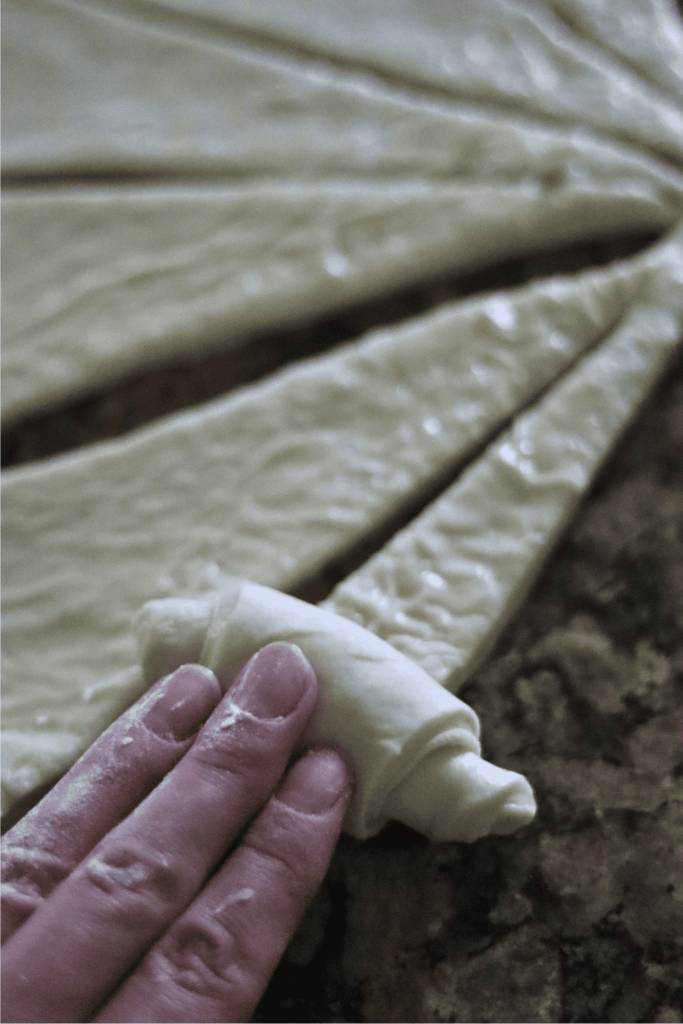
- Starting at the widest end, tightly roll each wedge up into a crescent shape. Do the same with the second dough ball.
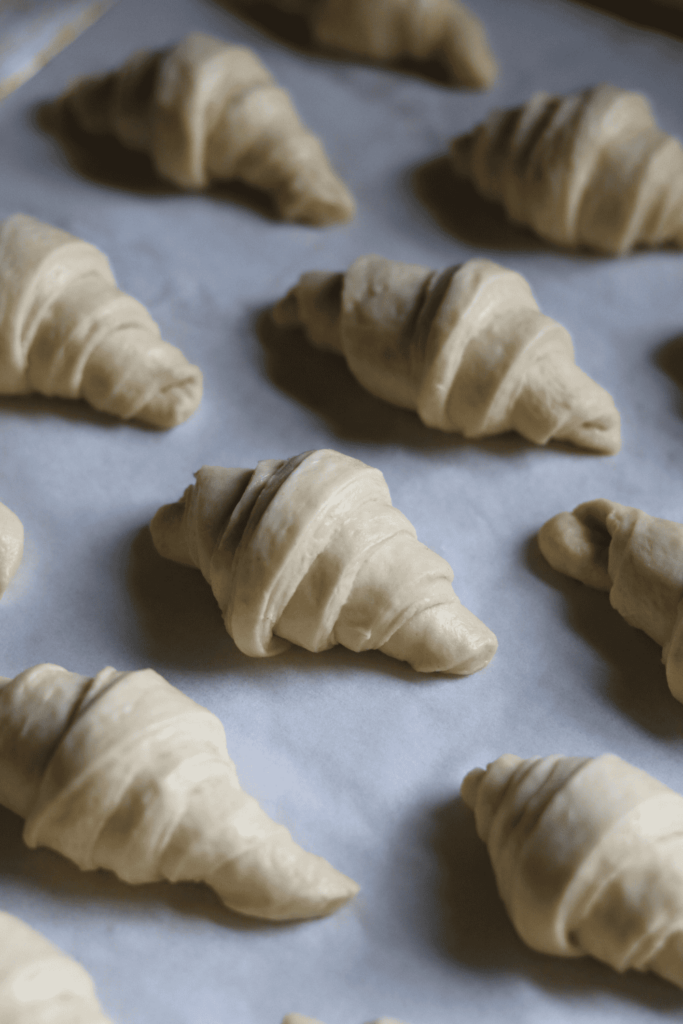
- Place the shaped rolls on a parchment paper-lined baking sheet, cover with a plastic cover or plastic wrap, and let them rise a second time. In a 70°F kitchen, this takes about 2 hours. They are ready when they look puffy and have grown noticeably.
- Not ready to bake yet? Cover the rolls with a plastic cover or plastic wrap and pop them in the fridge overnight. When you are ready, pull them out and let them rise at room temperature. In a 70°F kitchen, that second rise takes about 4 hours after coming out of the fridge.
Bake
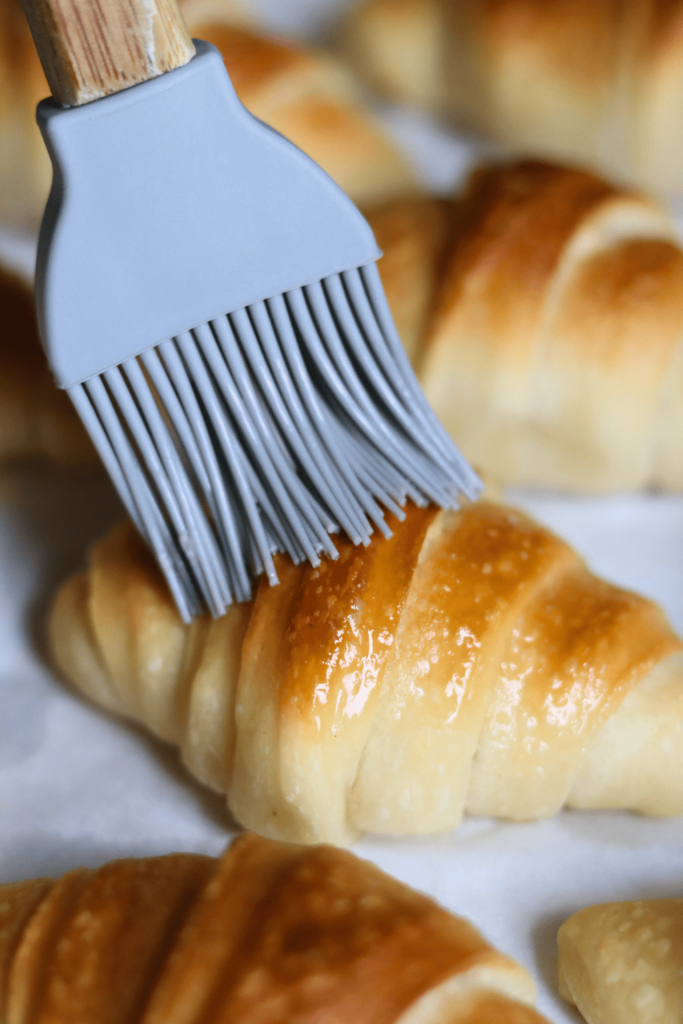
- Preheat the oven to 375°F and bake for 14 to 16 minutes or until the tops are golden brown. A fully baked roll will read 190°F on the inside (internal temperature).
- Pull them out of the oven and let them rest for 10 to 15 minutes, then top with more melted butter.
Serve
- These rolls are best served warm, so give them one more brush of melted butter right before you put them on the table.
- Want something sweet? A drizzle of honey or your favorite jam does the trick. Prefer savory? They are great with butter or next to roasted meats.
- Set them in a large bowl lined with a cloth napkin to keep them warm while your guests help themselves.
McKenna’s Helpful Tips
- Start with an active, bubbly starter- Make sure to use an active starter, not sourdough discard, or the dough won’t rise.
- Keep your liquids warm, not hot-Warm the milk and butter to about 110°F. If it gets too hot (over 120°F), it can kill your starter and the dough won’t rise.
- Knead until the dough is smooth and stretchy-You’re looking for a soft, elastic dough that pulls away from the bowl and passes the windowpane test. That’s what gives you that fluffy inside.
- Let the dough rise until it looks ready-In a 68–70°F kitchen, the first rise takes about 3–4 hours and the second about 2 hours, but don’t just watch the clock. Wait until the dough is doubled and puffy.
- Freeze them if you want to get ahead-You can freeze the rolls before or after baking. For unbaked rolls, freeze them on a lined baking sheet first, then move to a freezer bag. When you’re ready, let them thaw and rise, then bake as usual. You can also freeze fully baked rolls. Cool them first, then thaw and warm in the oven when you’re ready to serve.
How to Store
Cool the rolls completely on a wire rack, then store at room temperature in an airtight container for up to 48 hours to keep the crumb tender and the exterior lightly crisp. For longer storage, wrap individually in plastic and freeze up to 3 months. Flash-freeze unbaked rolls on a parchment-lined sheet pan before transferring to a freezer bag, or freeze fully baked rolls once cooled. When ready to serve, thaw at room temperature and warm briefly in a 350°F oven to restore their fresh-baked texture and flavor.

FAQs
Yes. You can substitute all-purpose flour 1:1. Bread flour gives a better rise, but all-purpose flour still works.
The dough should be smooth, shiny, and pull away from the sides of the bowl. It should also pass the windowpane test.
In a 68–70°F kitchen, bulk fermentation takes about 3–4 hours, and the second rise takes about 2 hours. Timing will vary depending on your kitchen’s temperature.


Sourdough Crescent Rolls Recipe
Enter your email below, and we’ll send it straight to your inbox! Plus, you’ll get my newest sourdough recipes and best tips every week!
Ingredients
- 113 grams unsalted butter 1/2 cup
- 240 grams milk 1 cup
- 200 grams active sourdough starter 1 cup
- 1 egg room temperature
- 70 grams sugar 1/3 cup
- 450 grams bread flour 3 3/4 cups
- 9 grams salt 1 1/2 teaspoons
- 26 grams unsalted butter **for brushing on top the dough 2 Tablespoons
Instructions
Make the Dough
- You'll find make-ahead options in the notes below!
- Heat the butter and milk in a small saucepan on the stove or in a small bowl in the microwave until warm, but no warmer than 110 degrees F. If the liquid is hotter than 120 degrees F, it can kill the sourdough starter, which will prevent the dough from rising.113 grams unsalted butter, 240 grams milk
- Meanwhile, add the bubbly sourdough starter, egg, and sugar to the bowl of a stand mixer with a paddle attachment. Mix on low speed until combined, then gradually add the warm milk and melted butter mixture while continuing to mix.This can also be done by hand.200 grams active sourdough starter, 1 egg, 70 grams sugar
- To the wet ingredients, add the flour and salt and mix again on low speed. Stop to scrape the sides of the bowl to incorporate all the dry ingredients, and then continue to mix on low for 1-2 minutes.450 grams bread flour, 9 grams salt
- The dough will look thick and sticky, like a cake batter. Cover with plastic wrap and allow the dough to rest for 30 minutes. This allows the gluten to rest before kneading.
Knead
- After 30 minutes, remove the cover and knead the dough on medium speed with the dough hook attachment for 15 minutes.This can also be done by hand. Knead for the same amount of time, or until the dough passes the windowpane test.
- You’ll know the dough has been kneaded completely when it is smooth and shiny. The dough will completely pull away from the sides of the bowl when it is being kneaded and it will pass the windowpane test.
- Remove the dough and place it in a lightly greased straight-edge bowl. I like to use butter or olive oil. Cover it again.I love using this straight-edge bowl because it allows me to clearly see when the dough has doubled in size.
Bulk Fermentation
- Place the dough in a warm place in your kitchen and leave to double in size. In my 70-degree F kitchen, the first proof took an additional 3-4 hours. Note that the bulk fermentation time greatly depends on the temperature of your kitchen. If you have a colder kitchen, the rise time will take longer. If your kitchen runs warm, the first rise will take less time.
Shape
- Once the dough has doubled in size, punch the top of the dough to remove all the air bubbles. Then, place the dough on a clean work surface. Divide the dough equally in half, then roll each into a round dough ball.
- Cover with a clean tea towel and leave the dough to rest for 10 minutes; this allows the gluten to relax before rolling.
- On a floured surface, roll out one of the dough balls into a 15-inch circle. With a pastry brush, brush half of the melted butter on top of the dough. Then with a pizza cutter or sharp knife, divide the dough into 16 even wedges.26 grams unsalted butter **for brushing on top the dough
- Tightly roll up each wedge, starting at the widest end, to form the crescent roll shape.
- Repeat these same steps with the second dough ball.
- Place the shaped crescent rolls onto a baking sheet lined with parchment paper, cover them with a plastic cover or plastic wrap, and let the dough rest for its second rise.In my 70-degree kitchen, this took about 2 hours. You will know the final proof is complete when the rolls have grown and look puffy.
- Not ready to bake? No worries! See the notes below.
Bake
- Preheat the oven to 375 degrees F and bake for 14-16 minutes or until the tops are golden brown. Completely cooked rolls will have an internal temperature of 190 degrees F.
- Remove the rolls from the oven and and let them rest for 10–15 minutes before topping with more melted butter. Serve warm and enjoy!

Would buttermilk be OK to use in this recipe in place of regular?
That should work! Just keep in mind it’s more acidic than regular milk, so the flavor may be slightly tangier and the dough a bit softer. I’d start with slightly less and add more as needed to get the same dough consistency.
Love your recipes. Thank you for sharing
Thank you so much — that truly means a lot! I’m so glad you’re enjoying the recipes. Happy baking!
I am making filled crescent rolls with cooked bacon, cooked egg, and cheese. I will be refrigerating until baking the next day.
What order would you think would work best? filling the rolls, refrigerating, set out for rising, and then baking or would you refrigerate, fill, rise, bake?
Ooo, this sounds like a delicious idea! For filled crescent rolls, here’s the order I recommend:
1. Shape + fill the rolls first
Fill them with the cooked bacon, egg, and cheese while assembling.
2. Refrigerate overnight
Place the filled rolls on a baking sheet, cover tightly, and refrigerate.
This keeps the butter in the dough cold (for flakiness) and keeps the filling safe.
3. Next day: Bring to room temp + let them rise
Take the rolls out of the fridge and let them finish their final proof on the counter.
They should look slightly puffy before baking.
4. Bake as directed
Once risen, bake according to the recipe instructions.
Could I use coconut sugar as a substitute for the white granulated sugar?
Absolutely! You can use coconut sugar in place of white granulated sugar in this recipe. Just keep in mind:
-It will change the flavor slightly—coconut sugar adds a light caramel/molasses note.
-The rolls may bake up a touch darker because coconut sugar is naturally darker.
-Use the same amount as listed in the recipe (1:1 swap).
Otherwise everything else stays the same! Enjoy your bake!
My husband doesn’t tolerate regular milk very well. Do you think an alternative like almond milk would work?
Great question! Yes — you can absolutely swap the whole milk for a dairy-free alternative. Unsweetened almond milk will work just fine in this recipe. The texture may be slightly less rich than using whole milk, but the rolls should still turn out soft and delicious. If your husband tolerates it, oat milk is another great option because it has a creamier consistency and behaves more like dairy milk in enriched doughs.
Let me know how they turn out for you!
Hello,
I’m concerned about leaving milk and egg ferment for several hours at room temperature. Is it safe ?
That’s a great question! Yes — it’s safe when made with an active sourdough starter, as the natural acidity and fermentation process help create an environment that discourages harmful bacteria from growing. The dough is also mixed, not left as liquid milk and egg. That said, if your kitchen is very warm (above 80°F), you can always shorten the fermentation time or move the dough to a cooler spot to slow things down.
I’m at high altitude, 7220’. Should I use more flour, and if so, how much more? Thanks!
Thank you for your question! At higher altitudes (like 7,200 feet), the dough can rise faster and sometimes feel a bit stickier due to lower air pressure and drier air. I recommend adding just 9-18 grams (1–2 tablespoons) of extra flour at a time until the dough feels soft and slightly tacky but not sticky. You may also find your rolls rise a bit quicker, so keep an eye on them during proofing. Hope that helps, and happy baking!
Can I put the bowl of dough in the fridge and then roll, cut and shape later instead of shaping and then refrigerating? Thank you!
That works too! Just be sure to keep the dough covered so it doesn’t dry out.
Can I decrease the starter amount in this recipe without changing anything else? Thanks!
You can decrease the starter, but just keep in mind it will change the timing. Less starter will slow fermentation, so your dough may need several extra hours to bulk ferment and proof. The rest of the ingredients can stay the same — you’ll just need to watch the dough, not the clock!
The best, most wonderful recipe! Sweet or savoury, perfect size, tastes amazing and so easy to make. Thank you so much 🙂
Thank you so much! I’m thrilled you loved the recipe—and I totally agree, sweet or savory, it’s such a versatile one. So glad you found it easy and delicious. I really appreciate you taking the time to share this!
How would I use this to make a dough sheet. Making mini pot pies that calls for a crescent roll dough sheet.
Hi Marie!
Sounds delicious! I would follow the recipe up to step number 11. Roll the dough out and then follow your chicken pot pie recipe.
No need for the second rise?
Hi! Can I use my sourdough discard in this recipe? Instead of using my sourdough starter?
Hi Yara! You certainly can, however it will take much longer for the dough to rise since the starter isn’t already active.