Sourdough Focaccia Bread (Easy True-Sourdough Loaf)
This post may contain affiliate links. Please read our disclosure policy.
This Sourdough Focaccia is one of my favorite breads to make because it’s simple, forgiving, and always turns out delicious. With just a few basic ingredients and no complicated shaping, it’s a great recipe for beginners or anyone wanting an easy sourdough bake, this Sourdough Sandwich Bread!
It bakes up with crispy golden edges, a soft airy center, and plenty of olive oil flavor in every bite. You can top it with anything you love—fresh herbs, tomatoes, cheese, caramelized onions—and if you need something quicker, my Sourdough Discard Focaccia is ready in just 3 hours.

Quick Look: Sourdough Focaccia
- Prep Time: 30 minutes
- Rise Time: 14 hours
- Bake Time: 25 minutes
- Total Time: 14 hours 55 minutes
- Servings: 1 loaf
- Calories: ~174 kcal per serving (based on nutrition panel)
- Cook Method: Baked
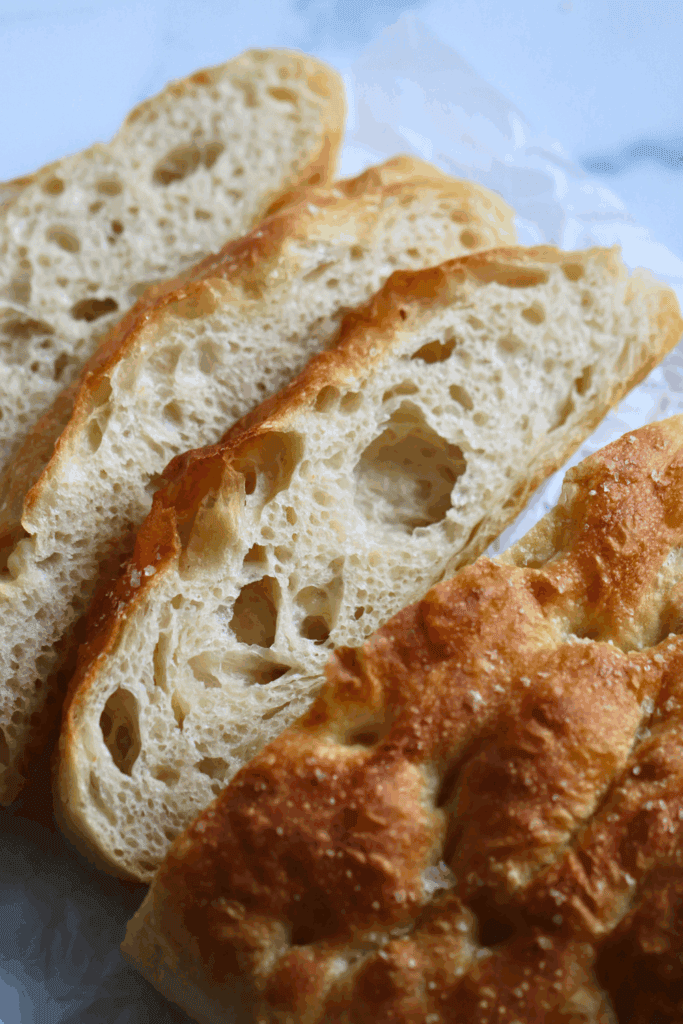
- Flavor Profile: Crispy on the outside, light and chewy on the inside with a rich olive oil flavor and flaky sea salt. A versatile canvas for endless topping combinations.
- Difficulty: Beginner-friendly — Simple ingredients, one stretch and fold, and a long hands-off rise. A great first sourdough project!
SUMMARIZE & SAVE THIS CONTENT ON
Why You’ll Love This Sourdough Focaccia Recipe
Sourdough focaccia is a flatbread made with sourdough starter instead of commercial yeast. It’s known for it’s super airy crumb and chewy crust, and you can top it a different way every time you bake it. Here’s why this easy sourdough focaccia recipe is worth making:
- Beginner-friendly-If you just started your sourdough journey, this is the recipe to begin with. The recipe calls for simple ingredients you may already have in your pantry, plus there’s no kneading or complicated shaping. As for the stretch and fold technique, it’s easy to pick up on your first try. If you want a faster version, my Sourdough Discard Focaccia is ready in just 3 hours. These Sourdough Dinner Rolls are another easy one to try once you get comfortable.
- Crispy outside, airy inside-The bread bakes in olive oil, so the bottom and edges get golden and crispy while the inside stays light and airy. That contrast makes sourdough focaccia so good that no one ever stops at just one slice. These Sourdough Ciabatta Rolls are made from a similar high-hydration dough and have the same chewy bite.
- Make it your own-Cherry tomatoes, caramelized onions, fresh rosemary, and cheese are just a few of the toppings that work really well on this bread. It gets even better; you can use different toppings every single time you bake it. If you have a sweet tooth, my Lemon Blueberry Sourdough Focaccia and Chocolate Sourdough Focaccia are two other versions worth trying.
Ingredients & Substitutions
* To find precise measurements, scroll to the bottom of this post to find the recipe card*
- Water- Use filtered water if you can. Chlorine in tap water can interfere with your sourdough starter and affect the final rise.
- Sourdough Starter – This is a 100% sourdough recipe, so I used an active sourdough starter. You can’t get good focaccia without a ripe, active starter. Make sure your starter is bubbly, has doubled in size, and is at its peak before you use it.
- Bread Flour – I highly recommend bread flour for this recipe. The higher protein content develops stronger gluten in the dough, which is what holds all those beautiful air pockets in place and gives you that light, chewy crumb.
- Salt – Any unrefined salt will do the job, but I really like Redmond’s Unrefined Salt for the extra minerals.
- Olive Oil – Use a good quality extra virgin olive oil for the best flavor and a golden, crispy crust.
- Toppings – Garlic powder, parmesan cheese, flaky sea salt, and fresh rosemary are just a few options. You’ll find a full list of topping ideas below.
Baking Schedule #1
|
Time |
Process |
|---|---|
|
DAY 1 |
Feed the sourdough starter before bed 1:4:4 ratio (ex. 10g starter /40g flour /40g water) |
|
DAY 2 |
|
|
5:00 AM |
Mix ingredients |
|
5:30 AM |
Stretch and fold |
|
5:00 PM |
Second dough rise in baking dish |
|
7:00 PM |
Dimple the focaccia and bake |
Baker’s Schedule #2
|
Time |
Process |
|---|---|
|
DAY 1 |
Feed the starter so that it’s active, bubbly, and at its peak (4-12hrs before mixing dough) |
|
8:00 PM |
Mix ingredients |
|
8:30 PM |
Stretch and fold |
|
DAY 2 |
|
|
8:00 PM |
Second rise in baking dish |
|
10:00 PM |
Dimple and bake |
How to Make Sourdough Focaccia
Make the Dough
- In a large bowl, mix your active sourdough starter and filtered water with a Danish Dough Whisk or your hand until it looks milky. Add the flour and salt to the wet ingredients and mix until all the flour is worked in. This is a high-hydration dough, which means you’ll be handling sticky, wet dough. Cover the bowl with a clean tea towel and let the dough rest for at least 30 minutes.
Stretch and Folds
- With a dough scraper(I like this one), scrape the dough away from the sides of the bowl.
- With wet hands, grab a section of the focaccia dough and stretch it above the bowl, then fold it over on top of the dough. Rotate your bowl clockwise a quarter turn and repeat the same stretch and fold. Continue until you come full circle. The dough will start to look smoother.
- Flip the dough so the seam side is down.
- Cup the sides of the dough and tuck it underneath itself to form a smoother dough ball. Do this about 10 to 20 times while turning the dough in a circle. Stop if the top starts to tear.
- Cover the bowl with plastic wrap or reusable shower cap (this the exact same one I use). Place the sourdough focaccia dough in a warm spot to rise. This can be a cabinet, on top of the fridge, or an oven that is turned off with the light on.

Bulk Fermentation
- This is the tricky part of sourdough because there’s no exact timing. Everything depends on your kitchen temperature, so a warmer space will speed things up while a cooler one will slow them down.
At around 68 -70°F (about room temperature), expect the dough to take about 12 to 18 hours, but don’t rely on the clock. Watch the dough instead.
Here are the dough-is-ready signs you’re looking for:
- The dough has grown by about 75 percent of the origibal size/volume
- The dough looks light and airy
- The dough jiggles a bit when you move the bowl
- Bubbles throughout
Second Proof
- Line an 11½ by 8 inch baking dish with parchment paper. You can use a different size dish, but this one works well and gives me nice, tall slices.
- Pour olive oil in and spread it evenly across the bottom and up the sides of the pan.
- Gently release the dough from the bowl using a dough scraper and tip it into the prepared baking dish.
- Once it settles into the pan, take the top of the dough and fold it toward the middle and press it so it sticks. Do the same with the bottom to create a tri-fold. Flip the dough so the seam side is down.
- Cover the pan and let the dough rise again until it has spread out and nearly reaches the edges of the pan.. The second rise/final rise takes 1 to 4 hours depending on the temperature of your kitchen.

Shape the Focaccia Dough
- Once the dough has risen, it should fill the pan, look light, and jiggle when you move it. Preheat your oven to 425°F. Drizzle a little more olive oil over the dough and on your fingers. To dimple it, press your fingers into the dough until you just touch the bottom of the pan. Keep going until you’ve dimpled the whole surface. Don’t press too hard or you’ll knock out the air and end up with a denser crumb. Sprinkle flaky sea salt over the top of the focaccia dough and add any toppings you like. Press your favorite toppings into the dimpled focaccia.
Here are a few topping ideas for your sourdough focaccia:
- Fresh herbs (coat in oil so they don’t burn)
- Sliced cherry tomatoes
- Caramelized onions
- Sliced yellow potatoes
- Olives
- Cheese
- Pesto
- Cinnamon and Sugar

Bake the Sourdough Focaccia
- Place the Sourdough Focaccia on the lowest rack in your oven and bake for 20 to 25 minutes. This helps the bottom of the focaccia get nice and crispy. I like to start checking it around 20 minutes. If it needs a little more color on top, move it to the top rack and bake for another 5 minutes.
- Remove the focaccia from the oven and let it cool in the baking dish for a few minutes before transferring it to a wire rack to finish cooling. Slice and enjoy.

Serve
- Enjoy the golden brown focaccia warm, straight out of the oven. Pull it apart or slice it up and eat as is. Or serve it alongside dinner with soup, pasta, or salad instead of bread or dinner rolls. And if you have leftovers, turn them into sandwiches the next day or top them with sauce and cheese and warm them up like a quick pizza.
Not ready to bake?
What If you’re not ready to bake your sourdough focaccia for some reason? Don’t worry. After you’ve placed your dough into the oiled baking dish, cover and place it into the fridge. Later on that day or the next, take the dough out of the fridge and allow it to proof for the second rise. Since the dough is cold, it’ll take longer to rise.Once it fills most of the pan, dimple it and bake as usual.
McKenna’s Helpful Tips
- Don’t rush bulk fermentation. Let the dough do its thing and go by how it looks and feels, not the clock. You’re looking for a noticeable rise, visible bubbles, and a jiggle when you move the bowl.
- Use wet hands for stretch and folds. Because this is a high-hydration, sticky dough. Wet hands keep it from sticking and help you stretch and fold it cleanly without tearing the surface.
- Handle the dough gently once it’s in the pan for the second rise. Too rough and you’ll knock out the air you’ve built up during fermentation. Without those bubbles, the focaccia won’t have the light, open pockets you’re after.
- Dimple the dough with intention, but don’t press too hard. Press all the way down to the bottom of the pan so you get those olive oil pockets, but stop once the surface is covered so you keep the structure and don’t deflate the dough.
How to Store
Store cooled sourdough focaccia bread at room temperature for up to 2 days, wrapped loosely in foil or kept in an airtight container. Freeze leftover focaccia for up to 3 months tightly wrapped in foil or plastic wrap and placed in a freezer-safe bag.
Reheating: warm it in a 350°F oven for 8 to 10 minutes for thin slices and 10 to 12 minutes for thicker pieces. If frozen, warm for 15 to 20 minutes, covering it loosely with foil at first so it heats through, then uncovering it at the end to crisp the crust back up.
Sourdough Focaccia FAQs
Yes, you can use all-purpose flour, but bread flour works better if you have it. Bread flour has a higher protein content, usually around 12 to 15 percent. That higher protein helps build stronger gluten, which gives the focaccia better structure so it rises more and stays light and airy with those open pockets.
Dense focaccia often results from overworking the dough, under-proofing, or using a weak sourdough starter. Learn how to make your own starter and maintain it if you haven’t gotten that down yet.
Yes. After placing the dough in the oiled baking dish, cover it and refrigerate it. The next day, bring it back out and let it finish its second rise at room temperature. Since it starts cold, it may take a little longer to rise. Once it fills most of the pan, dimple and bake as usual.


If you tried this Sourdough Focaccia recipe or any other recipe on my blog, please leave a 🌟 star rating and let me know how it went in the📝 comments below. Thanks for visiting!
FULL RECIPE TUTORIAL
Sourdough Focaccia Bread Recipe
Enter your email below, and we’ll send it straight to your inbox! Plus, you’ll get my newest sourdough recipes and best tips every week!
Ingredients
- 50 grams active sourdough starter 1/4 cup
- 400 grams filtered water scant 1 3/4 cups
- 500 grams bread flour * see notes below 3 1/2 cups
- 10 grams salt 1 1/2 teaspoons
- 28 grams olive oil, plus more for drizzling 2 Tablespoons
- flaky salt to taste
- toppings * see notes below
Instructions
- In a straight-edge bowl, mix the active starter and filtered water with a Danish dough whisk or your hand until it looks like a milky liquid.I love using a straight-edge bowl because it allows me to clearly see when the dough is done rising.50 grams active sourdough starter, 400 grams filtered water
- To the wet ingredients, add the bread flour and salt. Again, mix with a whisk or by hand. Be sure to mix until all of the flour is incorporated. This recipe has a higher amount of water, so it will an extra sticky and wet dough. This is normal.500 grams bread flour * see notes below, 10 grams salt
- Cover the bowl with the plastic cover or plastic wrap and let the dough rest for at least a half hour before you move on to the next step.
STRETCH AND FOLDS:
- With a bowl scraper, scrape the dough away from the the sides of the bowl.
- Now, with slightly wet hands, grab a section of the focaccia dough and stretch it above the bowl, then fold it over on top of the dough. Rotate your bowl clockwise a quarter of the way and repeat an identical stretch and fold. Repeat the process until you come full circle. You will notice the dough will start to look much smoother than before.
- Then, flip the dough ball with the seam side down. Continue to cup the sides of the dough by scooping and tucking the dough underneath itself to create a more smooth looking dough ball. Do this about 10-20 times while turning the dough in a circle. Stop if you start to see the top of the focaccia dough begin to rip.
- Cover the bowl again, then place the dough in a warm place to rise.
BULK FERMENTATION:
- Now this is the most finicky part of sourdough. There isn’t a set time for your bulk ferment. It is greatly dependent on the temperature of your environment. The warmer it is, the faster your dough will ferment. The opposite is true for cooler temperatures.
- In my 70 degrees F kitchen, the bulk ferment took about 8-10 hours, but again, you will have to look for the signs that your dough is done fermenting, rather than the clock. Warm temperatures will be faster, while cooler will be slower.
Here’s what to look for:
- -The dough should have increased in size by 75%-The dough looks light and airy, and jiggles when shaken.-There should be visible bubbles in the dough.
Second Rise
- Line a 9 x 13 inch metal baking pan with parchment paper and pour the olive oil on the bottom of the pan and spread it evenly all over the bottom and the sides of the pan.You can use a different sized baking dish, but I prefer this size because it makes the slices nice and tall! I prefer baking in a metal pan so that the exterior gets nice and crispy, but you can bake this in glass or ceramic.28 grams olive oil, plus more for drizzling
- Release the dough gently from the sides of the bowl with a dough scraper and tilt it into the prepared baking dish.
- Pour the sourdough focaccia dough into the pan. Then take the top of the dough and fold it towards the middle and lightly press it with your fingers so that it sticks. Repeat the same motion with the bottom of the dough, to create like a tri-fold. Now flip the dough with the seam side down.
- Cover the dough and allow it to rise again until the dough fills most of the baking dish. In my 70 degree F kitche, this took about 2-4 hours.
Shape
- Once the risen, it should fill the space of the baking dish and be very light and jiggly when you shake the pan.
- Preheat the oven to 425 degrees F.
- Drizzle a little more olive oil on top of the dough and on your fingers. To dimple the dough, gently press your fingers into the sourdough focaccia until you lightly touch the bottom of the dish. Repeat until the entire dough has been dimpled. Be sure not to over-dimple the dough. This can cause the lovely air pockets to pop and create a dense crumb.
- Sprinkle the sourdough with flaky sea salt and any other delicious toppings like these –-Fresh herbs (coat in oil so they don't burn)-Sliced cherry tomatoes-Caramelized onions-Sliced yellow potatoes-Olives -Cheese -Pesto-Cinnamon and Sugarflaky salt, toppings * see notes below
- Gently press the toppings into the dimpled focaccia.
Bake
- Place the Sourdough Focaccia on the lowest rack in your oven and bake for 20-25 minutes. This helps the bottom of the sourdough focaccia to get nice and crispy. I like to check the bread around 20 minutes. Then I will place it on the top rack to get a little more golden brown color. Continue to bake for five more minutes or until the top of the bread is cooked to your liking.
- Remove the Sourdough Focaccia from the oven and allow it to cool in the baking dish for a few minutes before removing it and placing the bread on a wire rack to cool. Once cooled slightly, slice and enjoy!

I had nothing but a sticky mess. I used a scale and was very careful measuring the ingredients. I have been successful with other recipes but the dough for this recipe was very watery.
I’m sorry it gave you trouble! A very sticky focaccia dough can sometimes be caused by the type of flour used, since some flours absorb significantly less water than others. Another possibility is a warm or humid kitchen, which can make an already high-hydration focaccia dough feel much looser. If you don’t mind sharing, what brand of flour did you use? That might help me troubleshoot what happened!
Super
Thank you for the review!
I am new at sourdough baking…I am confused on how to you calculate the ratio for making the correct sourdough starter…can you help me…..?
Great question! Sourdough starter ratios can definitely feel confusing at first, but it is actually quite simple once you understand the basic idea.
Most sourdough starters are maintained at 100% hydration, which means you feed the starter equal parts flour and water by weight.
For this recipe, you can feed 25 grams of starter 25 grams water and 25 grams flour. Once it doubles in size and looks bubbly, it is ready to use. Hope this helps!
This focaccia is a huge hit in our household and beyond. I appreciate the details on the different baking schedules and clear instruction on the amount of ingredients. The recipe is easy to follow. I prepare my starter in the morning, mix the dough in the evening and by the morning I’m ready to go. I gave these as gifts to our business clients and they loved it. I’ve also started a tiny side gig of selling sourdough items and giving proceeds to local charities and this is such an easy item to make. Thank you so much for sharing it with us.
This truly made my day — thank you so much for sharing this with me. I love hearing how the flexible schedule fits so naturally into your routine, and it means a lot that the instructions felt clear and approachable. Knowing you’ve gifted this focaccia to clients and are using it to support local charities is incredibly special. I’m honored this recipe gets to be a small part of something so meaningful. Thank you for baking and sharing it!
Made this for Christmas with Sun Dried Tomatoes and White Cheddar so glad I did. I’m just starting my sourdough journey; thank you for the amazing recipes. I am actually in the process of bulk fermenting the chocolate espresso loaf.
That sounds absolutely delicious—sun-dried tomatoes and white cheddar are such a perfect combo for focaccia! I’m so honored you chose this recipe for Christmas, especially as you’re just starting your sourdough journey. Thank you so much for trusting my recipes and taking the time to leave such a kind comment.
My sourdough focaccia is quite liquidy. What could be the reason ? It’s in the second rise right now.
Hi! Focaccia dough is naturally on the wetter side, but if yours seems extra liquidy it could be due to a couple things — sometimes flour measurement without a kitchen scale or very humid kitchen conditions can add extra moisture. A slightly wetter dough is okay; it will still bake up beautifully into soft, airy focaccia with a nice crust. Just be sure to use a well-oiled pan to prevent sticking!
This is my go to recipe for focaccia! So easy and is a crowd favorite! 🙂
So thrilled to hear that! Thank you so much for sharing!
I am so excited to try this recipe. Can you please share a link to the pan that you use? I can’t seem to find an 11 1/2 inch by 8 inch metal baking pan. Thank you!
Hi Cynthia! I used a ceramic 11 1/2 inch by 8 inch baking dish, but if you’re looking for a great metal pan, I highly suggest this 9×13 inch pan – https://amzn.to/42laEIa. The sourdough focaccia will be a little shorter, but still just as delicious. Hope you love this recipe!
Could you refrigerate the dough after bulk fermentation and wait a day or so to take out for second rise and bake it?
Sure you can! Since the dough will be cold, the second rise will take longer.
Would love to make Kalamata olive focaccia- at what point would I add them in the dough? (Vs just having on top of dough). Thanks!
Hi Deb, you could add the olives when you mix the dough if you prefer having it throughout the focaccia.
Followed the recipe exactly and it turned out beyond expectation! Huge hit with the family, it’s now the side dish I’m required to bring. Super simple and easy to make with little time, loving this and all the other recipes I’ve tried here!
Love this so much! So thrilled to hear you are enjoying the recipes. Thank you so much for sharing 🙂
So far I’m a little unhappy with this recipe. Experienced baker here…I made this dough and my normal sourdough last night. This dough is not rising at all and my other dough rose beautifully. Questioning if 50g is really enough starter for this recipe. Hoping I can still make something out of this! Commenting because I’m not sure if anyone else has had issues here.
Hi Sarah! Thank you for taking the time to share your experience— I’m sorry to hear you’re having trouble with the dough rising! Let’s troubleshoot this together.
The rising time can vary quite a bit depending on the temperature of your kitchen. If it’s cooler, the dough will take longer to rise. A warm spot (around 75–78°F) works best for sourdough fermentation. If the dough isn’t showing signs of activity yet but your starter was active and bubbly when you made it, it may just need more time.
As for the starter amount, 50g is typically sufficient in this recipe because it’s designed for a longer fermentation time.
If you have more details about the environment or process you used, I’d be happy to help further. I hope the dough surprises you with some activity soon—let me know how it turns out!
Are coil folds necessary? Can you do just stretch and folds with focaccia?
One round of stretch and folds are all you need for this recipe!
Can you make a video of how you shape the focaccia after the first stretch and fold? I’m having a hard time understanding. 😩
Hi Lilly! Thanks for being so patient. I finally uploaded the full tutorial on YouTube! Hopefully, this helps!