Chocolate Sourdough Focaccia Recipe with Peanut Butter
This post may contain affiliate links. Please read our disclosure policy.
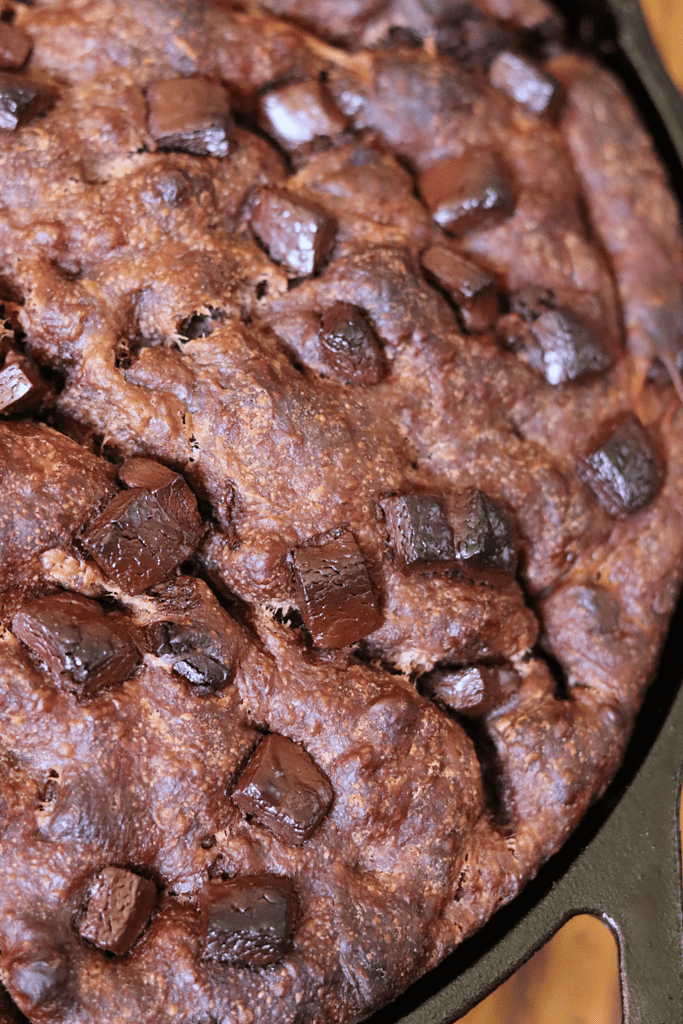
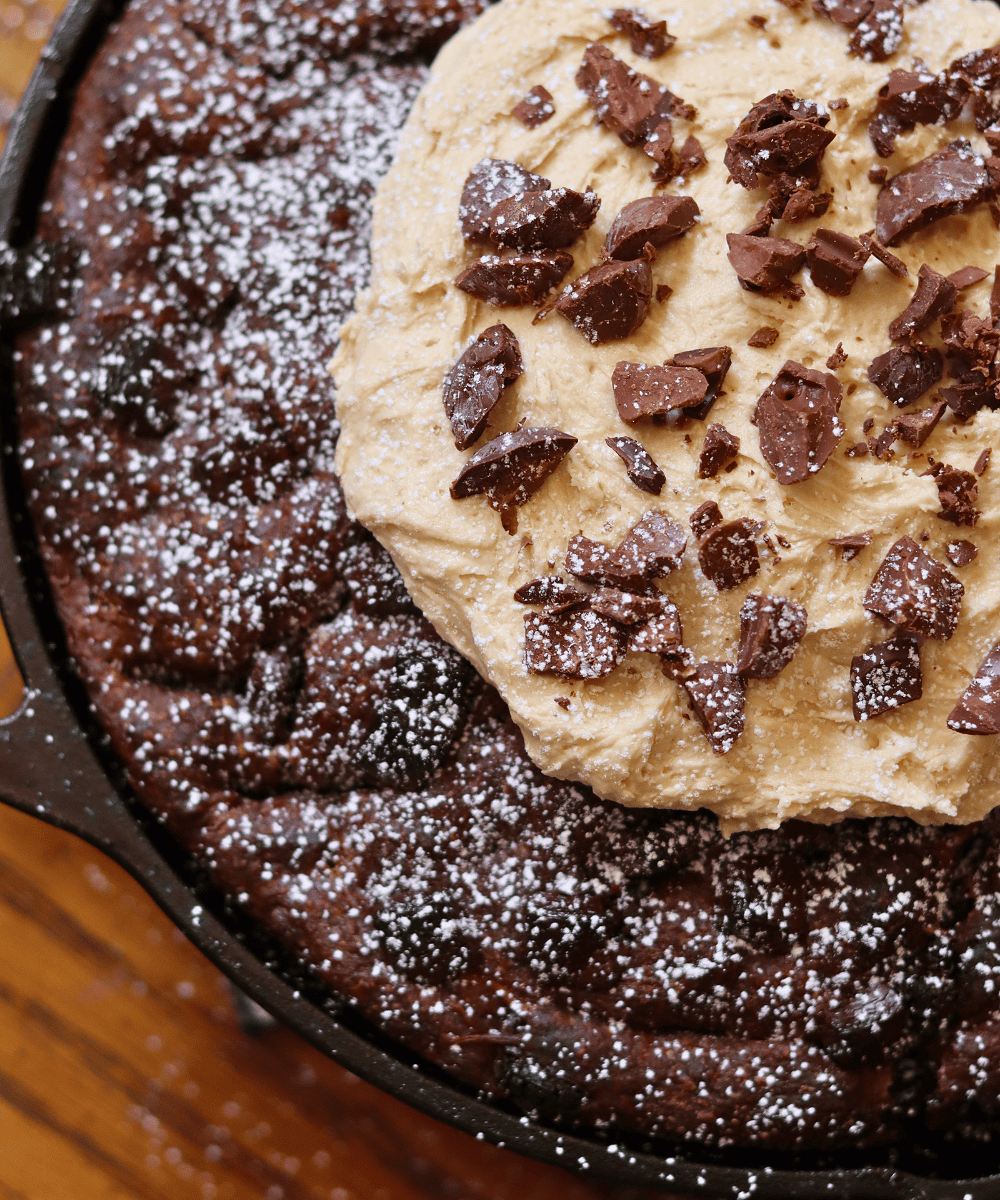
This Double Chocolate Sourdough Focaccia is thick, chewy, and full of chocolate chunks with a peanut butter topping. I never liked Reese’s as a kid, which is funny now because I’m all about chocolate and peanut butter. Just like my Chocolate Espresso Sourdough Bread recipe, the sourdough and cocoa work together to keep it from tasting overly sweet, giving it a deeper chocolate flavor instead of just sugary bread.
This sourdough recipe uses simple ingredients and is easy to make. So whether you’re new to sourdough baking or have been baking for years, this is a dessert you’ll want to make again and again!

Quick Look: Sourdough Chocolate Focaccia
- Prep Time: 10 minutes
- Fermentation Time: 20 hours
- Bake Time: 35 minutes
- Total Time: 20 hours 45 minutes
- Servings: 12-inch focaccia, about 12 slices
- Calories: ~390 kcal per serving (based on nutrition panel)
- Cook Method: Baked
- Flavor Profile: Rich, chocolatey, and lightly sweet with a soft, airy crumb and that subtle sourdough tang. It’s like a cross between focaccia and a fluffy chocolate bread, with a deep cocoa flavor in every bite and just the right balance of indulgent and not-too-sweet. And the peanut butter topping just brings it all together!
- Difficulty: Intermediate – The dough itself is pretty forgiving, but working with a high-hydration focaccia and getting that perfect texture takes a little practice. If you’ve made focaccia or sourdough before, you’ll feel right at home!
SUMMARIZE & SAVE THIS CONTENT ON
Why You’ll Love This Recipe
- Great for beginners: Focaccia is one of the easiest sourdough breads to start with. You do not have to shape it perfectly. You simply mix the dough, let it rest, and press it into the pan. It comes out soft, chewy, and delicious every time. If you’re looking for something quicker, check out my Sourdough Discard Focaccia, it’s ready to bake in just 3 hours!
- No kneading required: Most sourdough loaves need several rounds of stretch and folds, but this focaccia does not. Just like my true Sourdough Discard Focaccia, you only knead the dough for about a minute after the first rest to mix in the chocolate. After that, the dough rises on its own so you can bake it into that golden brown goodness.
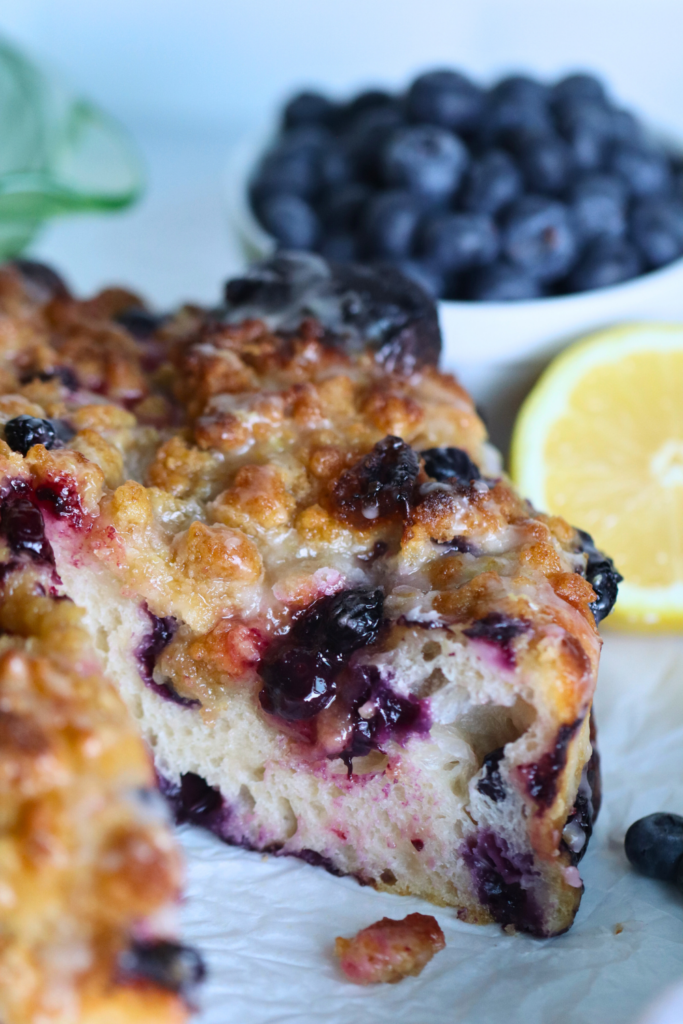
- A sweet twist on classic focaccia: This bread is usually savory, but cocoa and chocolate chunks turn it into dessert. The dimples give it a rustic, homemade look, and the chewy texture with chocolate makes it almost like chocolate cake. If you want more sweet focaccia recipes to try, check out my Lemon Blueberry Sourdough Focaccia recipe.
How to Make Chocolate Sourdough Focaccia:

- In a bowl, whisk the flour, cocoa powder, and salt until combined

- Then add the active starter, cool water, maple syrup, and vanilla extract. Mix with a Danish dough whisk or by hand until the dry ingredients are combined and you have a shaggy dough. Cover and let the dough rest for an hour.

- After the first rest, sprinkle the chocolate chips on top of the dough and knead for no more than a minute, just until the chocolate is mixed evenly into the dough. Cover again and leave in a warm place to rise until doubled in size.

- Once the dough has doubled, pour the melted butter into a 10-inch cast iron skillet or baking sheet. Swirl to cover the bottom of the pan.

- Transfer the dough into the pan and flip it so the butter covers the whole surface.

- Cover again to rest for an hour or until it has doubled from its original size and is quite puffy. Depending on the temperature of your kitchen, the butter may solidify, and that’s totally fine.

- Gently dimple and stretch the focaccia dough to reach the edges of the pan. Sprinkle another handful of chocolate chunks on top of the dough and press them in.
- Preheat the oven to 425°F. Place the skillet in the middle rack and bake for 35–40 minutes until the edges are golden and crisp. Remove from the oven and cool for at least 10 minutes on a wire rack.
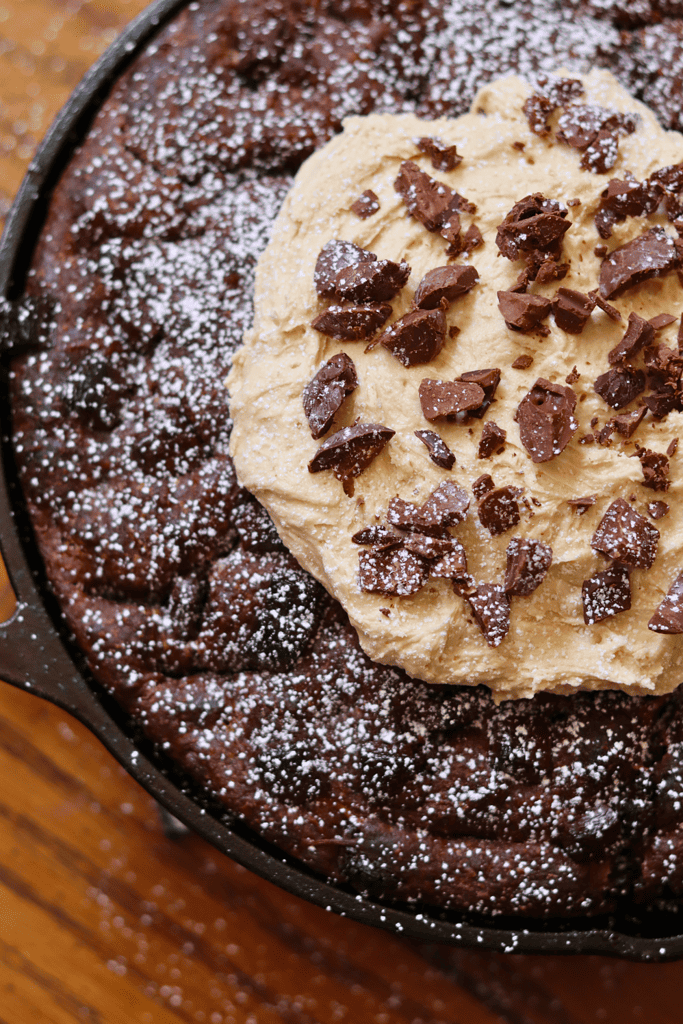
- While the focaccia is still warm, spread dollops of the peanut butter cream cheese topping over it and add extra chopped chocolate if you like. Dust with powdered sugar, cut into wedges, and enjoy warm.
- In a stand mixer, combine butter, cream cheese, and peanut butter. Add powdered sugar in three stages to avoid a mess. Once smooth, stir in the vanilla extract for extra flavor.
McKenna’s Helpful Tips
- Use a mix of flours: Combining bread flour with all-purpose flour gives you a focaccia that’s chewy in the middle but light and airy overall. Bread flour alone can be dense, and all-purpose alone can be too soft.
- Don’t overwork the dough: After folding in the chocolate, handle the dough gently. Over-kneading can make the focaccia tough instead of soft and pillowy.
- Let it rest in a warm spot: During the overnight bulk fermentation, keep the dough somewhere cozy—not cold, not too hot. A slightly warm kitchen ensures the sourdough develops flavor without over-proofing.
- Butter your pan generously: Melted butter in the pan and on the dough edges helps create a crisp, golden crust while keeping the inside tender. Even if some butter solidifies, it still works beautifully during baking.
How to Store
Chocolate sourdough focaccia is best eaten the day it’s baked. It will stay fresh for 2–3 days if stored in an airtight container or a large resealable bag. If it’s a day or two old, you can warm slices briefly in the oven or microwave to bring back the softness and melty chocolate.

Chocolate Sourdough Focaccia FAQs
Bread flour has a higher protein content than all-purpose flour. Baking chocolate sourdough focaccia with bread flour gives the best result for an airy, chewy bite. If you don’t have bread flour, you can use all-purpose instead. I like to use a mix of the two flours for a chewy but light crumb.
Metal heats faster than glass, which helps the focaccia rise higher and get crispier edges. A cast iron skillet gives the best results, but if you don’t have one, you can use a baking sheet or glass pan. The bread will still bake well, though the rise may be slightly lower.
Dimpling the chocolate sourdough focaccia keeps it from baking flat and prevents a well-proofed dough from rising too fast. It also creates little pockets for the butter to pool, which gives the bread a crisp, golden crust.


If you tried this Chocolate Sourdough Focaccia recipe or any other recipe on my blog, please leave a 🌟 star rating and let me know how it went in the📝 comments below. Thanks for visiting!
Chocolate Sourdough Focaccia Recipe
Enter your email below, and we’ll send it straight to your inbox! Plus, you’ll get my newest sourdough recipes and best tips every week!
Equipment
- 10-inch cast iron skillet
Ingredients
Dough
- 250 grams bread flour 1 3/4 cups
- 250 grams all-purpose flour 1 3/4 cups
- 30 grams cocoa powder 1/3 cup
- 6 grams salt 1 teapsoon
- 50 grams active starter 2 Tablespoons
- 400 grams water scant 1 3/4 cups
- 40 grams maple syrup 2 Tablespoons
- 4 grams vanilla extract 1 teaspoon
- 140 grams chocolate chunks 3/4 cup
- 70 grams butter, melted 5 Tablespoons
Topping
- 2.5 oz cream cheese room temperature
- 2 Tablespoons butter room temperature
- 1 1/4 cup powdered sugar
- 3 Tablespoons peanut butter
Instructions
Chocolate Sourdough Focaccia
Make the Dough:
- In a straight-edge bowl, add the active starter, cool water, maple syrup, and vanilla extract. Mix with a Danish dough whisk or by hand until combined.I love using a straight-edge bowl because it allows me to clearly see when the dough has doubled in size.50 grams active starter, 400 grams water, 40 grams maple syrup, 4 grams vanilla extract
- In a separate bowl, whisk together the flour, cocoa powder, and salt until combined.250 grams bread flour, 250 grams all-purpose flour, 30 grams cocoa powder, 6 grams salt
- Add the dry ingredients to the wet ingredients and mix until the flour has been incorporated and a shaggy dough.
- Cover the bowl with the plastic cover or plastic wrap and let the dough rest for an hour.
- After its first rest, sprinkle the chocolate chips on top of the dough. Now, with slightly wet hands, grab a section of the focaccia dough and stretch it above the bowl, then fold it over on top of the dough. Rotate your bowl clockwise a quarter of the way and repeat an identical stretch and fold. Repeat the process until you come full circle. You will notice the dough will start to look much smoother than before.140 grams chocolate chunks
- Then, flip the dough ball with the seam side down. Continue to cup the sides of the dough by scooping and tucking the dough underneath itself to create a more smooth looking dough ball. Do this about 10-20 times while turning the dough in a circle. Stop if you start to see the top of the focaccia dough begin to rip.
Bulk Fermentation:
- Cover the bowl and leave at room temperature overnight in a warm spot to rise. Now this is the most finicky part of sourdough. There isn’t a set time for your bulk ferment. It is greatly dependent on the temperature of your environment. The warmer it is, the faster your dough will ferment. The opposite is true for cooler temperatures.
- Doughs will typically bulk ferment for 12-18hrs hours, but again, you will have to look for the signs that your dough is done fermenting, rather than the clock. Warm temperatures will be faster, while cooler will be slower.
- Here's what you're looking for: -The dough should have increased in size by 75%-The dough looks light and airy, and jiggles when shaken.-There should be visible bubbles in the dough.
Second Rise:
- Once the dough has doubled in size, melt the butter, then pour it into a 10-inch cast iron skillet or baking sheet. Swirl to cover the bottom of the pan.70 grams butter, melted
- Gently transfer dough from the bowl into the cast iron pan.
- Flip to completely cover the surface of the dough with the melted butter.
- Cover again and leave to rest until it has doubled from its original size and is very puffy. This took about 1-2 hours in my 70 degree F kitchen. Depending on the temperature of your kitchen, the butter may solidify – totally fine.
Shape the Focaccia:
- To dimple the dough, gently press your fingers into the sourdough focaccia until you lightly touch the bottom of the dish. Repeat until the entire dough has been dimpled. Be sure not to over-dimple the dough. This can cause the lovely air pockets to pop and create a dense crumb.
- Sprinkle another handful of chocolate chunks on top of the dough and press them in.
Bake:
- Preheat oven to 425 degrees F.
- Place the cast iron skillet on the middle rack of the hot oven and bake for 35-40 minutes. Place a baking sheet underneath the cast iron skillet, just in case some butter bubbles over.
- Remove from the oven and cool for at least 10 minutes on a wire rack.
- While still warm, top the focaccia with dollops of the peanut butter cream cheese topping and extra chopped chocolate chunks.
- Sprinkle with a dusting of powdered sugar, cut as wedges, and enjoy warm!
Peanut Butter Topping
- In a stand mixer, mix the butter and cream cheese until creamy.2 Tablespoons butter, 2.5 oz cream cheese
- Add the powdered sugar in 3 stages, that way you don't have sugar flying everywhere. Mix until light and fluffy, about 3-4 minutes on medium.1 1/4 cup powdered sugar
- Finally, add the peanut butter and mix until fully incorporated.3 Tablespoons peanut butter

This turned out amazing. Thank you for your recipe.
Delicious 👏
So thrilled to hear that you loved this recipe! Thank you so much for taking the time to share.
Would it be ok to put in the fridge the next morning and then put in pan, rise and bake in the evening?
Hi Melinda! You can absolutely store the dough in the fridge after the bulk fermentation. The second rise will take longer since the dough will be cold. Hope you love this recipe!
It’s rising right now! Looks great! However, I’m not sure how much it should rise. Should it double?
Hi Lisa! The dough should double in size. Hope you love this recipe!
Did you have any issues with the butter spilling over the edge of your cast iron skillet while baking? I didn’t put a pan under my skillet and had a very smoky oven when the butter dripped over the sides of the skillet onto the bottom of my oven.
Sorry about that! Personally, I did not. But I will add a recommendation in the recipe to place a baking sheet underneath, just in case. Thank you for sharing!