

Sourdough Bread in a Loaf Pan
This post may contain affiliate links. Please read our disclosure policy.
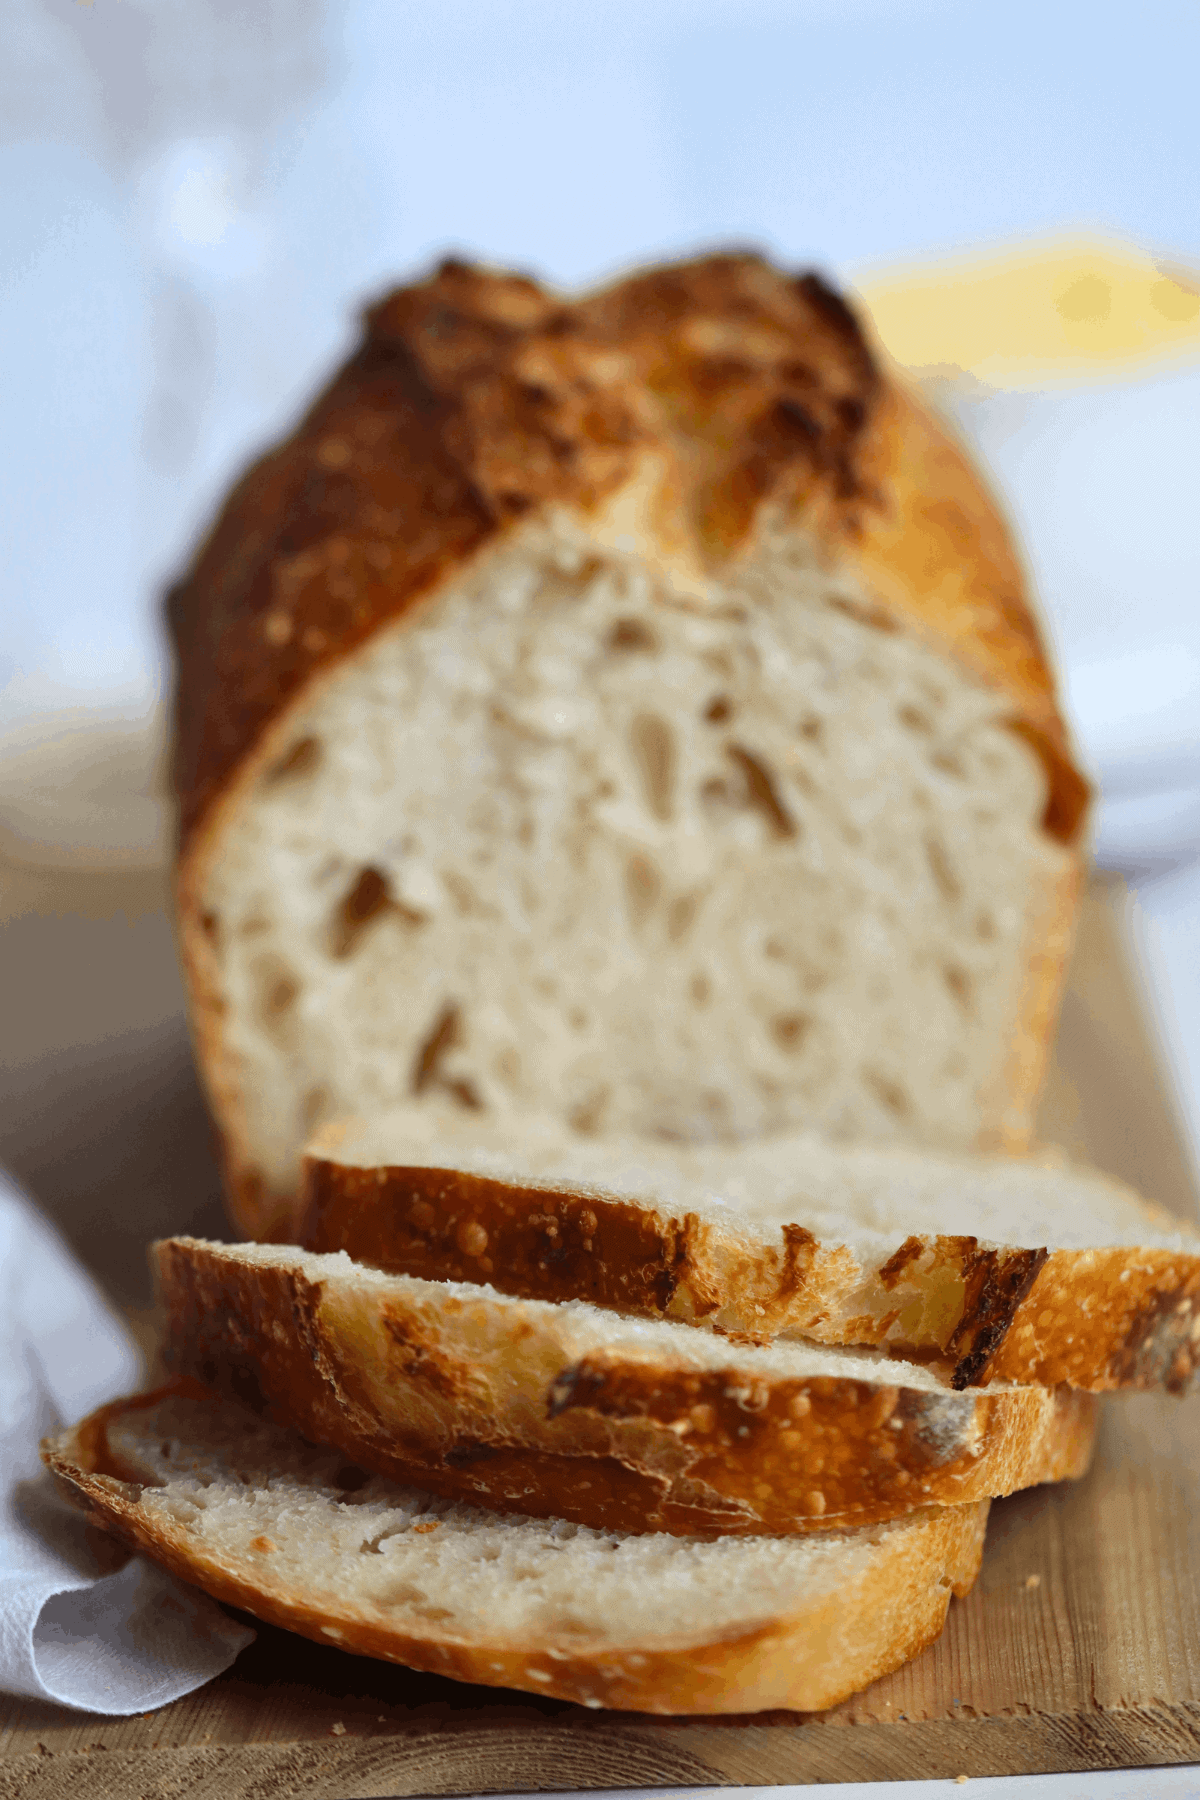
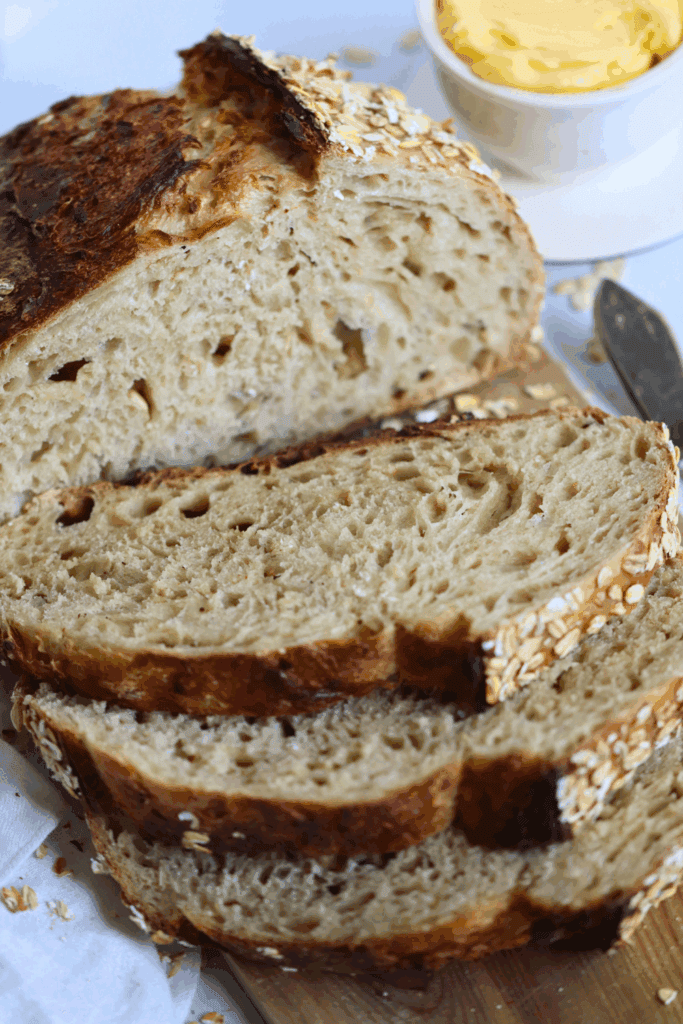
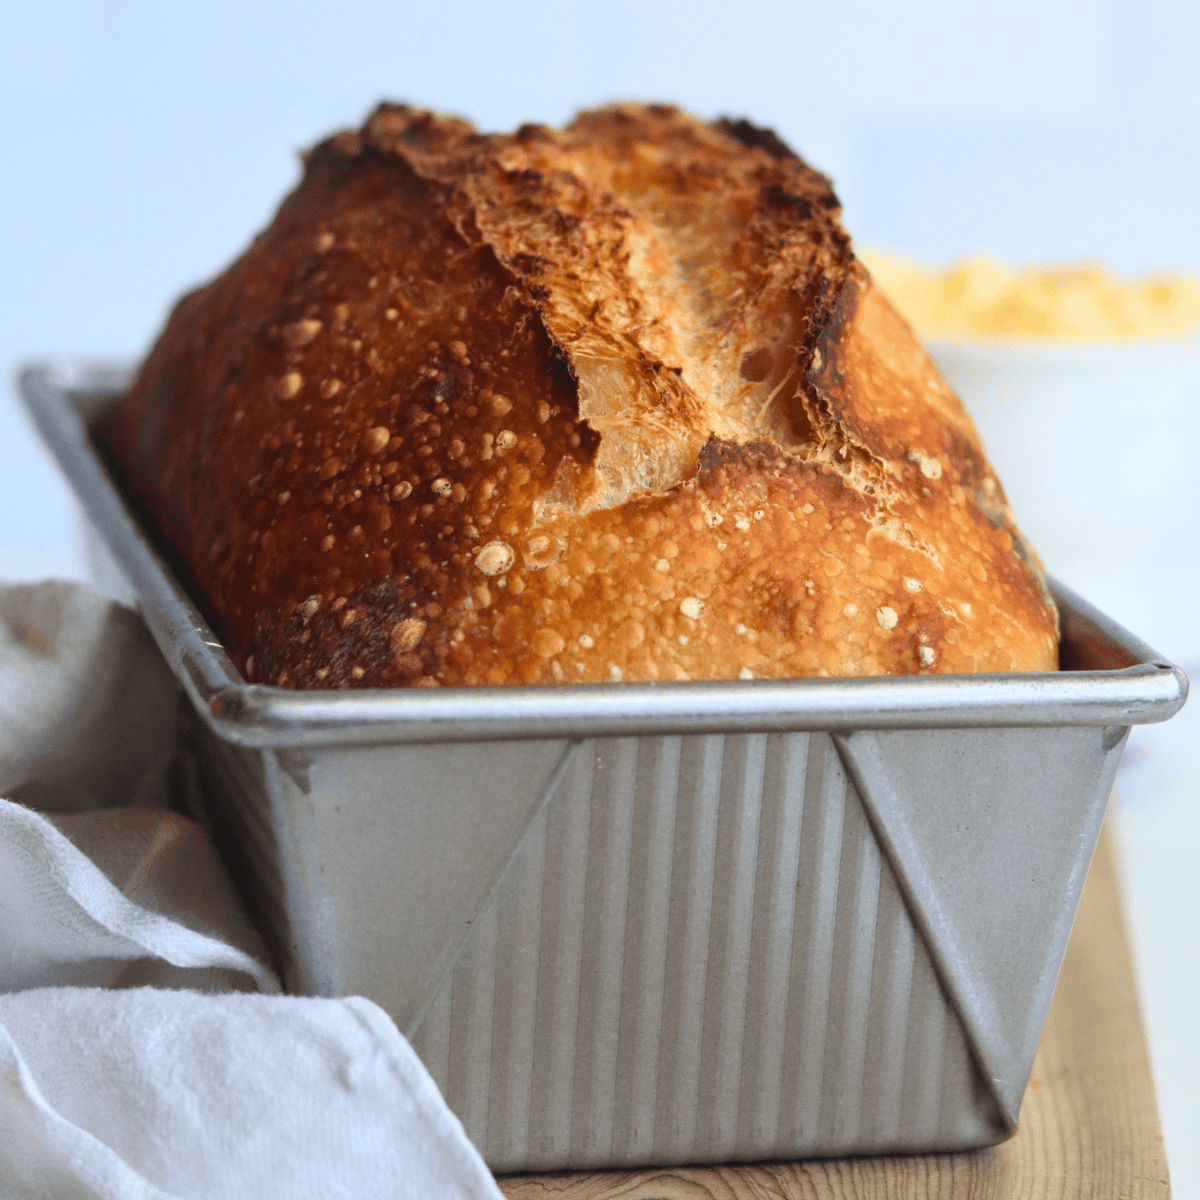
You don’t need a Dutch oven to bake a beautiful loaf of sourdough bread, and this Sourdough Bread in a Loaf Pan proves it! I took my Beginner Sourdough Bread Recipe and adapted the baking method so all you need are two standard loaf pans to get that same crispy crust and soft, chewy crumb.
One loaf pan holds the dough while the second traps steam as the bread bakes, giving it plenty of room to rise before that golden crust sets. It’s a simple option if you’re just getting started or don’t have a Dutch oven, and if you’re looking for a softer everyday loaf, my Sourdough Sandwich Bread is another favorite that bakes right in a loaf pan.
Quick Look: Sourdough in a Loaf Pan
- Prep Time: 2 hours
- Bulk Fermentation: 8 hours
- Cold Proof: 8–12 hours
- Bake Time: 45 minutes
- Total Time: ~20 hours
- Servings: 1 loaf
- Calories: ~1851kcal per loaf (based on nutritional panel)
- Cook Method: Baked in a loaf pan
- Flavor Profile: Classic sourdough tang with a chewy, open crumb and a golden crust. Perfect for toast and sandwiches — no Dutch oven required!
- Difficulty: Intermediate — A multi-day sourdough loaf with stretch and folds, shaping, and cold proofing, but beginner-friendly with mostly hands-off time!
SUMMARIZE & SAVE THIS CONTENT ON
Why You’ll Love This Sourdough Bread in a Loaf Pan
- Dutch oven not needed—Sourdough bread recipes typically calls for a Dutch oven, but not this one! The first loaf pan and the top pan act like a Dutch oven, trapping enough steam around the dough and helping it get the oven spring we all want. Another loaf you can make without a Dutch oven is this Sourdough Focaccia. I love this flavorful bread and I bet you’ll love it too!
- Easy slicing—The loaf pan gives the bread a long, even shape that’s easy to slice once it has cooled. The slices work really well for toast and sandwiches, and you can cut them as thick or thin as you like. For a whole-wheat version that’s just as easy to slice, this Soft Whole Wheat Sourdough Sandwich Bread is a great option.
- Can do this with any inclusion loaf—You can use this same loaf pan method with sourdough inclusion loaves too, like my Jalapeño and Cheddar Sourdough Bread . So go ahead and add your favorite cheese, herbs, garlic, or other inclusions during your usual stage of the bread-making process. Shape the dough and place it in the pan for the final proof.
Ingredients & Substitutions
* To find precise measurements, scroll to the bottom of this post to find the recipe card*
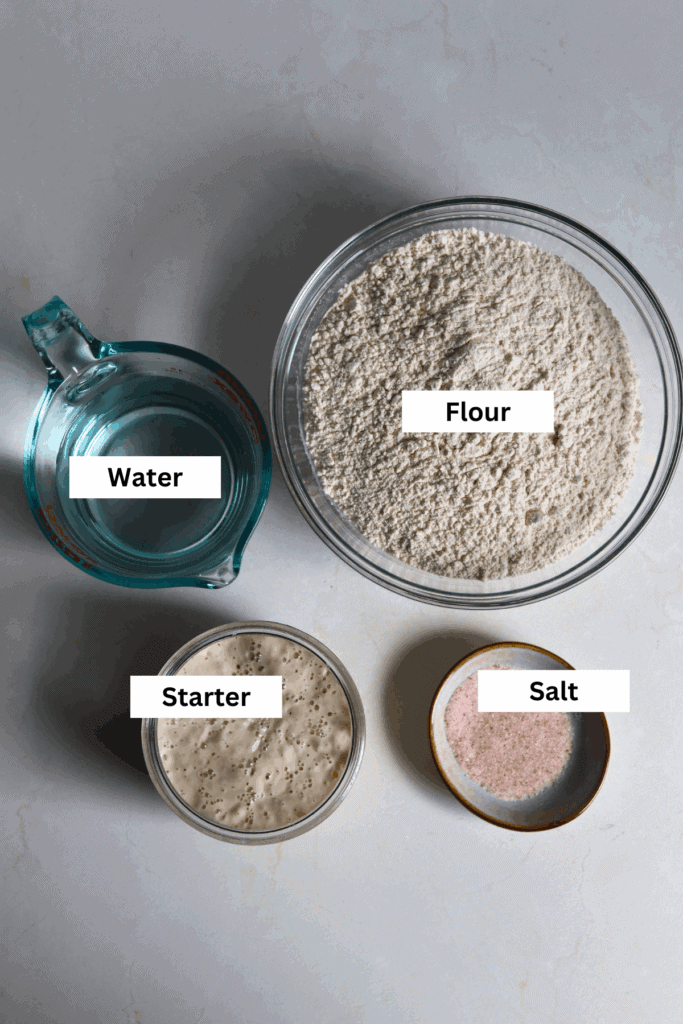
- Bread flour — Bread flour gives you the best results. It gives you the best crumb and texture, but if you only have all-purpose flour, you can use it 1:1. The loaf may be slightly shorter and have a tighter crumb.
- Filtered water — Use filtered water for the dough and sourdough starter. You sure can use tap water, but let it sit out for a while before mixing the dough. I used room temperature water. If you use cooler water, this will slow down the rise time.
- Sourdough starter—This bread uses an active sourdough starter as a natural leavener, so there’s no commercial yeast. Make sure it’s a bubbly, active starter that has been fed within the last 4–12 hours and is at its peak before mixing the dough.
- Salt – Salt seasons the bread dough and also affects bulk fermentation. When you’re mixing the dough, avoid putting the salt directly on top of the starter because it can interfere with its activity.
Day #1 Baking Schedule
|
Time |
Process |
|---|---|
|
8:00 PM |
Make the dough |
|
8:30 PM |
1st stretch and fold |
|
9:00 PM |
2nd stretch and fold |
|
9:30 PM |
3rd stretch and fold |
|
10:00 PM |
4th stretch and fold |
|
Overnight |
Bulk fermentation |
Day #2 Baking Schedule
|
Time |
Process |
|---|---|
|
6:30 AM |
Shape the dough |
|
6:30 AM – 4:30 PM |
Second rise in the fridge (8–12 hours) |
|
4:30 PM |
Score and bake |
|
5:15 PM |
Cool on a rack for at least 1 hour before slicing |
How to Make Sourdough Bread in a Loaf Pan
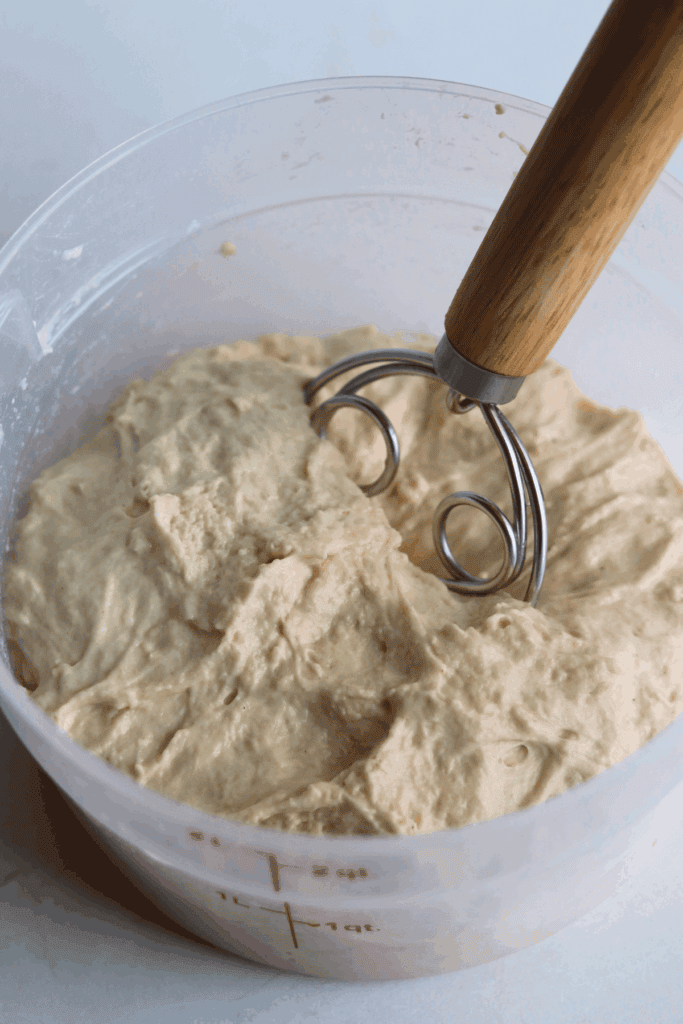
- Mix dough ingredients in a large bowl with a Danish dough whisk. Cover and let the dough rest for at least 30 minutes.
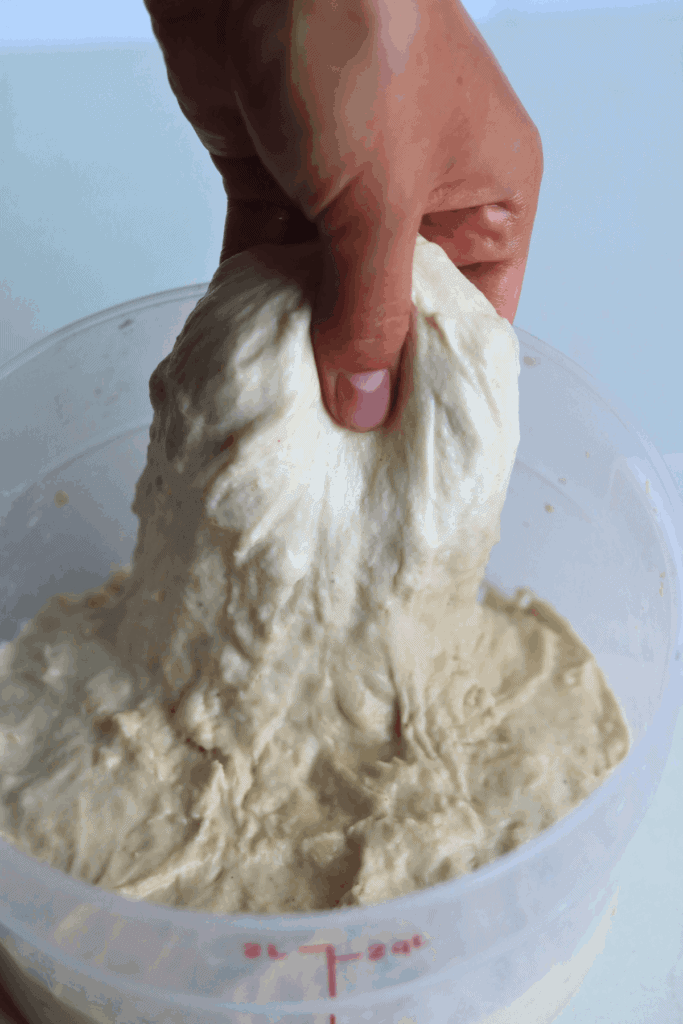
- Perform 4 sets of stretch and folds, with 30 minutes of rest between each set. Cover the dough during each resting period
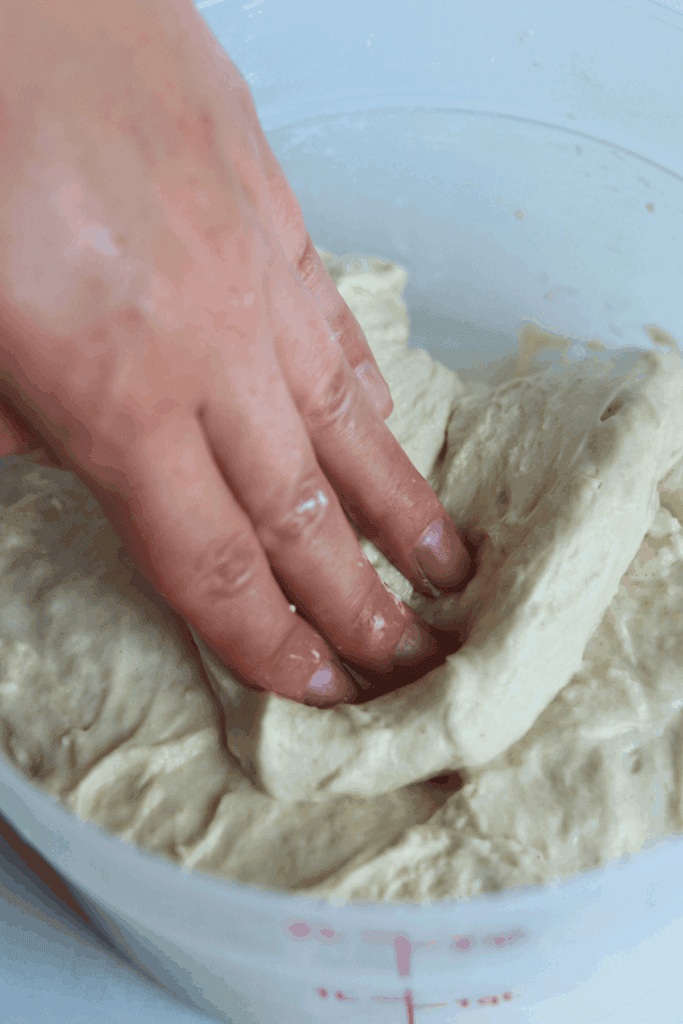
- To stretch and fold, pull a section of dough up and fold it over itself toward the center. Repeat until you’ve gone all the way around the dough.
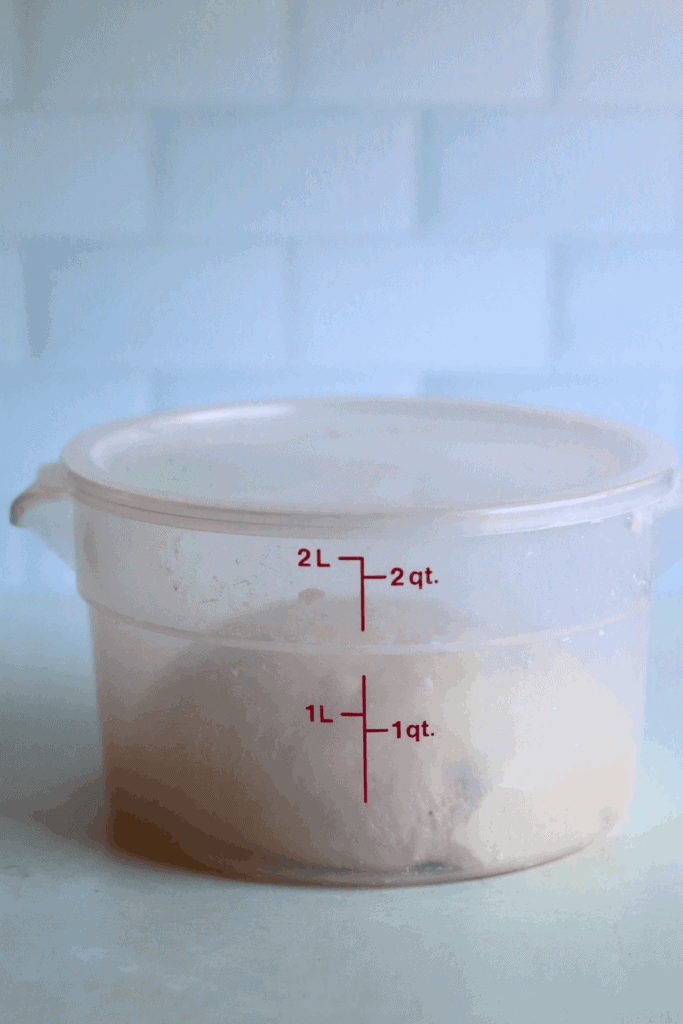
- Allow the dough to complete its bulk fermentation.
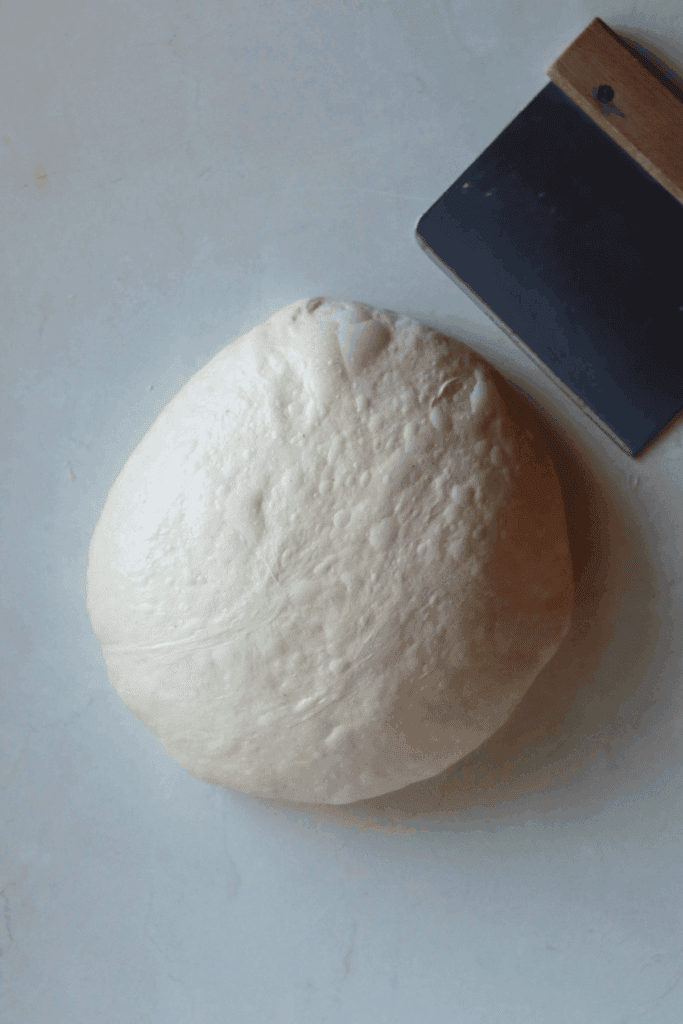
- Once the dough has finished bulk fermentation, preshape it and cover. Let the dough rest for 30 minutes.
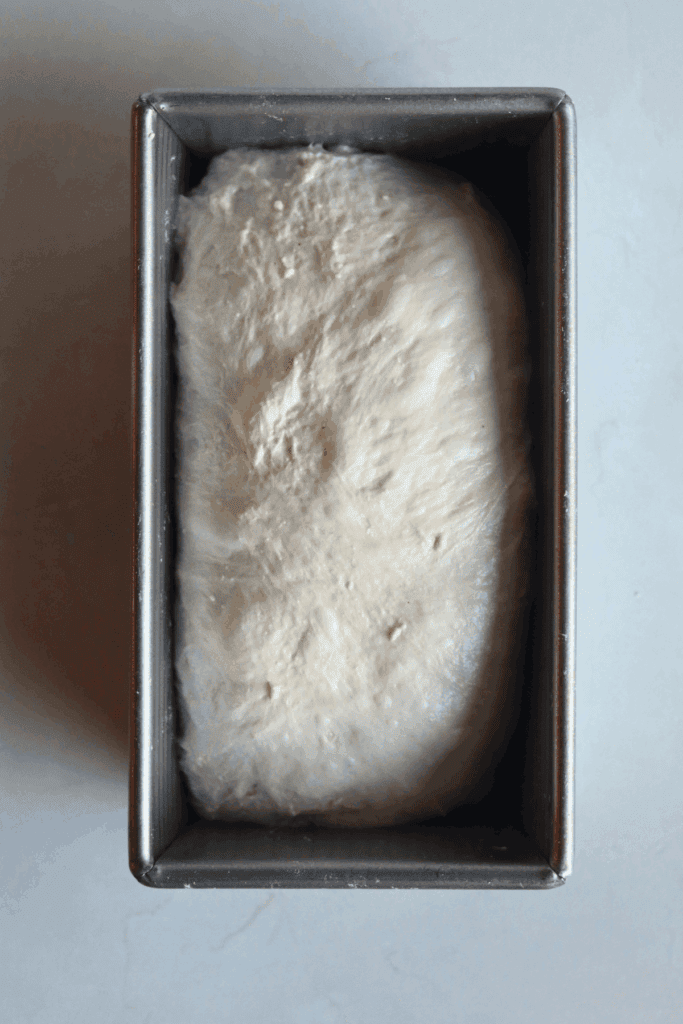
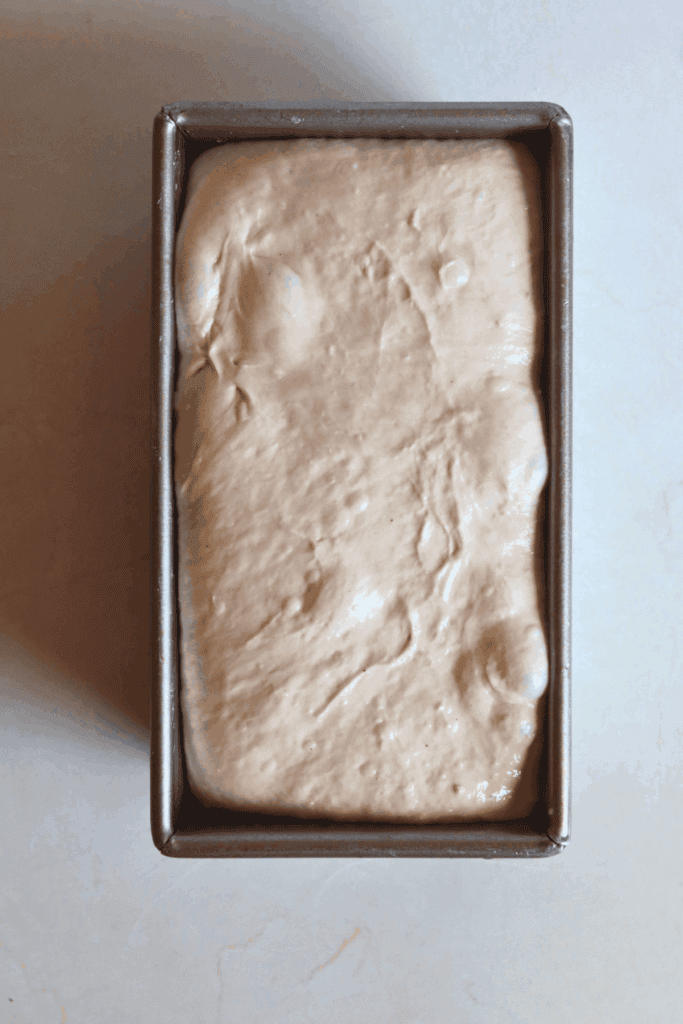
- Shape the soft dough into a sandwich loaf and place it seam-side down in a prepared 8.5×4.5-inch loaf pan. Cover and cold-proof for 8–72 hours.
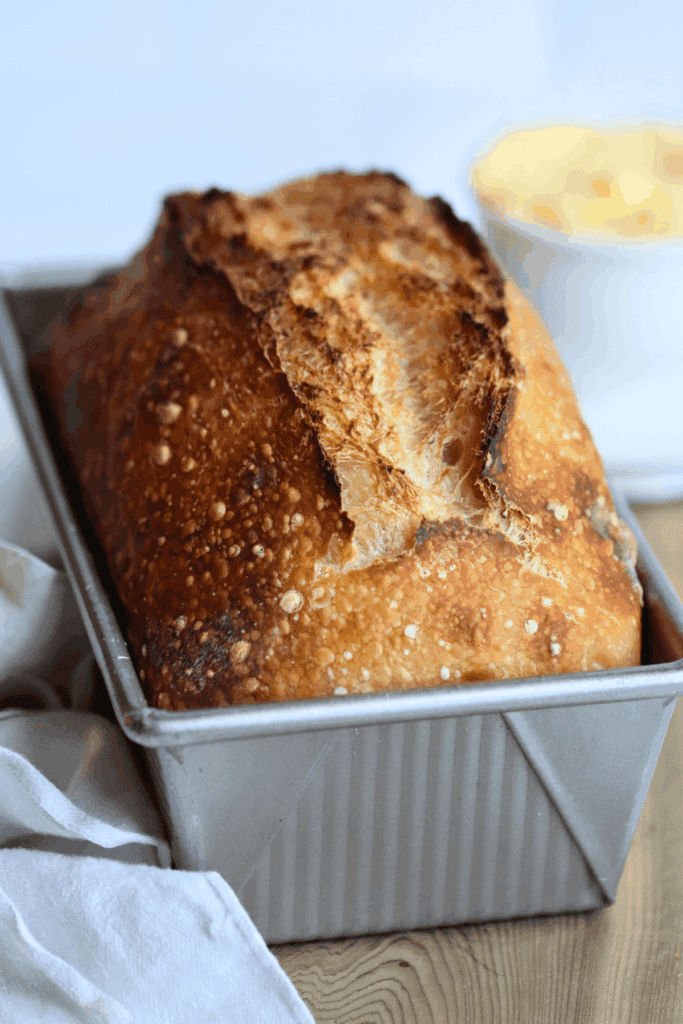
- Once the cold fermentation is complete, score the top of the dough and bake the loaf. Use a razor blade, bread lame, or even a sharp knife for scoring. *Get the baking temperature and other details from the recipe card below.
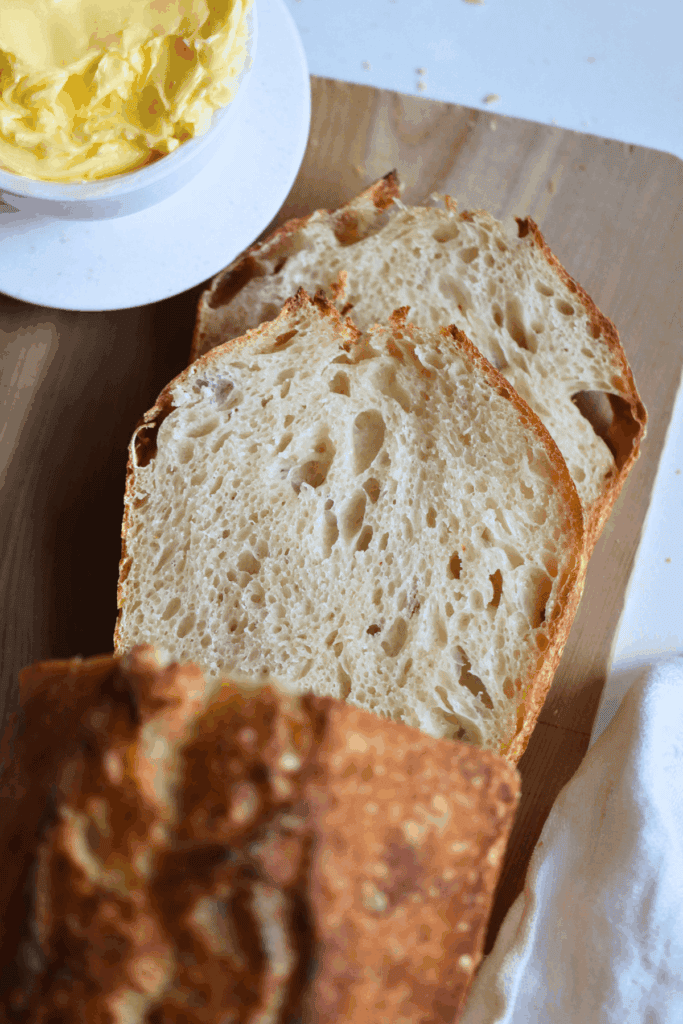
- Let the loaf cool to room temperature before slicing. Enjoy!
McKenna’s Helpful Tips
- Go by the dough, not the clock—It’s challenging to tell you the exact number of hours bulk fermentation will take. The process can be faster or slower depending on the temperature of your kitchen and dough temperature. Higher temperatures give you faster rise times, while lower temperatures do the opposite. Look for dough that’s increased in size by about 75%, feels light and airy, jiggles when you move the bowl, and has plenty of bubbles.
- Give it time in the fridge—I like to cold-proof this pan loaf for 8–72 hours because it gives the bread more flavor and lets you bake it when it works for you. If you’re in a hurry, let the dough rise at room temperature until it reaches the rim of the pan, then bake it the same day.
- Try your favorite sourdough inclusions—You can use this same method for all kinds of Sourdough Inclusions, including cheese, garlic, herbs, or whatever else sounds good. Add your chosen inclusions at the point in the recipe when you normally add them, then shape the dough and place it in the loaf pan for the final proof.
- Save those extra slices—This loaf is perfect for toast and sandwiches, but don’t let the leftovers go to waste. A few day-old slices make amazing Sourdough French Toast.
How to Store
Store the bread at room temperature in a plastic bread bag or plastic wrap to keep the loaf soft and fresh for several days. A handmade beeswax bread bag is another option if you prefer reusable bread storage. For longer storage, slice the loaf and freeze the slices in an airtight freezer bag so you can take out only what you need and toast them straight from frozen. For the best texture, freeze any bread you won’t eat within a few days rather than refrigerating it.
Loaf Pan Sourdough Recipe FAQs
Yes, you can bake this bread in an oven-safe glass loaf pan, although the bake time and browning may be a little different since this recipe was tested in a metal pan. I don’t recommend placing a second glass loaf pan on top of the first to trap steam. Instead, if you’re using glass, create steam with another oven-safe method, such as placing boiling water in a hot cast-iron pan, or bake the loaf uncovered.
Yes, but keep in mind that the size of your loaf pan will affect both the shape and baking time. A larger pan will give you a shorter, wider loaf, while a smaller pan will make a taller loaf and may require a little more time in the oven.
No, but I recommend it. Placing a second metal loaf pan upside down over the first creates a steamy environment around the dough, similar to baking sourdough in a Dutch oven. The steam gives the loaf more time to expand before the crust sets. You can bake the bread uncovered, but you may notice a difference in the crust and oven spring.
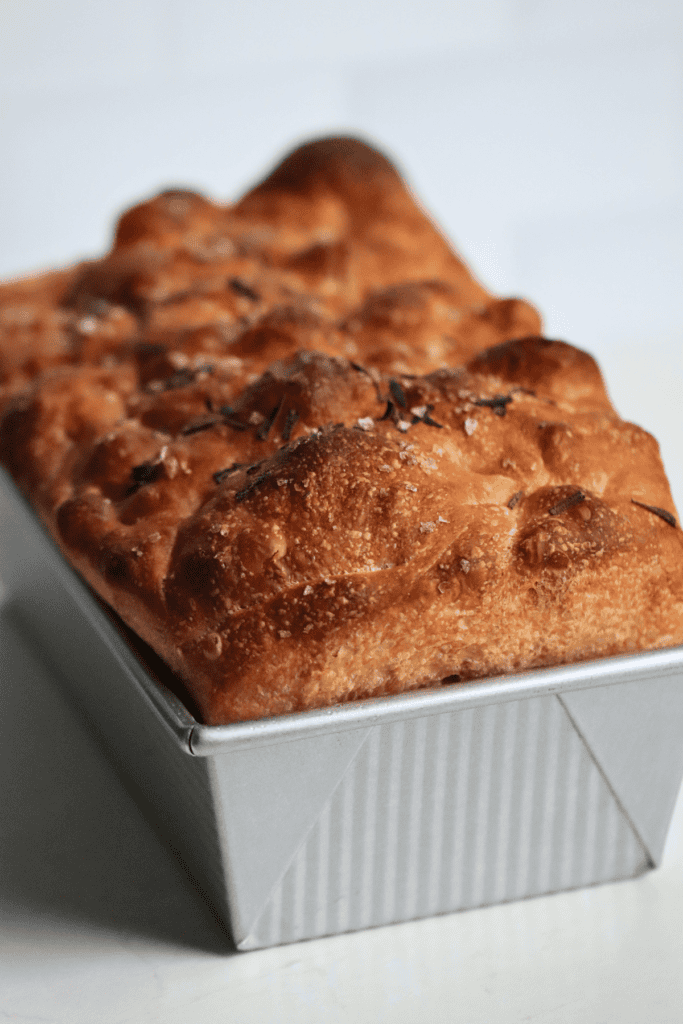
Yes, you can. This method should work well with many sourdough inclusion loaves. Add your inclusions during your usual stage of the bread-making process, then shape the dough and place it in the loaf pan for the final proof. Try it with something like Roasted Garlic and Rosemary Sourdough Bread or Honey Oat Sourdough Bread. Keep in mind that heavier or moisture-rich inclusions can affect fermentation and baking time, so check the internal temperature to make sure the loaf is fully baked. It should reach at least 205°F.


If you tried this Sourdough in a Loaf Pan recipe or any other recipe on my blog, please leave a 🌟 star rating and let me know how it went in the📝 comments below. Thanks for visiting!
Sourdough Bread in a Loaf Pan
Enter your email below, and we’ll send it straight to your inbox! Plus, you’ll get my newest sourdough recipes and best tips every week!
Equipment
Ingredients
- 50 grams active sourdough starter 1/4 cup
- 350 grams water, room temperature 1 1/2 cups
- 500 grams bread flour 3 1/2 cups + 1 teaspoon
- 10 grams salt 1 1/2 teaspoons
Instructions
Make the Dough:
- Mix together the active, bubbly sourdough starter and the room temperature water in a straight-edge mixing bowl until it looks like a milky liquid. I love using my Danish dough whisk for this step. I prefer using a straight edge bowl so I can clearly see when my dough has rise by 75%.50 grams active sourdough starter, 350 grams water, room temperature
- Next, add the bread flour and salt. Be sure to mix until all of the flour is incorporated. The dough will look rough and shaggy, not like a uniform dough ball.500 grams bread flour, 10 grams salt
- Cover the dough with plastic wrap or a reusable shower cap, and let the dough rest for at least 30 minutes before you move onto the next step.
Stretch and folds :
- With slightly wet fingers, grab a section of the dough and stretch the bread dough above your bowl. Then fold it over on top of the dough.
- Rotate your bowl clockwise a quarter of the way and repeat identical stretch and fold. Repeat the process until you come full circle, about 6 stretch and folds in total. You will notice the dough will start to look much smoother than before. Doing stretch and folds develops gluten in your dough, which is what allows your bread to rise beautifully while it bakes.
- Cover the dough and let rest for another 30 minutes.
- Repeat the identical stretch and fold process three more times (for a total of 4 different rounds), waiting at least 30 minutes between each stretch and fold.
- Cover the dough after each stretch and fold.
Bulk Fermentation :
- Now this is the most finicky part of sourdough. There isn’t a set time for your bulk ferment. It is greatly dependent on the temperature of your environment and dough. The warmer it is, the faster your dough will ferment. The opposite is true for cooler temperatures.
- Bulk fermentation begins the moment you mix your dough and continues until you shape your dough.
- In an environment of 70 degrees, doughs will typically bulk ferment for a total of 12 hours, but again, you will have to look for the signs that your dough is done fermenting, rather than the clock. Warm temperatures will be faster, while cooler will be slower.
Here’s what to look for:
- The dough should have increased in size by 75%The dough looks light, airy and jiggles when shaken.The dough should easily pull away from the bowl.There should be visible bubbles on top of the dough.The dough doesn’t tear when you do a windowpane test.
Pre-Shape :
- Once your dough has completed its bulk fermentation, it's time to shape! With slightly wet fingers, gently release the dough from the sides of the bowl. Be careful not to pop all of those lovely bubbles!
- Tilt the bowl and leave gravity to do the work to move the dough on the counter.
- Shape the dough by doing another round of stretch and folds until you have gone full circle.
- With a bench scraper or your hands, turn the dough upside down, so the seam is now on the counter. Lightly dust the top with some flour.
- Cover the dough with your mixing bowl and let it rest for 30 minutes. This pre-shape helps to create extra tension, just before shaping which helps for a beautiful rise.
Prep Loaf Pan:
- While you are waiting for the dough to rest, lightly grease a 8.5×4.5 inch loaf pan. Set aside.
Final Shape :
- After 30 minutes of rest, flip the dough, with the seamed side up. Stretch the dough into a large rectangle on your work surface, then roll the bread dough into a log, like you would a cinnamon roll. Curl the ends of the sourdough bread under itself and pinch the seams together.
- Flip the dough over again, seam side down.
- With a bench scraper or just your hands, carefully scoop up the dough and lay it seam side down into your prepared loaf pan and cover it with plastic wrap or a reusable shower cap.
Second Rise :
- Place your loaf pan in the fridge for cold proof for 8-72 hours. If you'd like to skip the cold proof, read the NOTES below.Placing your dough in the fridge slows down the fermentation process, which deepens the flavors of your loaf. It also gives you flexibility in when you want to bake your bread. But don’t wait too long! If left in the fridge for too long, your dough will over-ferment, causing the dough to not be able to rise.
Score :
- Pro-tip: 30 minutes before baking, place your dough in the freezer. This tightens the dough. which makes for easier scoring. At the same time, place an 8×8 inch metal pan with 1 inch of boiling water in your oven and preheat to 425 degrees F.
- After 30 minutes, remove sourdough from the fridge or freezer.
- Remove the plastic cover and with a lame / razor blade or sharp knife, score down the center on top of the dough. This is necessary for your bread to be able to expand while baking.
- Then place another 8.5×4.5 inch metal loaf pan on top of your dough to create a “Dutch oven” effect. Refer to the photos above!
Bake:
- Bake the bread covered for 30 minutes. Then remove the top loaf pan and continue to bake for another 15-20 minutes. If your crust is browning too quickly, cover it with a piece of aluminum foil and continue to bake.
- Once golden brown and the internal temperature is between 205 – 210 degrees F, remove the loaf pan from the oven.
- Carefully pour the sourdough bread out of the loaf pan and place it onto a wire rack to cool.
- Allow your homemade bread to cool for 1 hour before cutting into it.
- Once the hour is up, slice and enjoy!
Notes
Ingredients & Substitutions
- Bread flour — Bread flour gives you the best results. It gives you the best crumb and texture, but if you only have all-purpose flour, you can use it 1:1. The loaf may be slightly shorter and have a tighter crumb.
- Filtered water — Use filtered water for the dough and sourdough starter. You sure can use tap water, but let it sit out for a while before mixing the dough. I used room temperature water. If you use cooler water, this will slow down the rise time.
- Sourdough starter—This bread uses an active sourdough starter as a natural leavener, so there’s no commercial yeast. Make sure it’s a bubbly, active starter that has been fed within the last 4–12 hours and is at its peak before mixing the dough.
- Salt – Salt seasons the bread dough and also affects bulk fermentation. When you’re mixing the dough, avoid putting the salt directly on top of the starter because it can interfere with its activity.
Tips:
- Give it time in the fridge—I like to cold-proof this pan loaf for 8–72 hours because it gives the bread more flavor and lets you bake it when it works for you. If you prefer to bake the loaf in the same day, let the dough rise at room temperature until it reaches the rim of the pan, then bake it the same day. In my 70 degree F kitchen, the second rise took about 3 hours.
- Try your favorite sourdough inclusions—You can use this same method for all kinds of Sourdough Inclusions, including cheese, garlic, herbs, or whatever else sounds good. Add your chosen inclusions at the point in the recipe when you normally add them, then shape the dough and place it in the loaf pan for the final proof. Depending on what inclusions you might need to extend your bake time. Continue to bake until an internal temp of at least 205 degrees F is reached!

What temp to bake with?
425 degrees F
From a new sourdough baker… why isn’t there any oil in the recipe?
Great question! Oil isn’t required in a basic sourdough bread recipe. This loaf gets its structure and texture from the flour, water, starter, and fermentation, so it’s more of a traditional lean dough. Adding oil would make the crumb a little softer and more tender, but it would also change the texture of the loaf. I hope that helps, and welcome to the world of sourdough!
Can you bake these in glass loaf pans?
Yes, you can bake this bread in an oven-safe glass loaf pan, although the bake time and browning may be a little different since this recipe was tested in a metal pan. I don’t recommend placing a second glass loaf pan on top of the first to trap steam. Instead, if you’re using glass, create steam with another oven-safe method, such as placing boiling water in a hot cast-iron pan, or bake the loaf uncovered.
Such a great recipe! The bread turned out chewy and fantastic! Thank you!
I’m so thrilled you enjoyed it! Thank you for taking the time to leave such a kind review!
This is such an easy baking method for sourdough bread! The bread is still just as chewy and delicious, but easier to shape and slice!