

Honey Oat Sourdough Bread: Easy Homemade Bread Recipe
This post may contain affiliate links. Please read our disclosure policy.
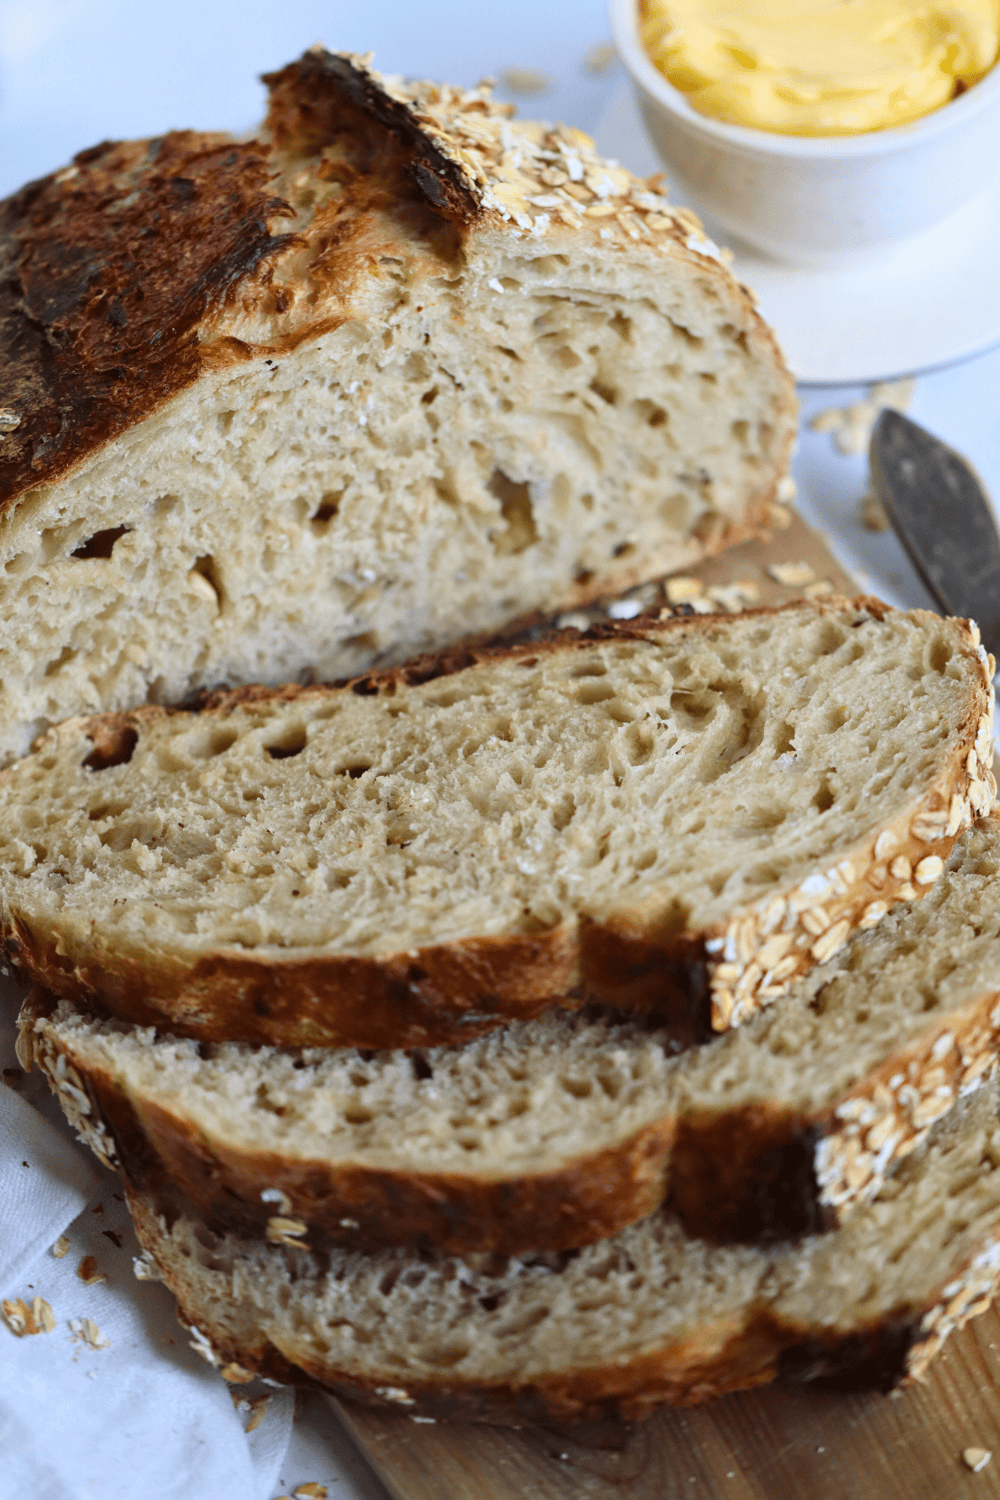
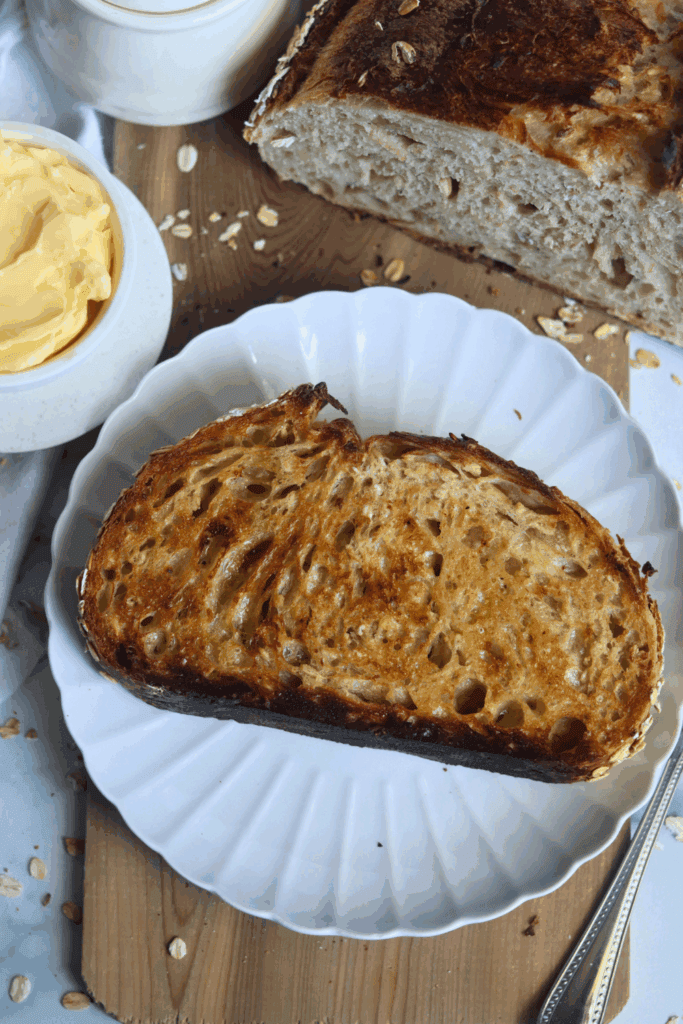
Honey Oat Sourdough Bread is a hearty, golden brown loaf made with bread flour, rolled oats, honey, and an active sourdough starter that delivers a soft crumb with a chewy bite and a beautiful nutty crust. The honey adds a little bit of tang and sweetness while the oats give this homemade bread a great texture and rustic finish that makes it perfect for sandwiches, french toast, or simply slathered with butter.
This easy honey oat sourdough bread fits right into your day with a baker’s schedule that’s similar to a traditional sourdough loaf: mix the bread dough in the morning, let it complete its first rise and bulk fermentation, shape it the next day, and bake a delicious bread that stays fresh for days and freezes well for baking ahead.
Quick Look: Honey Oat Sourdough Bread
- Prep Time: 9 hours
- Cold Proof: 8 hours
- Cook Time: 40 minutes
- Total Time: 17 hours 40 minutes
- Servings: 1 loaf
- Calories: ~2,541 kcal (whole loaf)
- Cook Method: Baked in a Dutch oven
- Flavor Profile: Hearty and wholesome with a chewy, lightly sweet crumb, rich honey flavor, and a nutty oat crust. A simple and beautiful twist on a classic sourdough loaf!
- Difficulty: Advanced — A multi-day sourdough loaf with stretch and folds, shaping, and cold proofing. Best for bakers with some sourdough experience!
SUMMARIZE & SAVE THIS CONTENT ON
Why You’ll Love This Honey Oat Sourdough Bread Recipe
- Rich, Tangy Flavor Built Over a Long Fermentation: The overnight cold proof gives the wild yeast and bacteria plenty of time to develop deep, complex flavor. The honey and rolled oats mingle with the sourdough during the dough rest, creating a loaf that tastes noticeably richer and more balanced than any store-bought bread. If you enjoy long-fermented loaves, try my Easy Pumpkin Pumpkin Bread or Easy Lemon Blueberry Sourdough Bread for other flavorful options.
- A Chewy Crumb with a Nutty, Crisp Crust: Bread flour builds structure and airiness, honey makes the crumb extra chewy, and the oat topping bakes into a crisp, golden brown crust. The result is a softer loaf with a hearty bite that holds up beautifully for sandwiches. For another bread with whole grains and a similar nutty depth, check out my Soft Whole Wheat Sourdough Sandwich Bread.
- Simple Timing That Works With Your Day: You are never stuck in the kitchen for hours. Mix the dough in a large bowl in the morning, perform your stretch and folds, let it complete the first rise, shape in the evening, and bake the next day. The process is spread out with plenty of resting so it fits easily into a busy schedule. This is one of my favorite sourdough overnight recipes for beginners.
Ingredients & Substitutions
* To find precise measurements, scroll to the bottom of this post to find the recipe card*
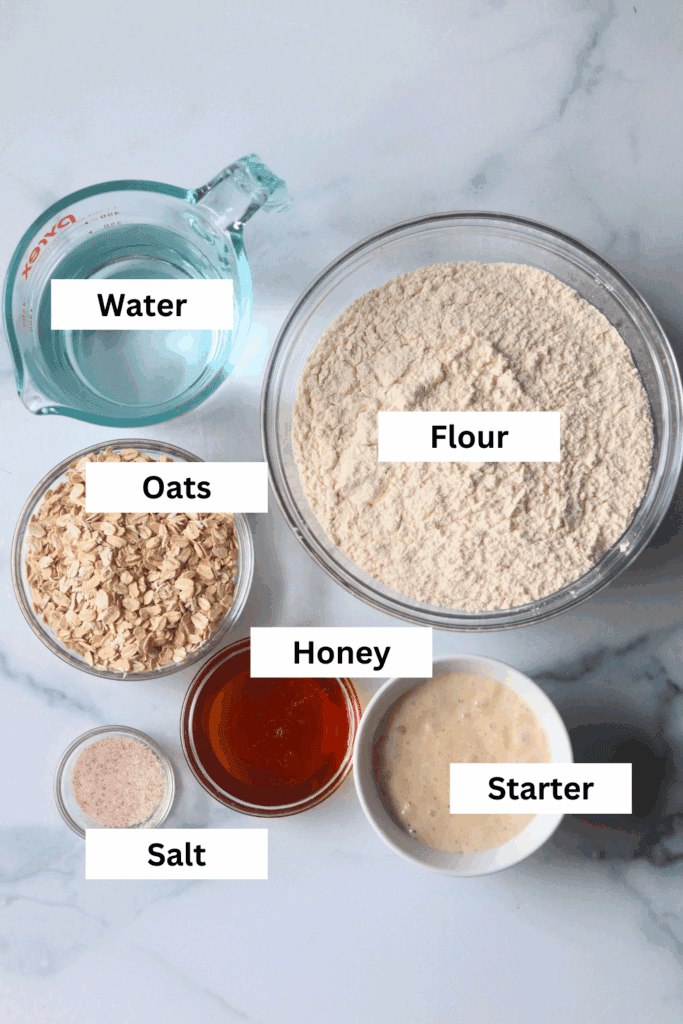
- Bread Flour – Bread flour is best when it comes to making sourdough bread. The higher protein percentage in this flour gives the dough strength so that it can rise to great heights and give you the best results. You can use all purpose flour if you want too. I haven’t tested this recipe with whole-wheat flour, but I’d suggest using 50% whole wheat flour and 50% bread flour for a nuttier flavor without making the loaf too dense.
- Honey – Using honey in this recipe not only slightly sweetens your sourdough bread, but it also makes your crumb extra chewy. Because honey is a sugar, your fermentation may happen faster than usual. It will also give your loaf a more dark brown exterior after baking. You can use any type of honey-store-bought, local, wildflower, clove, or raw. That said, I’ve found that darker honeys like local, wildflower, and raw add more depth of flavor.
- Oats – Rolled oats (not quick oats) are best for this bread because they keep their shape and texture during baking. They add a chewy bite, nutty flavor, and a pretty topping that doesn’t disappear into the dough. I don’t recommend instant oats because they break down much more quickly. They’ll dissolve into the bread, making it denser and less textured, and won’t give the same hearty oat topping.
- Starter: This bread works best with an active sourdough starter, which I recommend for a strong first and second rise and full flavor. If you want great dough rise and a softer loaf, it’s best to use an active starter.
Baker’s Schedule
|
Time |
Process |
|---|---|
|
DAY 1 |
|
|
9:30 AM |
Mix the dough |
|
10:00 – 11:30 AM |
Perform stretch and folds |
|
11:30AM – 6:30 PM |
Bulk fermentation |
|
6:30 PM |
Pre-shape |
|
7:00 PPM |
Shape and Cold proof |
|
DAY 2 |
|
|
9:30 AM |
Bake |
How to Make Sourdough Honey Oat Sourdough Bread
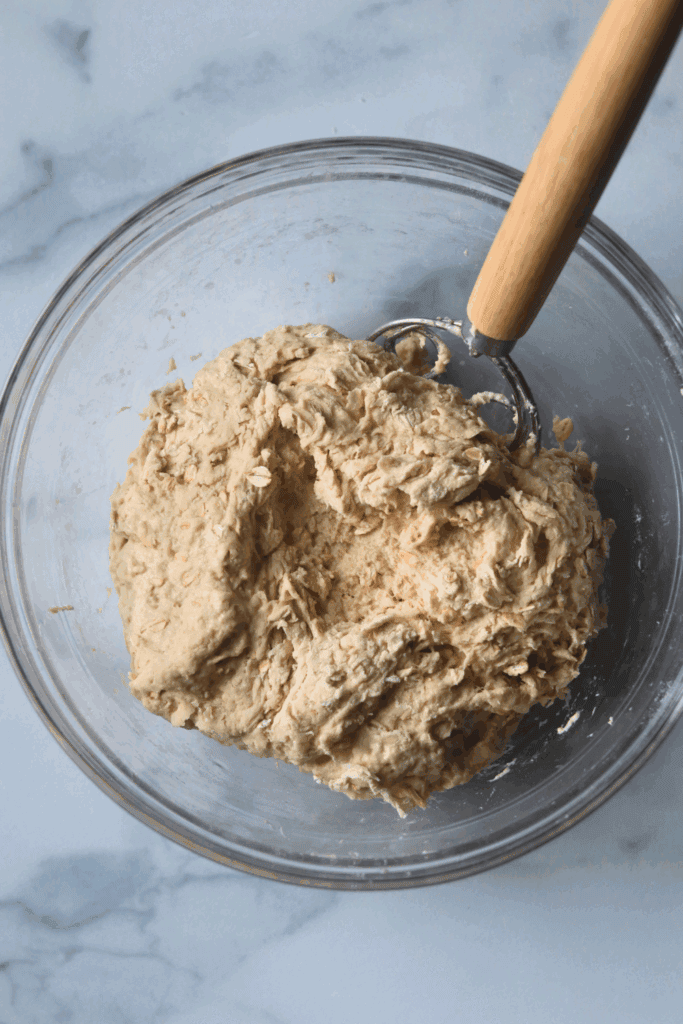
- Mix the dough ingredients in a large bowl, cover, and let rest for at least 30 minutes. I use a Danish dough whisk, but you can mix in the bowl of a stand mixer.
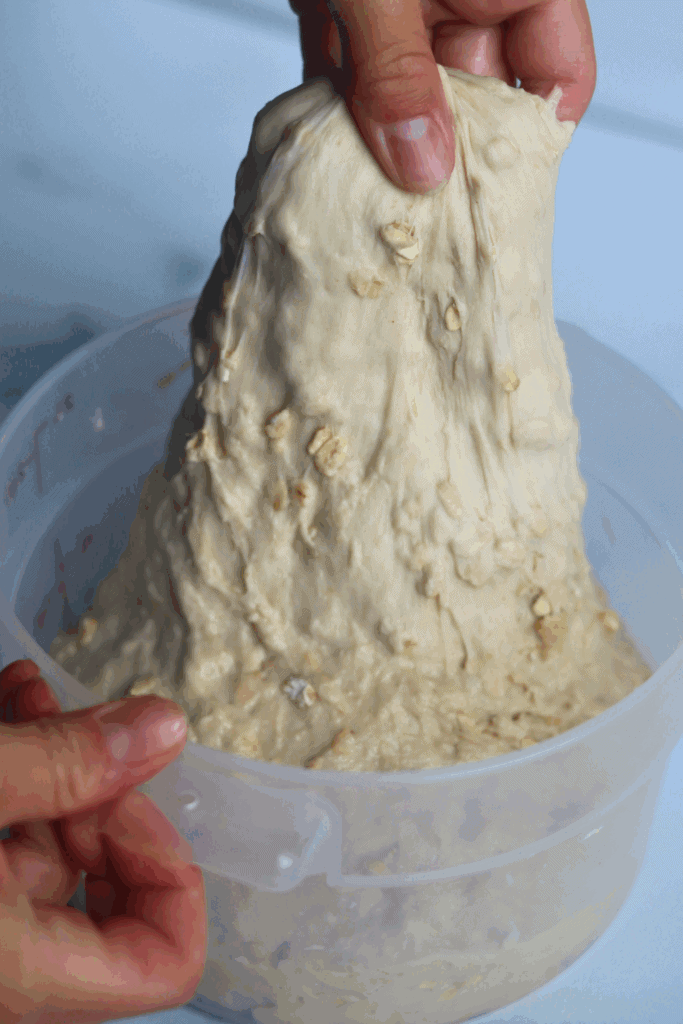
- Do 4 sets of stretch and folds, resting 30 minutes between each round. Keep the dough covered while it rests. To stretch and fold, lift a section of the dough up and fold it over itself, toward the center. Keep going around the bowl until you’ve gone all the way around. (See the recipe card below for more detailed instructions).
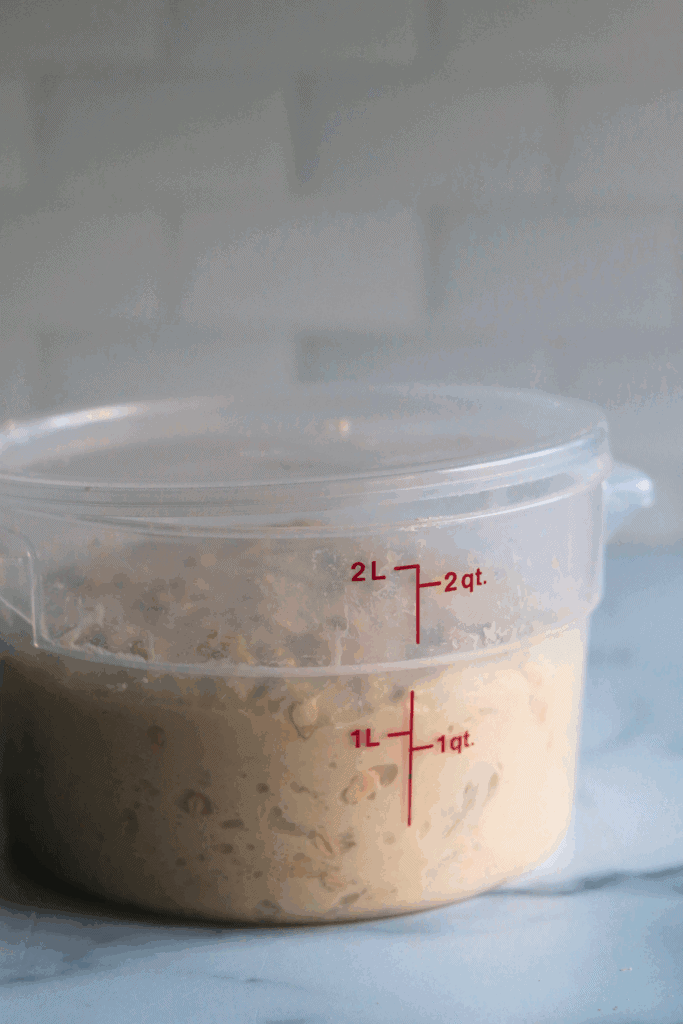
- Let the dough finish the first rise (bulk fermentation).
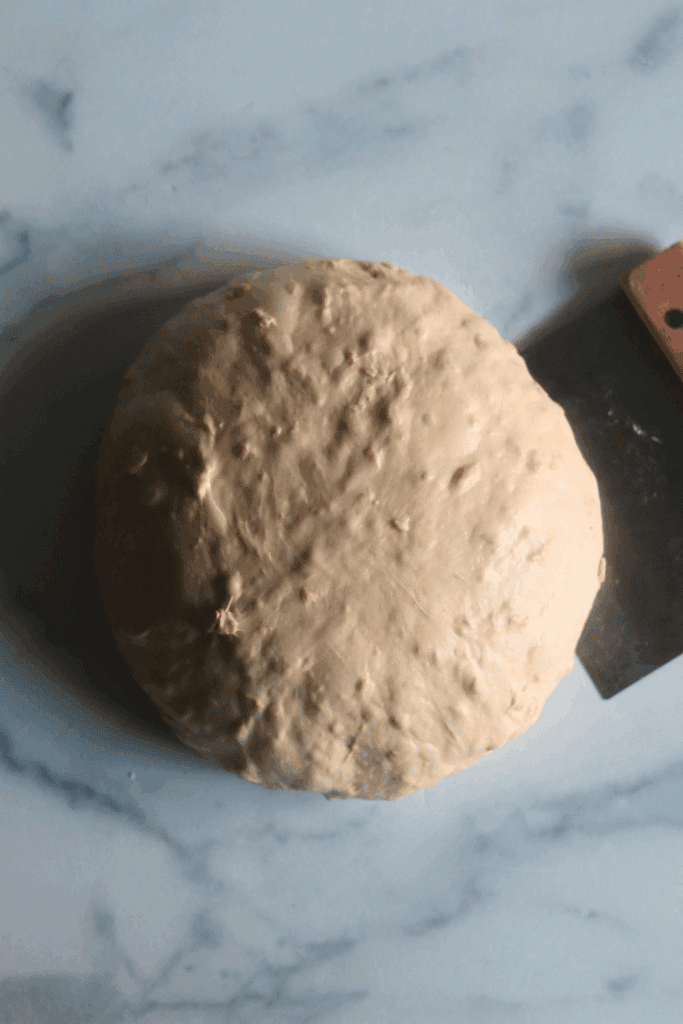
- Once risen, preshape the dough, cover, and let rest for 30 minutes.
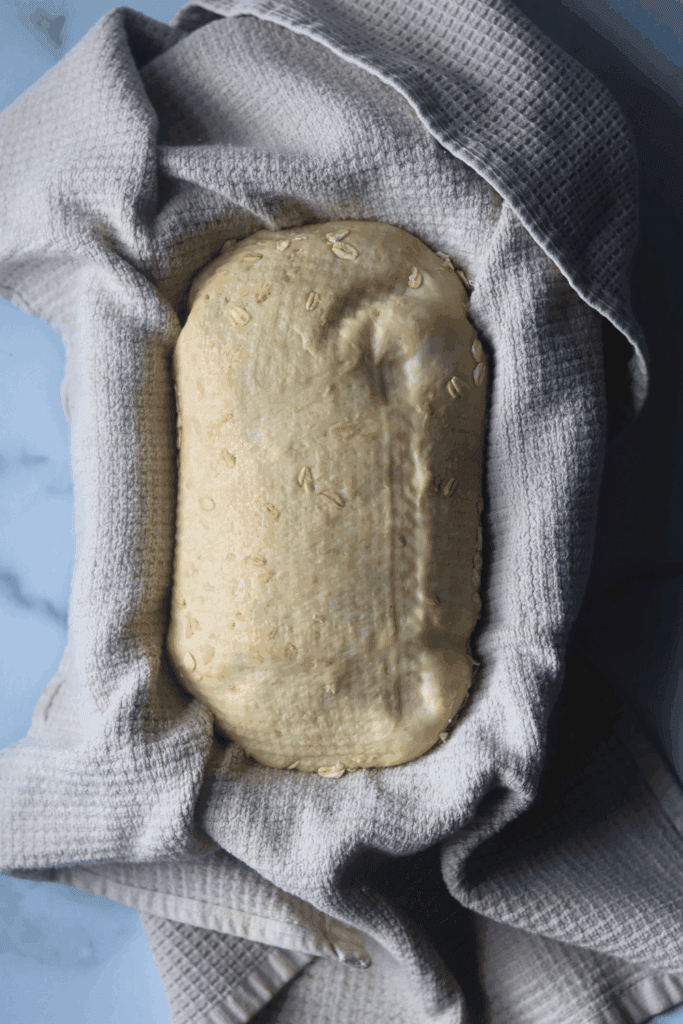
- Shape the dough into a boule or batard. Lightly dampen the top of the dough with water, then roll it in oats. Place the rolled oat side down in a prepared banneton. Cover and coldproof the dough for at least 8 hours. Don’t have a Dutch oven or banneton? No problem! You can also bake this Sourdough Bread in a Loaf Pan!
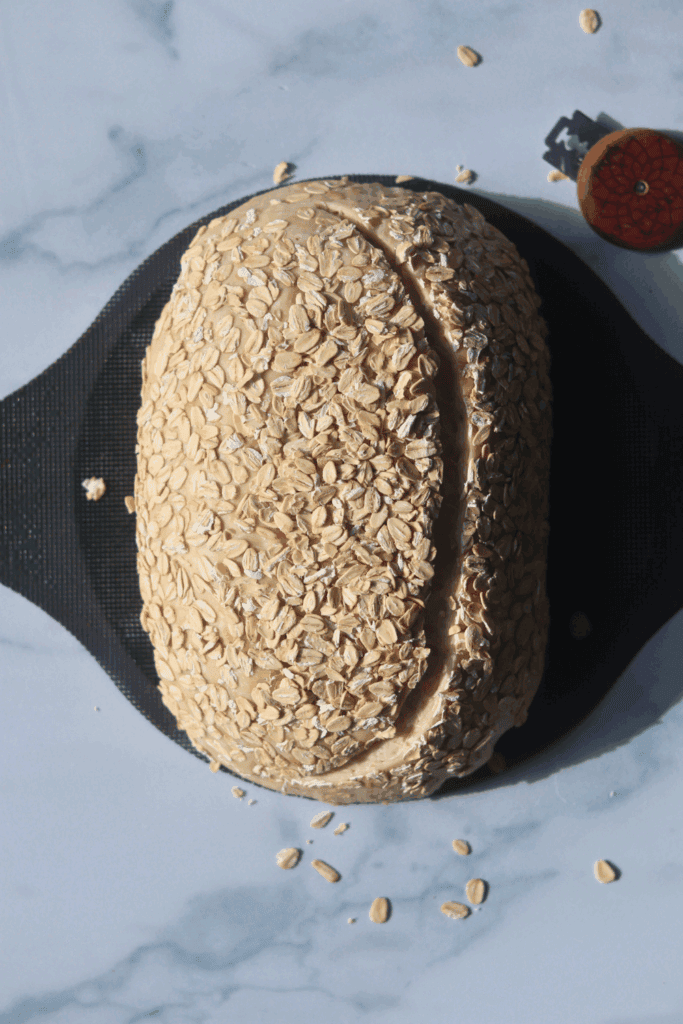
- The following day, place the dough on a piece of parchment paper, score, and bake.
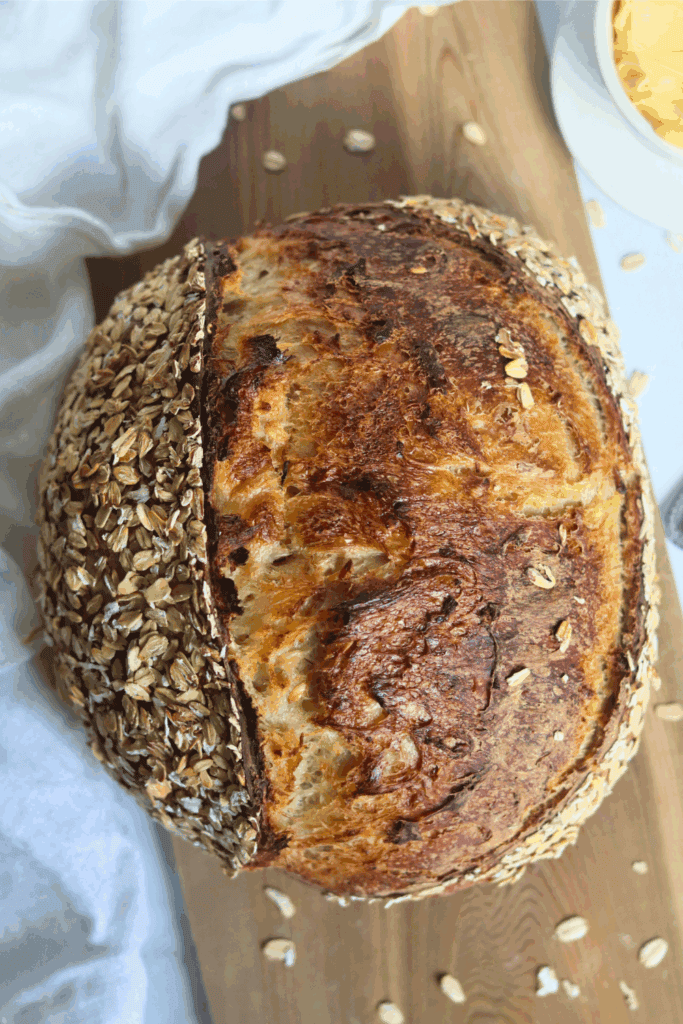
- Allow the loaf to cool to room temperature before slicing. Enjoy!
McKenna’s Helpful Tips
- Always use rolled oats, never quick oats: Rolled oats hold their shape and texture during baking, giving you that hearty oat topping and chewy bite throughout the bread. Quick oats dissolve into the dough and will make your loaf denser and less textured. If you love adding mix-ins to your bread, my Sourdough Inclusions Guide covers everything you need to know about timing and technique.
- Use a bubbly, active starter for the best dough rise: A fed starter that has doubled and is full of bubbles will give you the strongest first rise and second rise, plus the most satisfying tangy flavor. If your starter is sluggish, feed it 4 to 8 hours before mixing and wait until it peaks.
- Dampen the top of the dough before rolling in oats: Lightly wetting the surface of your shaped dough helps the rolled oats stick firmly so they do not fall off during scoring or baking. This gives you that beautiful rustic finish on top of your loaf without any extra effort.
- Darker honeys add more depth of flavor: While any honey works in this recipe, I have found that local, wildflower, or raw honeys produce a richer taste and deeper golden brown color on the crust. Store-bought clover honey is perfectly fine too, but experimenting with darker varieties is worth trying.
- Let the loaf cool completely before slicing: I know it is tempting to cut into a warm loaf, but allowing it to reach room temperature on a wire rack lets the crumb set properly. Cutting too early can result in a gummy interior. If you are new to sourdough baking, my Easy Sourdough Bread for Beginners walks you through all the basics step by step.
How to Store:
Let the beautiful loaf of bread cool completely. Store on the counter in a paper bag or loosely wrapped in a clean kitchen towel to keep the crust crisp and crumb soft, good for 3 days.
Slice and wrap in parchment inside a zip-top bag and store in the fridge for up to a week; toast or warm slices in the oven if they dry out. Freeze slices or the whole loaf tightly wrapped in plastic and foil or a freezer-safe bag for up to 3 months.
Thaw at room temperature while still wrapped and refresh in a 350°F oven for 5–10 minutes.
Honey Oat Sourdough Bread FAQs
Yes. I have made this loaf with only 30 grams of honey and it still comes out really good. It just will not have quite as much sweetness, chewiness, or color. If you use less honey, add a little extra water (about 350 grams total) to keep the hydration balanced. You can also leave the honey out completely if you prefer. If it’s your first time baking bread at home, this artisan bread is the best place to start.
I’ve made this loaf with only 30 grams of honey, and it still comes out really good. It just won’t have quite as much sweetness, chewiness, or color. If you use less honey, I’d add a little extra water, about 350 grams. And if you’d rather leave the honey out completely, that’s fine too.
I have not personally tried this, but fellow bakers have had great success using the double loaf pan method with this recipe. One reader baked 30 minutes covered and 30 minutes uncovered and reported excellent results. If you give it a try, bake covered for the first part, then remove the top loaf pan and finish baking until the bread reaches an internal temperature of 205 degrees F.
If your loaf is only reaching 135 degrees F after 35 minutes covered at 450 degrees F, your oven temperature is likely running low. That is quite a bit below where the loaf should be at that point in the bake. I recommend checking your oven with an oven thermometer to verify the actual temperature. If the burning is happening on the bottom specifically, try moving the rack up one position or placing a baking sheet on the rack below your dutch oven to deflect direct heat from the bottom element.
I have not tested this myself, but I do not see why it would not work. I would recommend using the two-loaf pan method: bake covered for the first part, then remove the top loaf pan and finish baking the bread until it reaches an internal temperature of 205 degrees F. If you prefer a sandwich-style loaf, my Sourdough Sandwich Bread is specifically designed for a bread pan and produces a perfectly soft, sliceable loaf.


If you tried this Honey Oat Sourdough Bread recipe or any other recipe on my blog, please leave a 🌟 star rating and let me know how it went in the📝 comments below. Thanks for visiting!
Honey Oat Sourdough Bread Recipe
Enter your email below, and we’ll send it straight to your inbox! Plus, you’ll get my newest sourdough recipes and best tips every week!
Equipment
Ingredients
- 100 grams sourdough starter 1/2 cup
- 100 grams honey scant 1/3 cup
- 330 grams water 1 1/4 cups + 2 Tablespoons
- 90 grams rolled oats, plus more for rolling 1 cup
- 500 grams bread flour 3 1/2 cups
- 12 grams salt 2 teaspoons
Instructions
Make the Dough
- In a large mixing bowl, add active sourdough starter, honey and room temperature, filtered water. Mix with a dough whisk or your hand until it looks like a golden, milky liquid.100 grams sourdough starter, 100 grams honey, 330 grams water
- To the wet ingredients, add the bread flour, rolled oats, and salt. Be sure to mix until all of the flour is incorporated. The dough will look wet and sticky, not like a uniform dough ball.90 grams rolled oats, plus more for rolling, 500 grams bread flour, 12 grams salt
- Cover the bowl with plastic wrap (I use a reusable shower cap) and let the dough rest for at least 30 minutes before you move on to the next step.
Stretch and Folds
- With slightly wet fingers, scrap a piece of the dough away from the bowl. Grab a section of the dough and stretch the bread dough above your bowl. Then fold over on top of the dough.
- Rotate your bowl clockwise a quarter of the way and repeat identical stretch and fold. Repeat the process until you come full circle, about 4-6 times. You will notice the dough will start to look much smoother than before.
- Cover the dough again and let it rest for another 30 minutes.
- Repeat the same stretch and folds for a total of 4 rounds with at least 30 minutes of rest in between each set. Cover the dough after each round of stretch and folds.
- Once you have completed the final set of stretch and folds, cover the dough and let it rest for the remainder of the bulk fermentation on your counter, about 7-9 more hours if the dough is kept at 70 degrees F.
Bulk fermentation
- Now this is the most finicky part of sourdough. There isn’t a set time for your bulk ferment. It is greatly dependent on the temperature of your environment and ingredients. The warmer it is, the faster your dough will ferment. The opposite is true for cooler temperatures.
- In an environment of 70 degrees, doughs will typically bulk ferment for 7-9 more hours after the stretch and folds, but again, you will have to look for the signs that your dough is done fermenting, rather than the clock. Warmer temperatures will be faster, while cooler temperatures will be slower.
- Here’s what to look for:
- -The dough should have increased in size by at least 75% and be domed on top.-The dough looks light, and jiggles when the bowl is shaken.-The dough should easily pull away from the bowl.-There should be visible bubbles in the dough and on top.-The dough doesn’t tear when you do a windowpane test
Pre-shape
- With slightly wet fingers, gently release the dough from the sides of the bowl. Be careful not to pop all of those lovely bubbles! Tilt the bowl and leave gravity to do the work to move the dough on the counter.
- Shape the dough by doing another round of stretch and folds until you have gone full circle.
- With a bench scraper or your hands, turn the dough upside down, so the seam is now on the counter. Cover the dough with the bowl and let it rest for 30 minutes.
- While you are waiting for the dough to rest, prepare your proofing basket. This can either be a banneton or a small mixing bowl lined with a tea towel. The purpose of this proofing basket is to keep the tight shape that you will create, so make sure you are using a standard bowl that is small enough to help keep the shape. I don't dust the banneton or tea towel with flour since the rolled oat will help to prevent the dough from sticking.
- You will also prepare the oat topping by laying a clean tea towel on your work surface. Pour more rolled oat on the tea towel in a single layer. Set aside.
Final shape
- After 30 minutes of rest, flip the dough, with the seamed side up. Gently pull the bottom of the dough towards you, then fold it towards the center of the dough. Pull the right side of the dough out and fold towards the center. Repeat with the left side. Finally, stretch the top of the dough away from you and fold towards the center of the dough.
- Flip the dough over again, seam side down.
- Gently cup your hands around the dough ball. Turn the ball in a clockwise motion about a quarter turn and then softly pull the dough towards you. Do this repeatedly until you see the dough form a tighter and more round shape. Stop if the dough starts to tear.
- While holding the dough carefully in one hand, lightly dampen the top of the dough with some water. Then gently roll the wet dough onto the tea towel with the rolled oats. The rolled oat should stick to the dough. Re-roll if you missed any spots.
- Carefully lay your dough into your proofing basket (oat side down) and cover it with a plastic bag or a shower cap.
Cold proof
- Place your proofing basket in the fridge to cold-proof for 8–72 hours.Placing your dough in the fridge slows down the fermentation process, which deepens the flavors of your loaf. It also gives you flexibility in when you want to bake your bread.But don’t wait too long! If left in the fridge for too long, your dough will over-ferment, causing the dough to not be able to rise while baking.
Score
- 30 minutes before baking, place the dough in the freezer. This helps the dough to be firmer for easier scoring.
- At the same time, place your Dutch oven in your oven and preheat to 500 degrees F. Allow the Dutch oven to preheat for at least 30 minutes.
- Place a piece of parchment paper on your workspace and gently flip the banneton upside down over the parchment paper. Since you coated the dough with rolled oats, your dough should slowly release and fall onto the parchment paper, landing in the middle with the oat side facing up.
- With a lame / razor blade or sharp knife, score a crescent moon shape on top of the dough. This is necessary for your bread to be able to expand while baking.
- Grab the corners of the parchment paper and carefully place the Honey Oat dough into your preheated Dutch oven and cover with the lid.
Bake
- Lower the oven to 450 degrees F and bake the bread covered for 30 minutes. Then remove the lid of the Dutch oven and continue to bake the bread for an additional 10-15 minutes with the lid off at 425 degrees F. If your crust is browning too quickly, cover the top with aluminum foil while you continue to bake.
- Once golden brown with the internal temperature at least 205 degrees F, remove the Dutch oven from your oven.
- Using the corners of the parchment paper, lift the sourdough bread out of the Dutch oven and place it onto a wire rack to cool.
- Allow your homemade bread to cool for at least 1 hour before cutting into it. (I know! How can you possibly wait when it looks and smells so good? But trust me, if you cut in too soon, your masterpiece will turn gummy.)
- Once the hour is up, slice into your work of art and slather on some butter with a drizzle of honey, and enjoy!
Notes
Ingredients & Substitutions
- Bread Flour – Bread flour is best when it comes to making sourdough bread. The higher protein percentage in this flour gives the dough strength so that it can rise to great heights and give you the best results. You can use all purpose flour if you want too. I haven’t tested this recipe with whole-wheat flour, but I’d suggest using 50% whole wheat flour and 50% bread flour for a nuttier flavor without making the loaf too dense.
- Honey – Using honey in this recipe not only slightly sweetens your sourdough bread, but it also makes your crumb extra chewy. Because honey is a sugar, your fermentation may happen faster than usual. It will also give your loaf a more dark brown exterior after baking. You can use any type of honey-store-bought, local, wildflower, clove, or raw. That said, I’ve found that darker honeys like local, wildflower, and raw add more depth of flavor.
- Oats – Rolled oats (not quick oats) are best for this bread because they keep their shape and texture during baking. They add a chewy bite, nutty flavor, and a pretty topping that doesn’t disappear into the dough. I don’t recommend instant oats because they break down much more quickly. They’ll dissolve into the bread, making it denser and less textured, and won’t give the same hearty oat topping.
- Starter: This bread works best with an active sourdough starter, which I recommend for a strong first and second rise and full flavor. If you want great dough rise and a softer loaf, it’s best to use an active starter.

Wanted to wait to comment until I ate it. And it is delicious. A few things:
1) the dough was very sticky through all of day one—stretch and folds, preshape, and final shaping were a challenge as a result.
2) starter was very active and the dough rose but i never got bubbles on the surface
3) cooked as directed in the time instructed and glad I pulled it when I did—bottom started getting dark (borderline burned)
These things made for a stressful but tasty loaf!
I’m so glad the loaf tasted delicious, even if the process felt a little stressful! This dough can be on the stickier side because of the honey and oats, and flour can vary quite a bit in how much water it absorbs. If it feels overly sticky next time, I’d hold back a small amount of the water at first and add it only if the dough needs it. For the darker bottom, I’d try moving the loaf one rack higher or placing a baking sheet on the rack below to help shield it from direct heat. Thank you so much for sharing all of these details!
This bread is so delicious! I ran out of honey so I used 20g maple syrup to get me to 100g. I love the hint of sweetness and the crunch from the oats. Already looking forward to making again. Thanks!
I’m so glad you loved it! Using a little maple syrup to make up the difference sounds like such a good swap, and I’m happy you still got that perfect touch of sweetness. The crunchy oats are one of my favorite parts too! Thank you so much for trying the recipe and sharing what you did.
Thanks so much for the recipe that even a newbie can succeed. Made half batch as trial and same day bake (using double pan method). It came out beautifully! It’s nutty, chewy and not very sour, enough to get a sourdough hater to try it! Yeah, the top did burn a little after taking out the cover, next time gonna try cover using foil as stated. I’m in a tropical climate, temp can be 29°C to 31°C daily. Feed starter about 7pm the night before. Start 8am mix & did couple of folds, 3pm shape, 5.30pm bake.
This is such a helpful review, thank you for sharing all of the details! I’m so glad your half batch and same-day bake turned out beautifully. Your timing notes will be so useful for other bakers in tropical kitchens, too. Thank you again for trying the recipe and sharing your experience!
So glad I found your site. After having great success with your bagels I wanted to give this a try. Instructions were easy to follow and the results were delicious with a perfect texture. Currently plan on making three loaves to gift to friends. Please create a recipe for Honey Oat Bagels. I am sure they would be phenomenal too!
This made my day, thank you so much! Gifting three loaves to friends sounds so sweet! And honey oat bagels are such a good idea, I’m definitely adding that one to my recipe idea list.
Hi! I’ve been making sourdough for 2-3 years and decided to make this recipe. I was wondering why only 330g of water with 500 flour + 90 oats (which really absorb water). I ended up mixing in 15g more, but the dough is unreasonably stiff. I have to lift all the dough out of the bowl to pull it some to do a stretch and fold, of sorts. I read the other reviews and didn’t see that anyone else had stiff doughs. I realize the 100g of honey does add some moisture…but wanted to get your thoughts. If I make it again, I will need to use at least 350g of water….but I’ll let you know how mine turns out. Thanks!
Thank you so much for the thoughtful feedback! You’re absolutely right that the oats absorb quite a bit of moisture, so this dough is naturally a little stiffer at first. Flour brands, the type of oats used, and even your kitchen environment can make a noticeable difference in how much water the dough needs. If your dough feels unusually stiff, adding a little more water is completely fine. I’d add it gradually, a few grams at a time, until the dough feels easier to stretch without becoming overly loose. I’d love to hear how your loaf turns out, and I really appreciate you sharing your experience!
⭐⭐⭐⭐⭐ My favorite sourdough recipe!
I’ve tried so many recipes on my journey to making fantastic sourdough, and McKenna’s oatmeal honey sourdough boule is hands-down my favorite. It’s the recipe I keep coming back to—the one I love baking and sharing with the people I care about.
My family loves it, and it’s an especially big hit with my friends! There’s something so rewarding about making a loaf that everyone enjoys, and this recipe has become a staple in my kitchen.
Thank you, McKenna, for sharing such a wonderful recipe through Simplicity and a Starter. If you’re looking for your next favorite sourdough loaf, give this one a try—and keep following her for more baking inspiration!
This is such a thoughtful review. Thank you so much! I’m incredibly happy this loaf has become a favorite in your kitchen and one you enjoy sharing with family and friends. Knowing it’s a recipe you keep coming back to means so much to me. Thank you for baking along with me and for taking the time to share such kind words!
I’m a bit of a sourdough newbie, but I’m pretty happy with the results from my usual recipe and I’m keen to branch out. I normally store my starter in the fridge, so curious on the timing/ratios you’d use in that case to get a nice active starter in the morning to start making this…
Great question! If your starter is stored in the fridge, I’d take it out the night before and give it a feeding so it has time to become nice and active by morning. A 1:2:2 or 1:4:4 feeding ratio usually works well for an overnight rise (ex 25 grams starter, 50 grams water, and 50 grams flour for 1:2:2 ratio). If your kitchen is especially warm, you may want to use a slightly larger feeding ratio or cooler water so it doesn’t peak too early. By morning, I’d look for it to be doubled or more, bubbly, and at or near its peak before using it in the dough. Thanks so much for asking!
I am still a fairly newbie to sourdough. I made this yesterday and I thought it was probably the best loaf I’ve made to date. I’m want to make another loaf but I’m low on honey but I have Molasses do you think I could substitute? And what ratio if I was to use the Molasses instead of the honey.
Thank you
I’m so glad this was your best loaf yet! You could substitute molasses for the honey, but it will give the bread a much deeper, stronger flavor. I haven’t tested this exact swap, so I’d probably start by replacing only about half of the honey with molasses and use another mild sweetener for the rest if you have one. If you want to use all molasses, you can try a 1:1 substitution by weight, just expect a darker loaf with a more pronounced molasses flavor. If you give it a try, I’d love to hear how it turns out!
My go to weekly recipe. Its soo good
I’m so honored that this has become your go-to weekly loaf! Thank you so much for taking the time to leave a review!
I have made this bread several times, and it is so so good! It has become a favorite for my friends’ daughter.
I love hearing that! I’m so glad this bread has become one you make again and again, and even sweeter that it’s a favorite with your friend’s daughter. Thank you so much for taking the time to leave a review!
Can I bake this without doing a cold proof?
Absolutely! Allow it to complete its second rise at room temperature, then bake!
This makes an amazing loaf of bread and is my family’s favorite! It never lasts long and the recipe is very forgiving and almost foolproof.
I’m so glad this has become a family favorite! We seriously can’t get enough of it either! Thanks for taking the time to leave such a kind review.
I made this bread yesterday (and baked today) and it was so good! Thank you so much for the recipe, I will definitely make this more often now 🙂
I’m so happy you enjoyed the bread and that it’s one you’ll be making again! Thank you for taking the time to leave such a kind review!
This is my first time making this recipe, but not sourdough. My dough is currently bulk fermenting. I could feel it becoming more solid as I did S&F, but it’s still stickier than I’m used to. Is that normal? I followed the recipe exactly. My house is warm right now, so maybe it’s that?
Hi! Yes, some stickiness is completely normal with this dough, especially if it’s warmer or more humid in your kitchen. The fact that you could feel the dough gaining strength with each stretch and fold is a great sign! As it continues through bulk fermentation, it should become stronger and easier to handle. Just keep in mind that a warm kitchen will also speed up fermentation, so watch the dough rather than relying strictly on the suggested timing. Happy baking!