Honey Walnut Sourdough Bread Recipe (Sweet, Nutty & Spiced)
This post may contain affiliate links. Please read our disclosure policy.
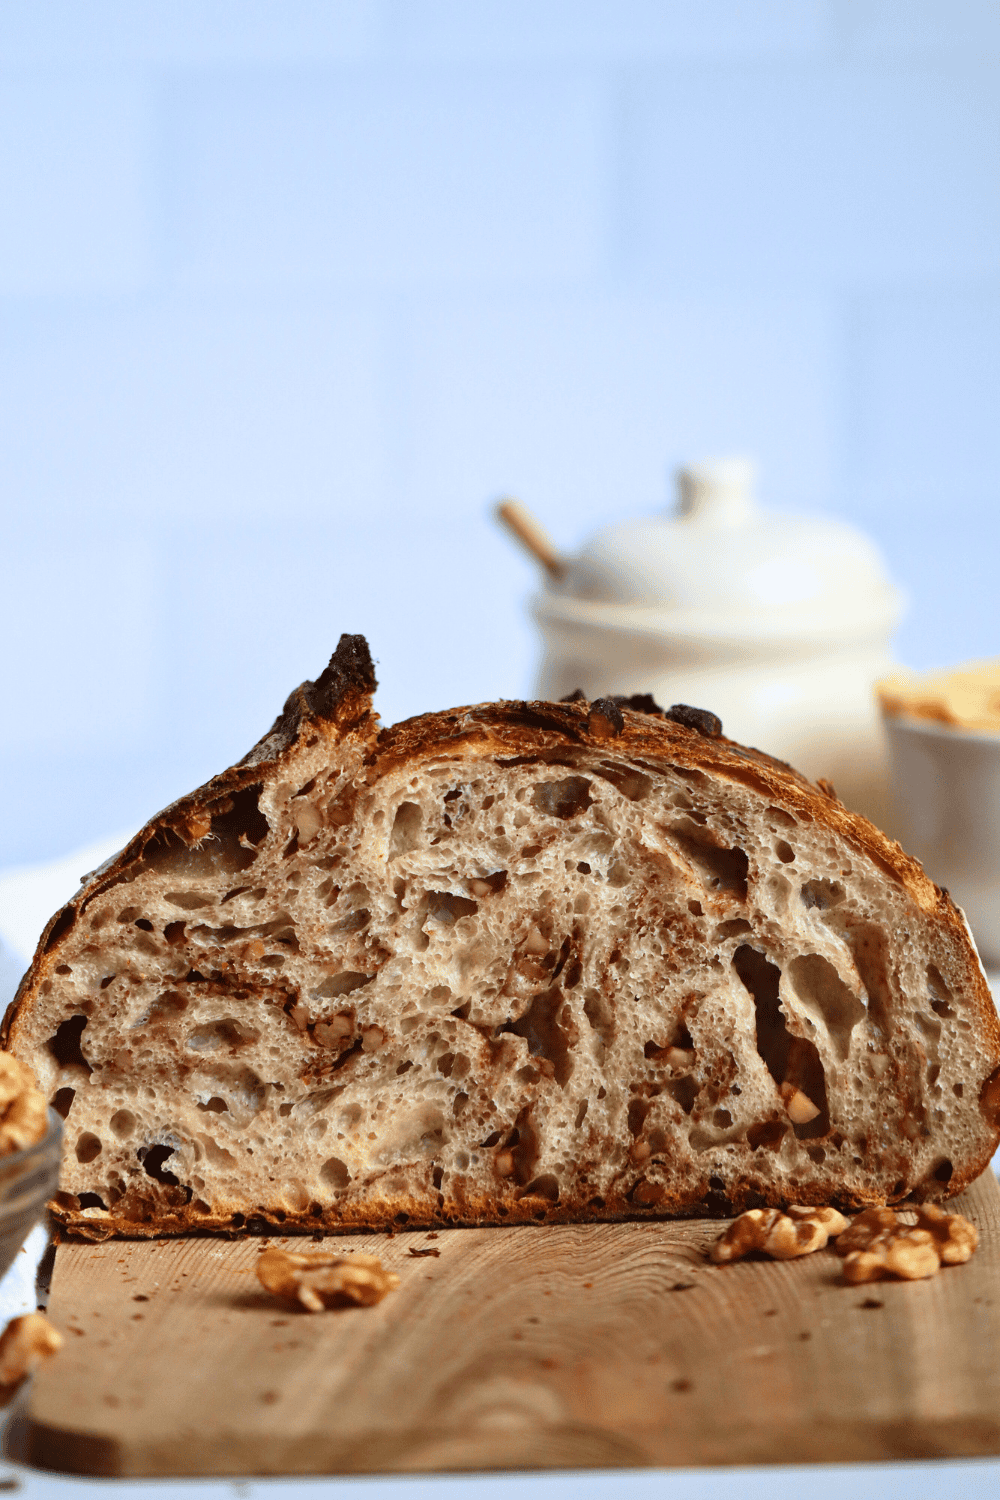
Nutty, fragrant, and just a touch sweet, this Honey Walnut Sourdough Bread is the ultimate cozy fall loaf. Just like in my Honey Oat Sourdough Bread, honey lends a gentle sweetness and keeps the crumb wonderfully chewy, while toasted walnuts add richness without any bitterness. A hint of cinnamon ties all the flavors together, making each slice warm and inviting. Perfect for toasting with butter or pairing with cheese, this bread feels special yet is just as simple to make as your favorite sourdough loaf.
MY LATEST VIDEO
Why You’ll Love This Recipe:
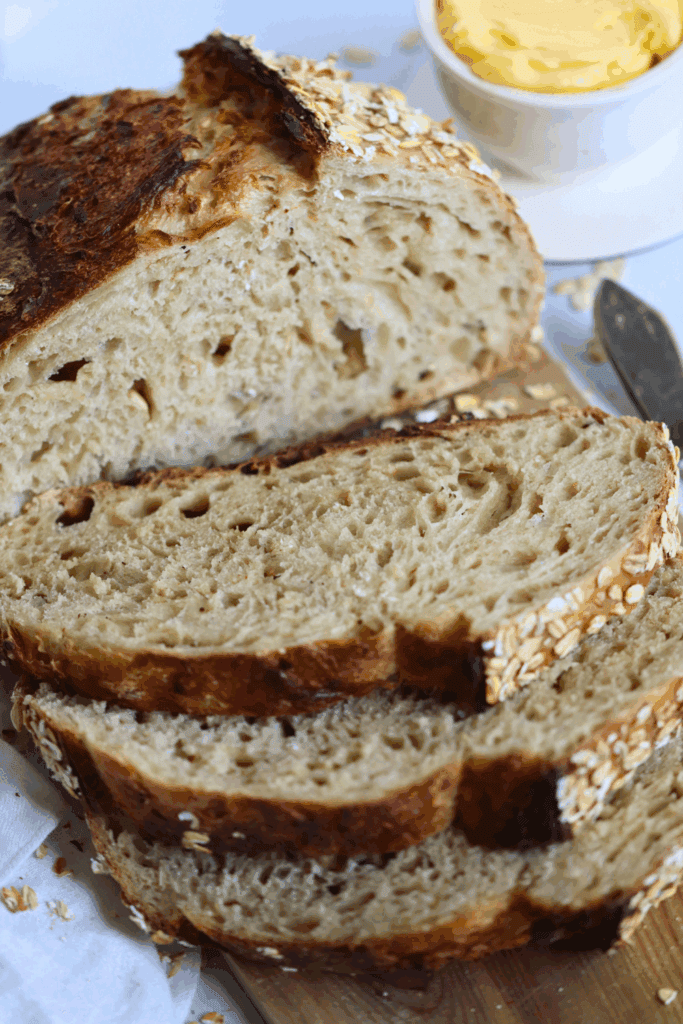
The crumb has bakery-level chewiness:
Honey isn’t just for flavor, it pulls in and holds onto water, which is why the inside stays soft and moist for longer than a plain sourdough loaf. You’ll notice the difference as soon as you slice into it. It’s also brings a touch of sweetness and bakes into a deep golden brown.
A baking schedule that works with yours:
Some sourdough recipes lock you into a strict timeline, but not this one. After the bulk ferment, the dough can cold-proof in the fridge anywhere from 8 to 72 hours. The best thing is that the dough actually benefits from the longer rest. The flavor deepens, the crust turns a richer brown, and the crumb stays moist.
Multi-layered flavor:
This isn’t just a nut bread, nor is it just a honey bread. It’s a bread where every ingredient has a role. The honey sweetens gently and keeps the crumb moist. The walnuts bring crunch and earthiness. The cinnamon slows fermentation and adds warmth without overpowering the loaf. And then the sourdough tang ties everything together. The balance reminds me of my Chai Sourdough bread, complex without being fussy and so deliciously cozy.
Ingredients & Substitutions
* To find precise measurements, scroll to the bottom of this post to find the recipe card*
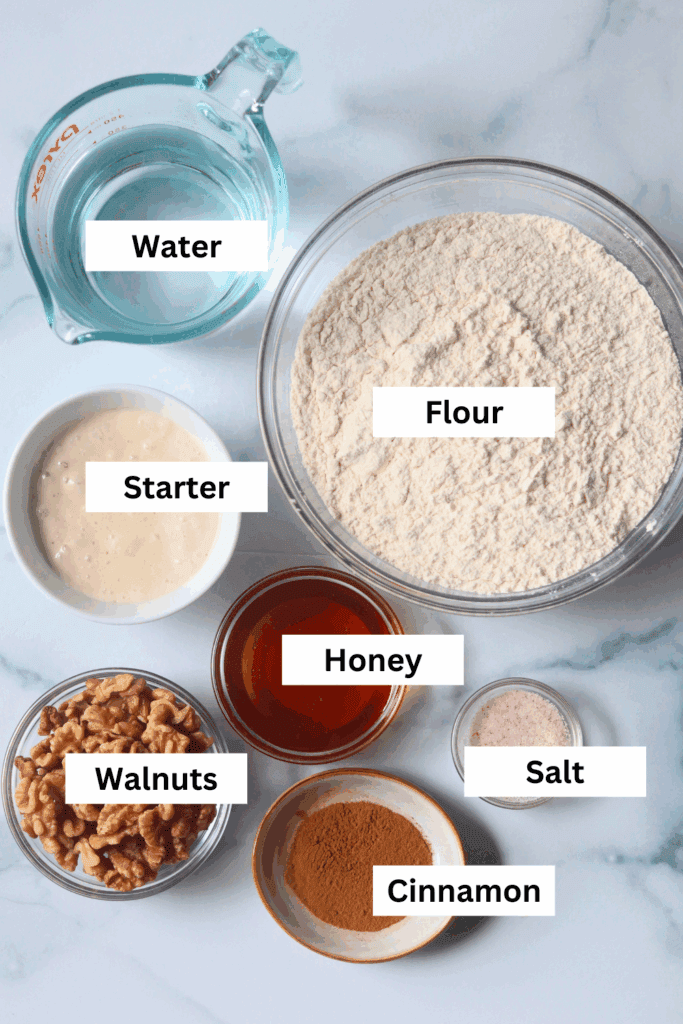
- Bread Flour – Bread flour is best when it comes to making sourdough bread. The higher protein percentage in flour gives the dough its strength so that it can rise to great heights and give you the best results. Some home bakers use white flour/all-purpose, whole wheat flour, spelt flour, or even rye sourdough, but bread flour gives me the best results.
- Honey – Using honey in this recipe not only slightly sweetens your sourdough bread, but it also makes your crumb extra chewy! Since honey is a sugar, be aware that your fermentation process can be faster than what you are typically used to. This loaf will also lead to a more dark brown exterior after baking. You can use any type of honey (that is, store-bought, local, wildflower, clove, raw), however, the darker honeys (local, wildflower, raw) will give a greater depth in flavor.
- Walnuts – To reduce the naturally bitter flavor of walnuts, I like to toast them, but this step is optional. You can also swap the crunchy walnuts for chopped pecans, almonds, pistachios, or any other nut or nut mix you have on hand. I’m even thinking of adding walnuts to this cranberry bread to see how much of an upgrade cranberry walnut bread really is.
- Cinnamon – I love the way cinnamon compliments the honey and walnuts in this sourdough bread recipe, however, keep in mind, cinnamon naturally slows yeast activity. So, be prepared for a slightly longer bulk fermentation.
Baking Time For
|
DAY 1 |
|
|---|---|
|
Time |
Process |
|
9:30 AM |
Mix the dough |
|
10:00 – 11:30 AM |
Perform stretch and folds, Add mix-ins |
|
11:30 – 6:30 AM |
Bulk fermentation |
|
6:30 PM |
Preshape |
|
7:00 PM |
Shape & Cold proof |
|
DAY 2 |
|
|
9:30 AM |
Bake |
How to Make Sourdough Honey Walnut Sourdough Bread

- Mix dough ingredients in a large bowl. Cover and let it rest for at least 30 minutes.

- Perform 4 sets of stretch and folds with 30 minutes of rest in between each round.
- Cover the dough during each resting period. Add the toasted walnuts and cinnamon during the 2nd round of stretch and folds.
- Let the dough rise completely in a warm place for bulk fermentation.

- Once risen, preshape the dough, cover and let rest for 30 minutes.

- Shape the dough into a boule or batard and place it into a prepared banneton basket. Cover and cold proof the dough for at least 8 hours.
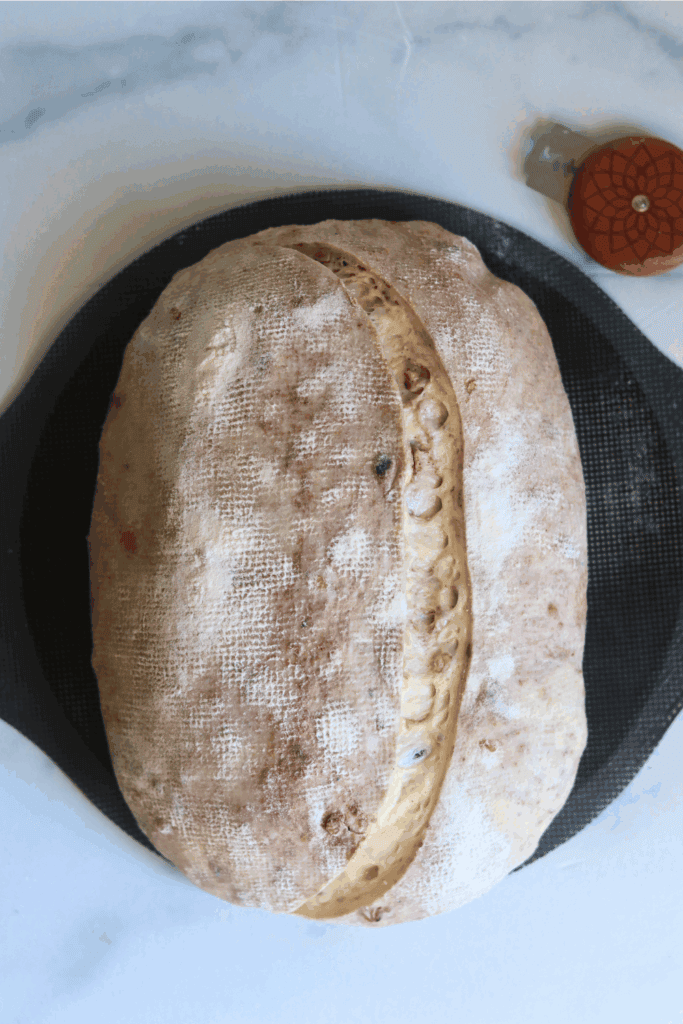
- The following day, place the dough on a piece of parchment paper, score and bake.
- Allow the loaf to cool to room temperature before slicing. Enjoy!
How to Store:
After this honey walnut sourdough bread has cooled, it’ll stay fresh on the counter for 2–3 days if you wrap it in a clean towel or a linen bread bag and keep it cut-side down. Don’t bother with plastic, as it just makes the crust soft and moldy.
Because of the honey, the loaf holds onto moisture a little longer, but it’s really best eaten within 48 hours.
If you’ve got extra, slice it, wrap it tight, and stash it in the freezer for up to 3 months. When you’re ready to eat some bread, pop slices straight in the toaster oven or warm the whole loaf at 350°F for 10–15 minutes. A quick spritz of water before heating brings the crust back to life.
FAQs
This recipe is not overly sweet, so it won’t take like a dessert bread. This recipe uses 100 grams of honey, which is just enough to balance the sourdough tang and keep the crumb moist.
Yes. Pecans give a soft, buttery bite that pairs beautifully with honey, while almonds are firmer and give the loaf crunchier bursts. Pistachios add sweetness and a little green fleck that looks gorgeous in sourdough slices. You could also try hazelnuts or cashews if that’s what you have on hand, though I haven’t tested those so results may vary. Whatever nut you choose, consider toasting it first to bring out the best flavor.
Yes. The recipe works with as little as 30 grams of honey, but you’ll want to increase the water to 350 grams to keep the hydration balanced. If you cut it back, the bread will be less chewy and the crust won’t caramelize as deeply, but it will still be tasty. You can omit honey entirely too, but the loaf will bake more like a standard rustic sourdough.
You can, but the results will be different. Bread flour has more protein (usually 12–13%) compared to all-purpose (10–11%). That higher protein content gives the dough strength, better rise, and a more open crumb. If you use all-purpose flour, expect a denser loaf with a smaller rise and less stretch in the crumb. It’s still good, but it won’t have the same lofty structure. You can also use a mix of AP flour and bread flour, or a blend that includes whole wheat bread flour. When it comes to home sourdough baking, it’s best to keep testing recipes until you find the flour combo and hydration that gives you the best results.


Honey Walnut Sourdough Bread Recipe
Enter your email below, and we’ll send it straight to your inbox! Plus, you’ll get my newest sourdough recipes and best tips every week!
Equipment
Ingredients
- 100 grams sourdough starter 1/2 cup
- 100 grams honey scant 1/3 cup
- 330 grams water 1 1/4 cups + 2 Tablespoons
- 500 grams bread flour 3 1/2 cups
- 12 grams salt 2 teaspoons
- 90 grams walnuts 3/4 cup
- 4 grams cinnamon 2 teaspoons
Instructions
Make the Dough
- In a large mixing bowl, add active sourdough starter, honey and room temperature, filtered water. Mix with a dough whisk or your hand until it looks like a golden, milky liquid.100 grams sourdough starter, 100 grams honey, 330 grams water
- To the wet ingredients, add the bread flour and salt. Be sure to mix until all of the flour is incorporated. The dough will look wet and sticky, not like a uniform dough ball.500 grams bread flour, 12 grams salt
- Cover the bowl with plastic wrap (I use a reusable shower cap) and let the dough rest for at least 30 minutes before you move on to the next step.
Stretch and Folds
- With slightly wet fingers, scrap a piece of the dough away from the bowl. Grab a section of the dough and stretch the bread dough above your bowl. Then fold over on top of the dough.
- Rotate your bowl clockwise a quarter of the way and repeat identical stretch and fold. Repeat the process until you come full circle, about 4-6 times. You will notice the dough will start to look much smoother than before.
- Cover the dough again and let it rest for another 30 minutes.
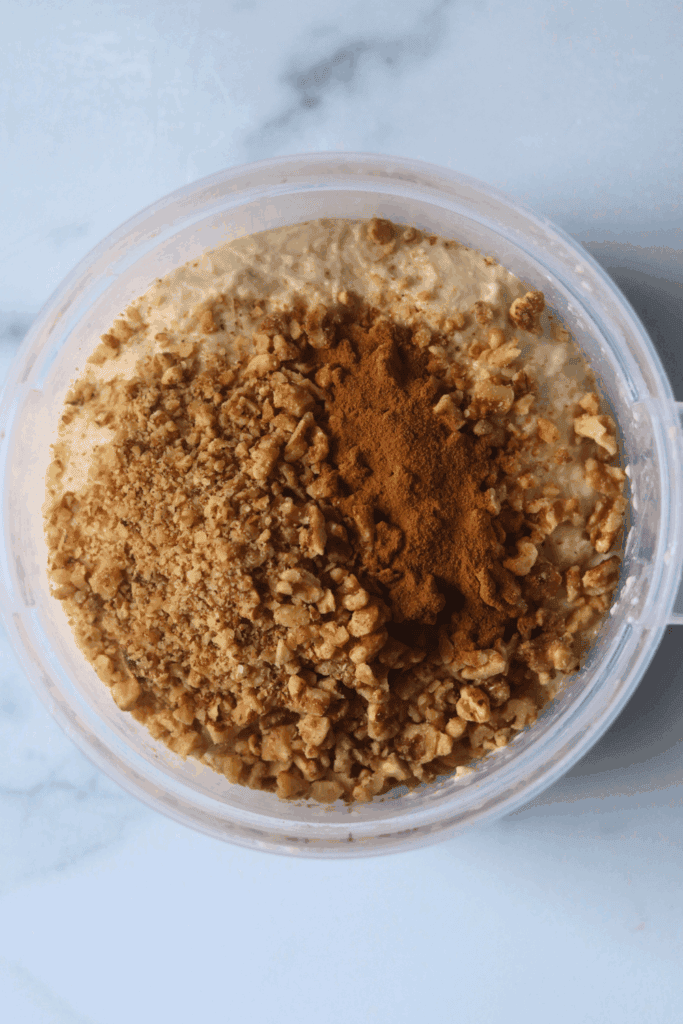
- Before the next set of S&F, prepare the mix-ins. Bring a small skillet to medium-low heat, then toast the walnut for about 5 minutes or until fragrant, stirring often. Be sure to keep and eye on the walnuts! They burn easily. Remove the walnuts from the heat and allow them to come to room temperature. Give them a rough chop. Set aside.90 grams walnuts
- Pour the chopped walnuts and ground cinnamon on top of the dough, then perform the 2nd round of S&F. Cover the dough and let it rest for 30 more minutes. You can add the mix-ins during any of the rounds of S&F, however, I prefer to add them during the 2nd round so that the mix-ins can continue to be incorporated during the following sets of S&F.4 grams cinnamon
- Repeat the same stretch and folds for a total of 4 rounds with at least 30 minutes of rest in between each set. Cover the dough after each round of stretch and folds.
- Once you have completed the final set of stretch and folds, cover the dough and let it rest for the remainder of the bulk fermentation on your counter, about 7-9 more hours if the dough is kept at 70 degrees F.
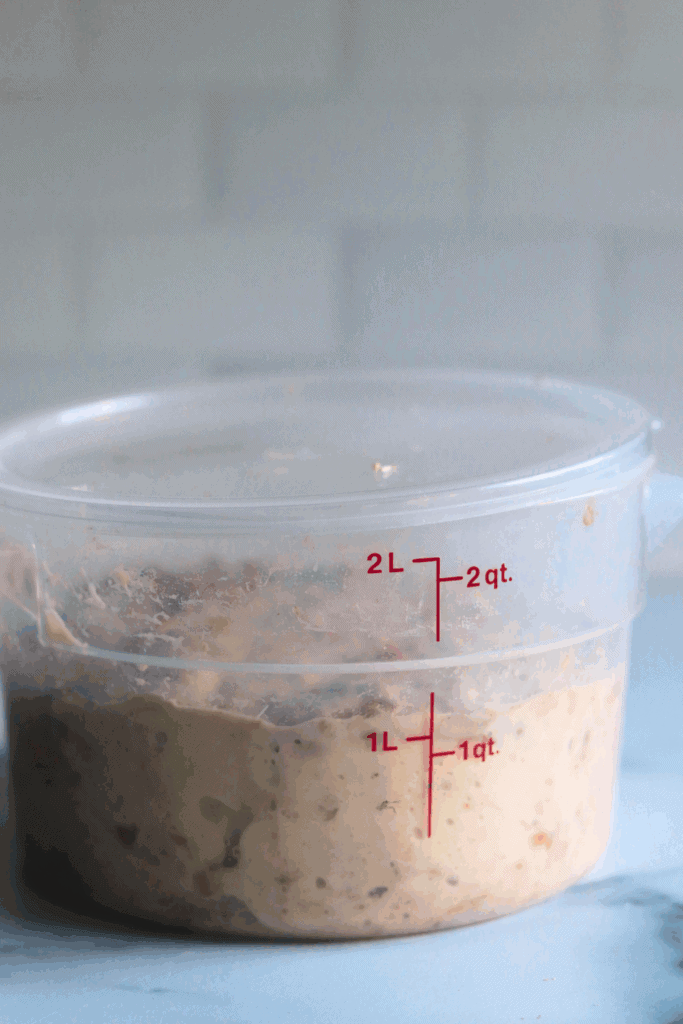
Bulk fermentation
- Now this is the most finicky part of sourdough. There isn’t a set time for your bulk ferment. It is greatly dependent on the temperature of your environment and ingredients. The warmer it is, the faster your dough will ferment. The opposite is true for cooler temperatures.
- In an environment of 70 degrees, doughs will typically bulk ferment for 7-9 more hours after the stretch and folds, but again, you will have to look for the signs that your dough is done fermenting, rather than the clock. Warmer temperatures will be faster, while cooler temperatures will be slower.
- Here’s what to look for:
- -The dough should have increased in size by at least 75% and be domed on top.-The dough looks light, and jiggles when the bowl is shaken.-The dough should easily pull away from the bowl.-There should be visible bubbles in the dough and on top.-The dough doesn’t tear when you do a windowpane test
Pre-shape
- With slightly wet fingers, gently release the dough from the sides of the bowl. Be careful not to pop all of those lovely bubbles! Tilt the bowl and leave gravity to do the work to move the dough on the counter.
- Shape the dough by doing another round of stretch and folds until you have gone full circle.
- With a bench scraper or your hands, turn the dough upside down, so the seam is now on the counter. Cover the dough with the bowl and let it rest for 30 minutes.
- While you are waiting for the dough to rest, prepare your proofing basket. This can either be a banneton or a small mixing bowl lined with a tea towel. The purpose of this proofing basket is to keep the tight shape that you will create, so make sure you are using a standard bowl that is small enough to help keep the shape.
- Dust the banneton or the tea towel with flour (most will say to use rice flour, but I have used just regular all-purpose flour) to prevent sticking.
Final shape
- After 30 minutes of rest, flip the dough, with the seamed side up. Gently pull the bottom of the dough towards you, then fold it towards the center of the dough. Pull the right side of the dough out and fold towards the center. Repeat with the left side. Finally, stretch the top of the dough away from you and fold towards the center of the dough.
- Flip the dough over again, seam side down.
- Gently cup your hands around the dough ball. Turn the ball in a clockwise motion about a quarter turn and then softly pull the dough towards you. Do this repeatedly until you see the dough form a tighter and more round shape. Stop if the dough starts to tear.
- Carefully lay your dough into your floured proofing basket (seam side up) and cover it with a plastic bag or a shower cap.
Cold proof
- Place your proofing basket in the fridge to cold-proof for 8–72 hours.Placing your dough in the fridge slows down the fermentation process, which deepens the flavors of your loaf. It also gives you flexibility in when you want to bake your bread.But don’t wait too long! If left in the fridge for too long, your dough will over-ferment, causing the dough to not be able to rise while baking.
Score
- 30 minutes before baking, place the dough in the freezer. This helps with the scoring design.
- At the same time, place your Dutch oven in your oven and preheat to 500 degrees F. Allow the Dutch oven to preheat for at least 30 minutes.
- Place a piece of parchment paper on your workspace and gently flip the banneton upside down over the parchment paper. Since you dusted the banneton, your dough should slowly release and fall onto the parchment paper, landing in the middle with the oat side facing up.
- With a lame / razor blade or sharp knife, score a crescent moon shape on top of the dough. This is necessary for your bread to be able to expand while baking.
- Grab the corners of the parchment paper and carefully place the Honey Walnut dough into your preheated Dutch oven and cover with the lid.
Bake
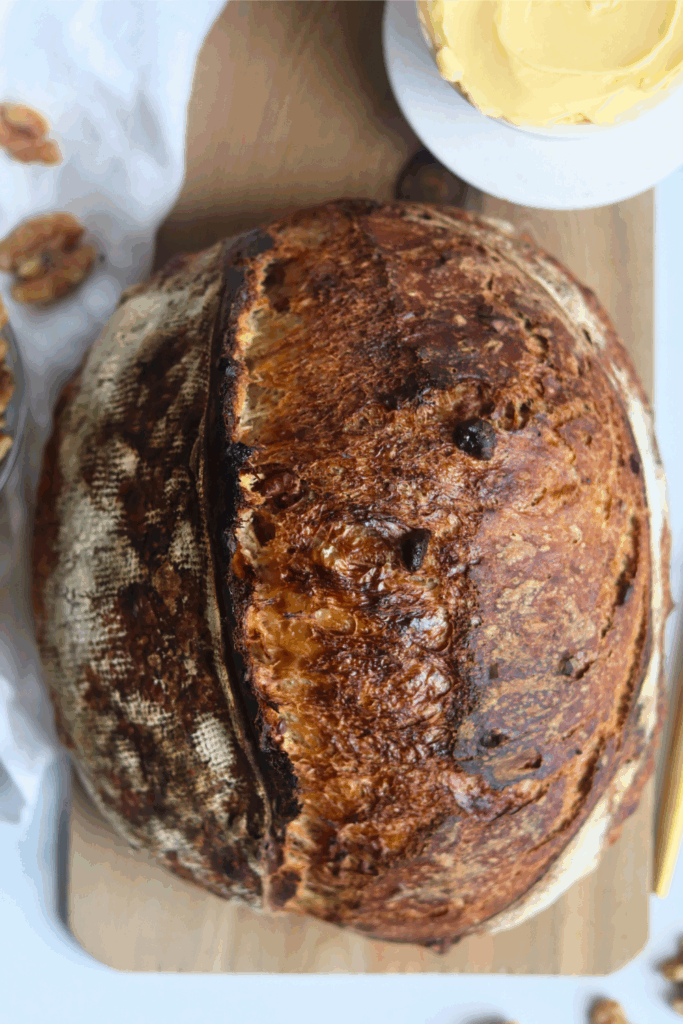
- Lower the oven to 450 degrees F and bake the bread covered for 30 minutes. Then remove the lid of the Dutch oven and continue to bake the bread for an additional 10-15 minutes with the lid off at 425 degrees F. If your crust is browning too quickly, cover the top with aluminum foil while you continue to bake.
- Once golden brown with the internal temperature at least 205 degrees F, remove the Dutch oven from your oven.
- Using the corners of the parchment paper, lift the sourdough bread out of the Dutch oven and place it onto a wire rack to cool.
- Allow your homemade bread to cool for at least 1 hour before cutting into it. (I know! How can you possibly wait when it looks and smells so good? But trust me, if you cut in too soon, your masterpiece will turn gummy.)
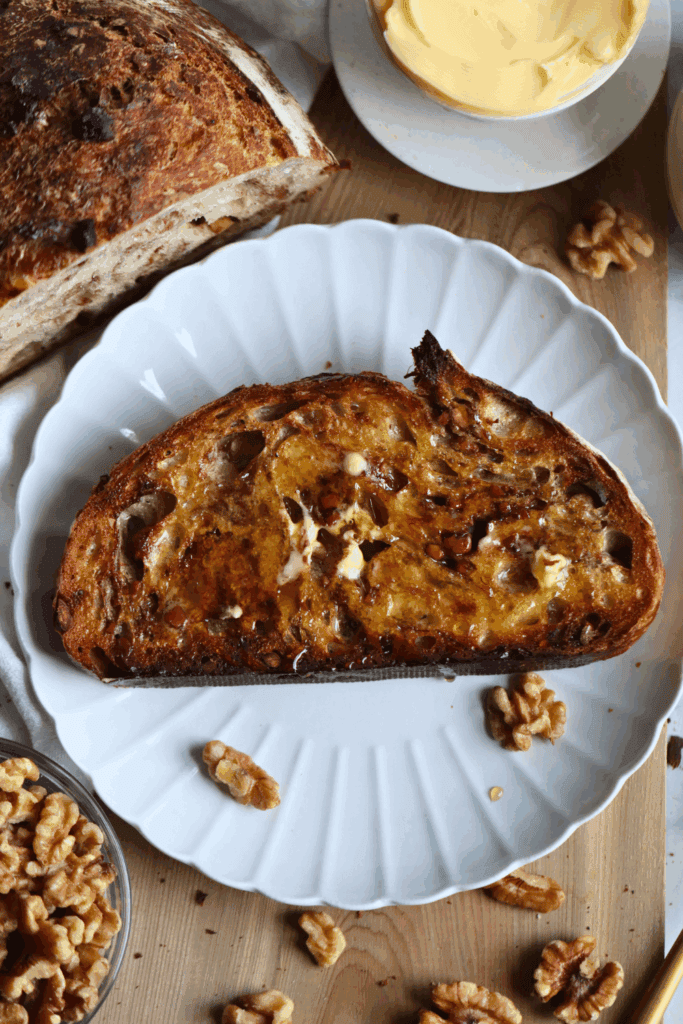
- Once the hour is up, slice into your work of art and slather on some butter with a drizzle of honey, and enjoy!
Notes
Ingredients & Substitutions
- Bread Flour – Bread flour is best when it comes to making sourdough bread. The higher protein percentage in flour gives the dough its strength so that it can rise to great heights and give you the best results. Some home bakers use white flour/all-purpose, whole wheat flour, spelt flour, or even rye sourdough, but bread flour gives me the best results.
- Honey – Using honey in this recipe not only slightly sweetens your sourdough bread, but it also makes your crumb extra chewy! Since honey is a sugar, be aware that your fermentation process can be faster than what you are typically used to. This loaf will also lead to a more dark brown exterior after baking. You can use any type of honey (that is, store-bought, local, wildflower, clove, raw), however, the darker honeys (local, wildflower, raw) will give a greater depth in flavor.
- Walnuts – To reduce the naturally bitter flavor of walnuts, I like to toast them, but this step is optional. You can also swap the crunchy walnuts for chopped pecans, almonds, pistachios, or any other nut or nut mix you have on hand. I’m even thinking of adding walnuts to this cranberry bread to see how much of an upgrade cranberry walnut bread really is.
- Cinnamon – I love the way cinnamon compliments the honey and walnuts in this sourdough bread recipe, however, keep in mind, cinnamon naturally slows yeast activity. So, be prepared for a slightly longer bulk fermentation.

Oops. Forgot to leave rating. It’s my favorite sourdough variation so far!
Thank you so much for taking the time to leave a rating!
Question. Is there a modification to make it same day instead of overnight cold fermentation? I made it exactly as the recipe and it was soooo good. But I’m wanting to make it tomorrow which wouldn’t be possible since it’s too late to start today.
So glad you loved it—that makes me so happy to hear! You can absolutely make it same-day, you’ll just skip the cold proof and let it do a full second rise at room temperature instead. After shaping, cover the dough and let it rise until puffy and slightly jiggly, which will likely take a few hours depending on your kitchen temperature. You’ll lose a little bit of that deeper, developed flavor from the overnight rest, but it will still turn out really delicious!
I love this recipe. I have made it twice now, the second time I used pecans instead of walnuts and it was great!
I love the idea of using pecans instead of walnuts – a delicious swap! I’m so glad you’ve been enjoying the recipe enough to make it more than once!
I think this might be one of the best sourdough breads I’ve ever made. My dad said he can’t stop eating it. Thankyou so much for sharing this. I’m really enjoying making it.
Thank you so much for sharing that! I am so glad you enjoyed the recipe, and hearing that your dad cannot stop eating it is the best compliment. Thank you for taking the time to leave such a kind comment!
Made this today and it is delicious! I made a honey & cinnamon ricotta spread and wow! So good. I do have one question, is there a reason why I couldn’t mix initially with a mixer. Does it overwork the dough too much? Just curious.
I’m so glad you loved it — and that honey & cinnamon ricotta spread sounds incredible!
You can absolutely use a mixer if you’d like. I usually mix by hand to keep the dough from being overworked and because sourdough develops strength nicely with stretch-and-folds. But using a mixer on low speed for the initial mix (about 6-8 minutes) is totally fine if that’s easier for you!
This bread is so so good! I’ve been making sourdough for about two years now and I have tried a lot of different recipes, but I think this one is my favorite so far! If you haven’t tried it yet, you are missing out!!! I followed the recipe and didn’t substitute anything.
This comment absolutely made my day — thank you so much! Coming from someone who’s been baking sourdough for two years and tried lots of recipes, that truly means the world. Thank you for sharing and for the sweet encouragement!
Haven’t tried yet, but sounds divine! I appreciate the listing of the ingredients with the specific step. I think the second set where it says 90 grams of walnuts should actually be the honey as it was referring to the liquid ingredients.
Thank you so much for catching that! You are absolutely right. I’ve gone ahead and updated the recipe card. I really appreciate you taking the time to point it out!
I am planning to make this as my very first sourdough recipe, and I’m so excited! This may be a silly question, but since I’ve never done this before, I need to ask. My two-week old starter is in the fridge. Do I need to feed it and bring it to room temperature before I use it in this recipe?
How exciting! Welcome to the world of sourdough. Great question – yes! You will want to pull your sourdough starter out and give it a feeding. Once it is bubbly and active it should be ready to use for this recipe. Can’t wait to hear how your first bake goes!
Would it work for me to just leave out the walnuts and not replace it with anything else either?
Yes, absolutely! You can leave the walnuts out completely without replacing them with anything. The dough and fermentation won’t be affected at all, and you’ll still get a soft, lightly sweet honey sourdough loaf.
So delicious!
So glad you enjoyed this recipe, Terrie!
The aroma of this loaf from fermentation all the way to baking is heaven! The texture of the dough (I used King Arthur bread flour) was a dream. I should have let bulk fermentation go at least another 30 minutes, and could have done better with evenly distributing the walnuts. Nevertheless, this is a delicious loaf! Mine had the sourness note up front, the honey played in the background, and the walnuts give a great crunch. I think this would be tastiest toasted with some butter or honey or ricotta!
This makes me so happy to hear! You described it perfectly — that aroma is one of my favorite parts too. I love your serving ideas; toasted with butter or ricotta sounds incredible!
The perfect fall loaf! Slightly sweet with a great crunch every bite!