

The Best Sourdough Sandwich Bread Recipe (Soft & Fluffy)
This post may contain affiliate links. Please read our disclosure policy.
This Sourdough Sandwich Bread is the kind of everyday loaf I make again and again because it’s incredibly soft, fluffy, and completely naturally leavened with 100% sourdough starter. It has that perfect balance of flavor and texture that works for everything from toast in the morning to sandwiches packed for lunch.
Even though it’s fully fermented, the dough is simple to work with and bakes up beautifully every time. And if you’re short on time, my Easy Sourdough Discard Sandwich Bread Recipe is a great quicker option that’s ready to bake in just 2 hours.

Quick Look: Sourdough Sandwich Bread
- Prep Time: 10 minutes
- Rise Time: 12 hours
- Bake Time: 40 minutes
- Total Time: 12 hours 50 minutes
- Servings: 1 loaf
- Calories: ~ kcal per serving (based on nutrition panel)
- Cook Method: Baked
- Flavor Profile: Soft, fluffy, and lightly sweet with a subtle sourdough tang. Perfect for toasting at breakfast or building your favorite sandwich.
- Difficulty: Intermediate — A 100% sourdough loaf with a long bulk fermentation and two rises, but mostly hands-off and very beginner-friendly!
SUMMARIZE & SAVE THIS CONTENT ON
Why You’ll Love This Sourdough Sandwich Bread Recipe
- No Fancy Equipment Required: For the best results all you need is a tin loaf pan to bake a delicious loaf of bread. No fancy challenger bread pan or Le Creuset Dutch Oven is needed here. This makes it incredibly accessible, just like my Sourdough Discard Focaccia Recipe which bakes right in a 9×13 pan.
- Delicious and Soft Sourdough Bread: This sourdough sandwich bread recipe gives you soft and incredibly delicious bread with a beautiful crust. It will be the easiest swap, no one will notice the difference between this homemade bread and store-bought! It’s perfect for making a Crispy Sourdough Grilled Cheese Sandwich.
- Bare Minimum of Kneading: Only 20 seconds of kneading is required, that’s all! Can this recipe get simpler than that? Plus, I’ve included two baker’s schedules with step-by-step instructions. One schedule will even give your fresh bread all in one day. If you love simple kneading, you’ll also enjoy my Soft Whole Wheat Sourdough Sandwich Bread Recipe.
Ingredients & Substitutions
* To find precise measurements, scroll to the bottom of this post to find the recipe card*
- Active Sourdough Starter – No commercial yeast is needed for this recipe! Your active starter will do all the work to give you that soft and chewy slice of sandwich bread.
- Warm Water – Make sure that the water isn’t boiling, no hotter than 120 degrees F. This can kill your sourdough starter, causing the dough not to rise and instead be dense.
- Unsalted Butter, melted – Adding butter to this recipe makes this everyday bread so soft. You can substitute for a 1:1 ratio with olive oil if preferred.
- Sugar – For some sweetness and color! While the bread bakes, the crust will turn golden brown due to the Maillard reaction.
- Bread Flour – Bread flour has a higher gluten count, which helps this homemade sourdough bread keep its shape.
- All-Purpose Flour – Incorporating some white flour keeps the bread nice and soft.
- Salt – To enhance the overall flavor of the bread.
Bake the Same Day
|
Time |
Process |
|---|---|
|
9:00 AM |
Make the Dough |
|
10:00 AM |
Knead the Dough |
|
10:00 AM |
First Rise |
|
7:00 PM |
Shape |
|
7:00 PM |
Second Rise |
|
9:00 PM |
Bake |
Bake the Next Day
|
Time |
Process |
|---|---|
|
9:00 PM |
Make the Dough |
|
10:00 PM |
Knead the Dough |
|
10:00 PM |
First Rise |
|
NEXT DAY |
|
|
7:00 AM |
Shape |
|
7:00 AM |
Second Rise |
|
9:00 AM |
Bake |
How to Make Sourdough Sandwich Bread in a Loaf Pan:
- In a large mixing bowl, whisk together the starter, warm water, melted butter, and sugar. Add the flour and salt to the wet ingredients and mix with a Danish dough whisk until all the flour has been incorporated. The bread dough will be shaggy and a little sticky.
- Cover the bowl with a damp tea towel, a tied plastic bag, or plastic wrap. Let the dough rest for 30 minutes to an hour to allow the gluten to relax a little bit.


- First, wet your fingers so the dough doesn’t stick to them. Then, take a piece of the bread dough and pull it upwards.

- Then fold it towards the center of the dough. Push the heel of your hand into the dough.

- Turn the bowl clockwise a quarter turn and repeat the same motion. Continue to knead the dough for about 20 seconds. The dough should become more stiff and smooth looking. Grease another bowl with butter and place the dough with the seam side down

- Cover the bowl again and let the dough rise till doubled in size. The bulk rise will take anywhere from 8-10 hours.
- Once the dough has doubled in size, remove the bowl cover and punch the dough. Do so by placing your fist in the center of the dough and pushing it downwards. Punching the dough helps to release all the air bubbles. This creates a tighter crumb that you want for sandwich bread.

- Using a bench scraper, gently lift the sourdough bread dough and place it into a greased 9 x 5-inch (23 x 13 cm) loaf pan with the seam side down. Cover the dough for the final rise. This should only take 1-2 hours, or until the dough is 1″ above the rim of the pan.

- Preheat your oven to 375 degrees F. Place the pan in the hot oven on the middle rack and bake for 50-55mins.

- Remove from the oven and place the bread pan on a wire rack. Keep the pan loaf in the tin pan for an extra 5 minutes before removing it to cool.
- While it is still warm, melt butter all over the top of the bread for a super soft crust.
Cool for at least 1 hour before slicing.
McKenna’s Helpful Tips
- Create extra steam for a soft crust: To prevent the crust from tearing, place a cast iron skillet or baking sheet on the bottom rack with a cup of ice cubes while the bread bakes. This steam keeps the surface soft, allowing the bread to expand fully.
- Butter the top while warm: For an extra soft and delicious crust, melt butter all over the top of the bread immediately after removing it from the oven.
- Let it cool completely: Always cool your loaf for at least 1 hour on a wire rack before slicing. Cutting into hot bread can make the crumb gummy. If you’re new to sourdough baking, check out my Sourdough for Beginners guide for more essential tips.
- Freeze for later: This bread freezes beautifully! Once completely cooled, slice it up and store the pieces in a gallon-sized ziplock bag with small pieces of parchment paper between the slices so they don’t freeze together. Then you can just pop a slice in the toaster for The Best Easy Sourdough French Toast anytime!
How to Store
This sourdough sandwich bread will stay fresh for 3-5 days when stored in a plastic bag.
My favorite way of storing this bread is actually by freezing it. Once the bread has cooled completely, I will slice it up and store the pieces in a gallon-sized ziplock bag. I also like to place small pieces of parchment paper in between the slices so they don’t freeze together.
To refresh, I will either pull out some slices and bring them to room temperature or pop them into the toaster. Super simple, but still super tasty!

The Best Sourdough Sandwich Bread FAQs
A gummy line at the bottom of sourdough sandwich bread is usually caused by slight underproofing or underbaking. To prevent this, make sure the dough is fully risen and puffy before baking and allow the loaf to bake until the internal temperature reaches 200–205°F.
If the side of your sourdough sandwich bread exploded during baking, the dough was likely slightly underproofed. As the loaf rapidly rose in the oven, it burst through a weaker area of the dough instead.
Though you can skip the sugar in this sourdough sandwich bread, if recommend keeping it because it helps keep the loaf stay soft, tender, and fresh for longer while also encouraging better browning during baking. If you prefer, you can substitute the sugar with the same amount (by grams) of honey! If you’re looking for an even sweet loaf, check out my Cinnamon Raisin Swirl Sourdough Sandwich Bread recipe!
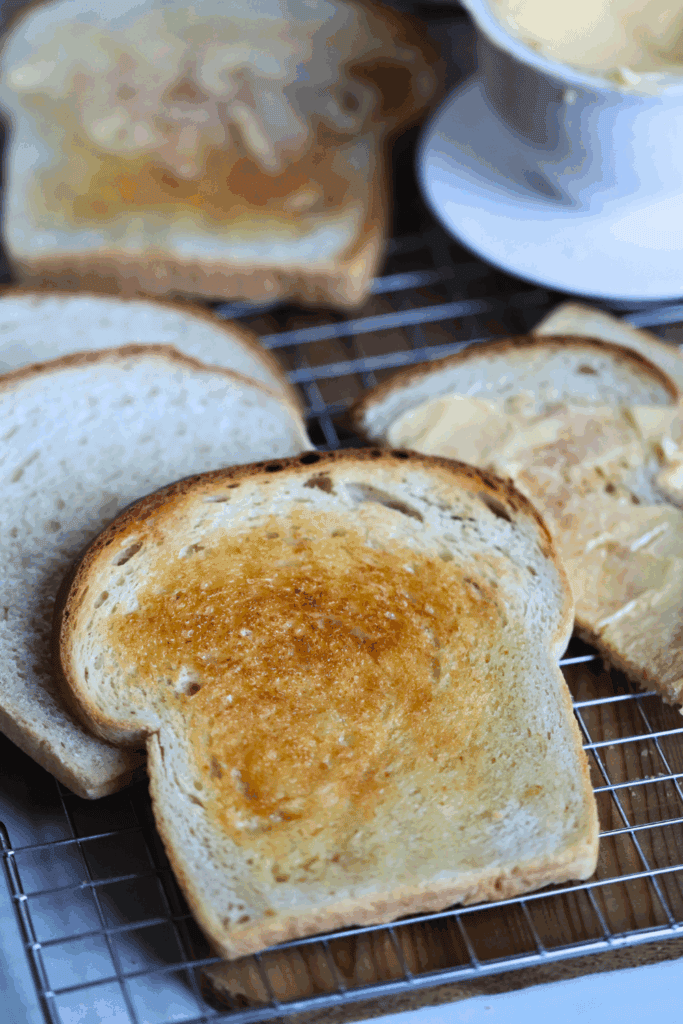
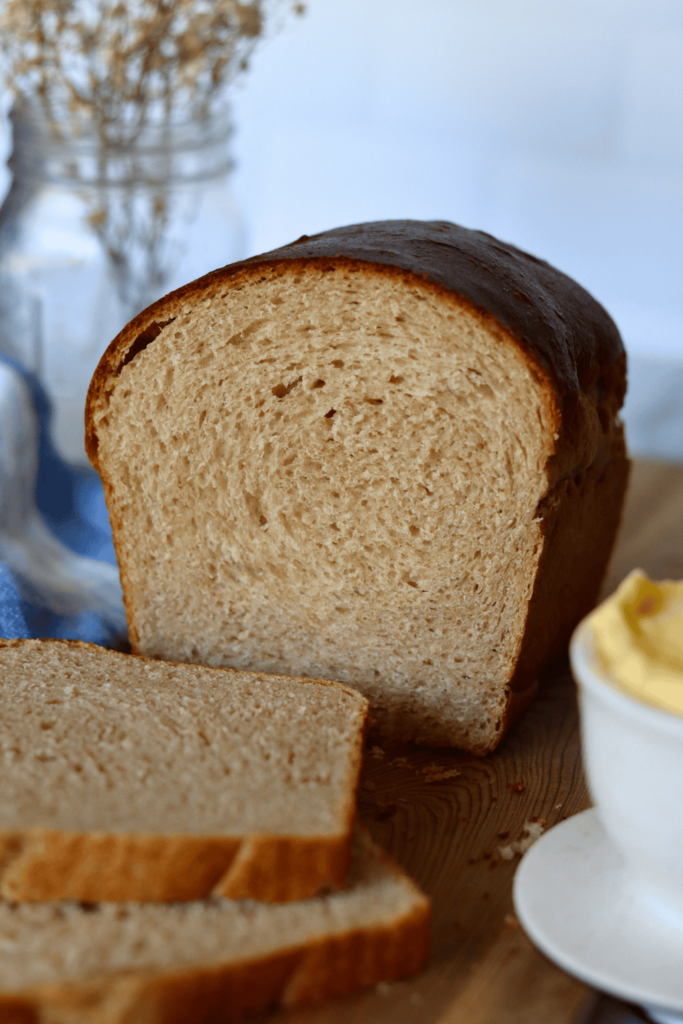
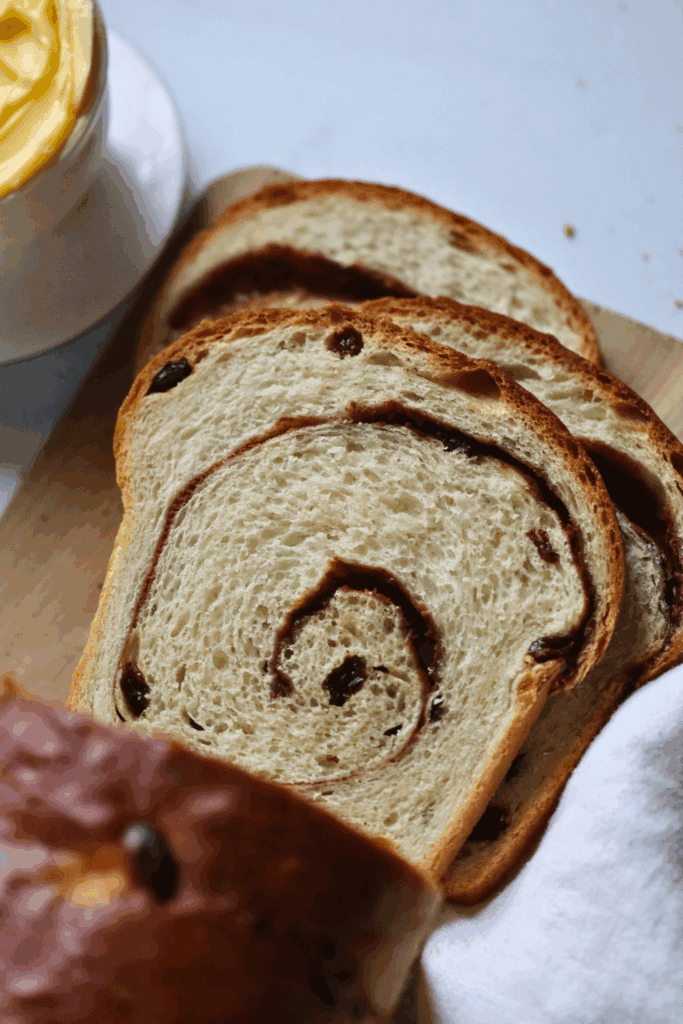

If you tried this Sourdough Sandwich Bread recipe or any other recipe on my blog, please leave a 🌟 star rating and let me know how it went in the📝 comments below. Thanks for visiting!
FULL RECIPE TUTORIAL
Sourdough Sandwich Bread Recipe
Enter your email below, and we’ll send it straight to your inbox! Plus, you’ll get my newest sourdough recipes and best tips every week!
Ingredients
- 65 grams active sourdough starter heaping 1/4 cup
- 300 grams warm water 1 1/3 cups
- 57 grams unsalted butter, melted 4 Tablespoons
- 25 grams white sugar 2 Tablespoons see notes*
- 400 grams bread flour 2 3/4 cups + 1 Tablespoon
- 100 grams all-purpose flour 3/4 cup
- 9 grams salt 1 1/2 teaspoons
Instructions
Make the Dough
- In a large mixing, whisk together the starter, warm water, melted butter, and sugar. The water and butter shouldn't be hotter than 110 degrees F, otherwise this can kill the starter. For the best results, use a kitchen scale and measure ingredients by grams.65 grams active sourdough starter, 300 grams warm water, 57 grams unsalted butter, melted, 25 grams white sugar
- Add the flour and salt to the wet ingredients and mix with a Danish dough whisk or your hand until all the flour has been incorporated. The bread dough will be shaggy and a little sticky.400 grams bread flour, 100 grams all-purpose flour, 9 grams salt
- Cover the bowl with plastic wrap or a reusable shower cap. Let the dough rest for 30 minutes to an hour to allow the gluten to relax a little bit.
Knead the Dough
- First, wet your fingers so the dough doesn't stick to them. Then, take a piece of the bread dough, pull it upwards, and fold it towards the center of the dough. Push the heel of your hand into the dough.
- Turn the bowl clockwise a quarter turn and repeat the same motion. Continue to knead the dough for about 20 seconds. The dough should become more stiff and smooth looking and feel tacky to the touch.
- Grease a straight edge mixing bowl with butter and place the dough with the seam side down.I love using this straight-edge bowl because it allows me to clearly see when the dough has doubled in size.
Bulk Fermentation
- Cover the bowl again and let the dough rise till doubled in size. In my kitchen at 70 degrees F, the bulk rise will takes anywhere from 8-10 hours. If your kitchen is warmer, it will take less time. Check often and look for signs that your dough is done, rather than the time. The dough will have doubled in size, be domed on top, remove easily from the bowl and if you are using a glass bowl, you'll see bubbles all throughout the bottom of the dough.
Shape the Dough
- Once the dough has doubled in size, remove the cover and punch the dough. Do so by placing your fist in the center of the dough and pushing it downwards. Punching the dough helps to release all the air bubbles.
- Remove and stretch the bread dough into a large rectangle on your work surface, then roll the bread dough into a log, like you would a cinnamon roll. Curl the ends of the sourdough sandwich bread under itself and pinch the seams together.
Second Rise
- Using a bench scraper, gently lift the sourdough bread dough and place it into a greased 8.5 x 4.5 inch loaf pan with the seam side down.
- Cover the dough for the final rise. In my 70 degree F kitchen, this will typically take 3-4 hours. To speed this step, I like to place the dough in my proofing box at 90 degrees F or in an OFF oven with just the light on. This creates a toasty environment for the dough to rise quickly, about 1-2 hours. Don't rush this step, allow the dough to rise until it is 1″ above the rim of the pan. Otherwise, the loaf will bake up dense and gummy.
Bake
- Preheat your oven to 375 degrees F.
- Place the loaf pan in the hot oven on the middle rack and bake for 40-45 mins, or until golden brown on top and the internal is 190-200 degrees F. If you notice that the top is browning too much before the loaf has finished baking, place a piece of aluminum foil on top of the loaf. for the rest of the baking time.
- Keep the loaf in the tin pan for an extra 5 minutes before removing it to cool on a wire rack.
- While the loaf is still warm, spread butter all over the top of the bread for a super soft and shiny crust.
- Place the loaf on a cooling rack for at least one hour before slicing. Enjoy!
Notes
Recipe Tips
- To prevent the sourdough sandwich bread crust from tearing, I like to place a cast iron skillet or baking sheet on the oven rack below the bread with a cup of ice cubes. This creates extra steam in the oven while the bread bakes, which keeps the surface of the dough soft allowing the bread to expand and rise without tearing.
- Sourdough sandwich bread will stay fresh for 3-5 days when stored in a plastic bag.
- Sourdough sandwich bread freezes exceptionally well. Once the bread has cooled completely, slice and store the pieces in a gallon-sized ziplock bag. Place small pieces of parchment paper in between the slices so they don’t freeze together.

I have tried this recipe three different times now and I cannot get my dough to rise the second time. I’ve tried both the same day and the overnight options. I even used my dough warmer to help it keep consistent temp and the dough still only rises a small amount the second rise. What am I doing wrong?
I’m sorry you’re having trouble! My first thought is that it could be a starter strength issue, but I have a couple of questions first. During bulk fermentation, is your dough doubling in size, and is your starter doubling (or more) after each of feeding? That will help narrow down whether it’s a fermentation issue or something else, and I’m happy to help troubleshoot!
Love this recipe! Not o it are your instructions so easy to follow, but it’s delicious!! A staple in our home! Would I be able to add inclusions this recipe? Thinking cinnamon swirl 🤗
Thank you so much! I’m so glad it’s become a staple in your home. You certainly could add inclusions, but if you’re looking for a cinnamon swirl, I actually have a Sourdough Cinnamon Raisin Swirl Sandwich Bread recipe that would be perfect! It walks you through exactly how to create that delicious swirl.
I have made this recipe three times now, yesterday was my third attempt and the bread turned out just right. The first two times it turned out gummy at the bottom, but was still good. I did everything the same except for I baked it 50 minutes and turned the pan half way through. I also let my dough proof for 4 hours after I formed my loaf. Bulk Fermentation took me 8 hours in a 72-74 degree kitchen. I fed my starter the night before and used it the next morning, which ended up being 7 hours. This recipe is awesome, my husband and I both love it.
Thank you so much for sharing your experience! I’m so glad you stuck with it and found what worked in your kitchen. Every starter and baking environment is a little different, so I’m sure your notes on the longer bake time and proofing will be helpful to other readers. I’m thrilled you and your husband are loving the bread!
This bread looks amazing! Is it possible to make without butter? Could I use a non dairy butter substitute? We have a severe dairy allergy in the household.
Thank you so much! Yes, a non-dairy butter substitute should work just fine in this recipe. Others have used avocado oil, just use the same amount in grams. I hope your family enjoys it!
Hi!
When I took out the bread from the loaf pan after being in the oven it looked like the bread had a mold spot on the bottom on the bread. Is it mold or what can it be? I don’t understand how it can have molded.
Hi! My guess is that it may have been a lighter or darker spot caused by flour, moisture, air bubbles, or even where the loaf made contact with the pan during baking. If you have a photo, feel free to share it with through email and I’d be happy to take a closer look!
WOW WOW WOW! Amazing recipe, i love it. It came out so good, tastes amazing, smells amazing. I accidentally left it to rise in the pan overnight for 8 hours instead of 3-4, and it rose 2 inches over the pan. I was so nervous it would be too airy, not hold its shape, but it came out perfectly, better than any sourdough i’ve ever made. Thank you, will use again!
I’m so glad it turned out so well for you, especially after the unexpected overnight rise! Thank you so much for sharing this. I’m honored that it’s one of the best sourdough loaves you’ve made!
Can I put a top loaf pan to keep the loaf from getting too large on the sides?
That should work – similar to a Pullman-style loaf! Just make sure there’s enough room for the dough to rise and that the top pan is oven-safe.
I have yet to make one of your recipes that doesn’t come out great. Not just “alright”, but these are truly fool proof.
Sincerely, the fool 💕
This might be one of my favorite reviews ever! Thank you so much for your kind words. My goal is always to make sourdough feel approachable and achievable, so hearing that the recipes have been so reliable for you truly means the world to me!
I have not made the loaf yet but I’d like to ask if honey can be substituted for sugar
You can! Just use the same amount in grams. Hope you love this recipe!
I use honey almost always or coconut sugar as I dont always have white sugar on hand.
Thank you for sharing!
I have already posted that this is a staple in our house! Here today to ask a question about shaping. I am awful at it! One side always is fatter than the other. Any tips on that? Can I just do a clasp fold like I do with my artisan loaf? Thanks in advance!
Lisa
I’m so thrilled this recipe has become a staple in your household! I have a step-by-step turtorial for this recipe on my YouTube channel. I show you just how I shape my loaves. Hope this helps! https://youtu.be/Z0oyCtARXU4?si=ieaFMCNzD8_93ZZj
I’ve struggled a bit with this recipe. I did 3 extra stretch and folds and it turned out better, the second time I tried. My loaf pan is bigger 12”x4.5” any suggestions on how to get it to rise better in this pan? It had great texture but it was long and flatter. Do I need a different recipe?
I actually think the pan size is the main issue here! A 12×4.5 pan is quite a bit larger than a standard loaf pan, so the same amount of dough will naturally spread out more and bake up flatter. I’d suggest using a 8.5×4.5 inch pan for your next bake. Hope this helps!
Could I use just all purpose floor as I don’t have any bread flour?
Yes, you can use all-purpose flour instead! The loaf may be slightly less chewy and structured compared to using bread flour, but it should still turn out soft and delicious.
All of your recipes are so straightforward and easy to follow! I’m a huge fan of the chocolate chip cookies and bagels! I am making this loaf now and it is currently doing the first bulk fermentation, however, when I was kneading it for 20 seconds the dough was very sticky and wet. I’m wondering if you have any tips for this? I think I added 5g extra of starter my accident, do you think this would have made that kind of impact? My kitchen is also very warm, around 75 F. Thank you so much!! 🙂
Thank you so much, that means a lot! I’m so glad you’ve been enjoying the recipes! An extra 5g of starter wouldn’t make a major difference, so I wouldn’t worry about that. A warm kitchen and even certain brands of flour can definitely make the dough feel a bit wetter or stickier since some flours absorb water differently. As long as the dough becomes smoother as it rests and ferments, you should be totally fine. If it still feels overly sticky during shaping, you can lightly flour your hands or work surface, but try not to add too much extra flour. Would love to know how your loaf bakes up!
Thank you so much for your insight! The loaf baked out beautifully. I lightly floured my hands and work surface and it worked great! My partner said it was the best loaf I’ve made so far. He ate half of it within 24 hours lol. Will definitely be my go to from now on 🙂 thank you again!!
When half of a loaf disappears within 24 hours, that’s the ultimate compliment! Thank you so much for coming back to share this. I’m honored it’ll be your go-to recipe now!
Iv made this bread once before and it was amazing! Just wondering can you put the dough in the fridge during the first bulk fermentation? I know you say it’s recommended after shaping but it’s hard to fit into my schedule as I don’t have the time to start bakeing untill around 1 – 4pm
Yes, absolutely! I’d recommend letting the dough sit at room temperature for about 1–2 hours first to get fermentation started, then place it in the fridge overnight. The next day, let it warm up a bit and rise if it hasn’t doubled in size, then shape and continue with the second rise as usual. If you give this a try, let me know how it goes!
I’ve made this bread many time I love this loaf and so does my family. My question is this- can I freeze the dough after it doubles in size, before I shape it.