Caramelized Onion Sourdough Bread (It’s Gorgeous and Soft!)
This post may contain affiliate links. Please read our disclosure policy.
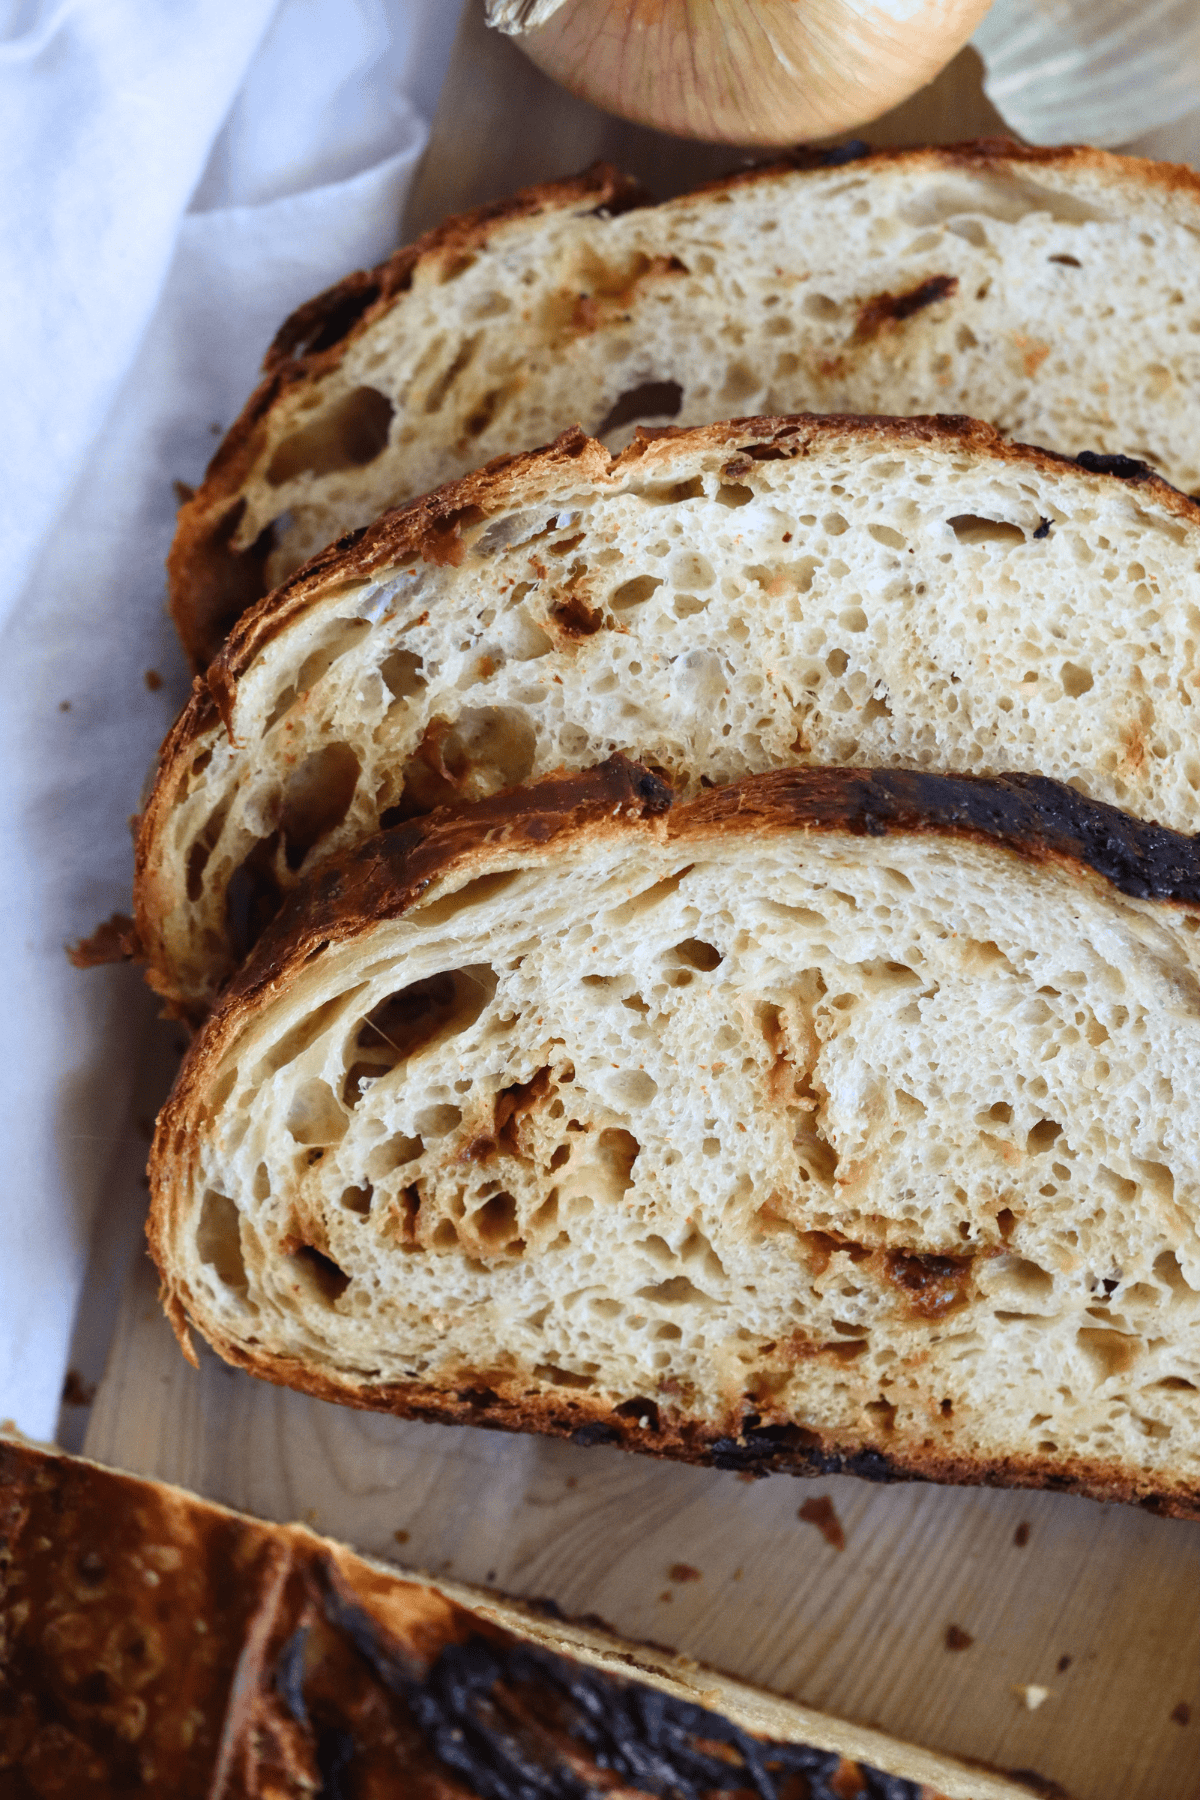
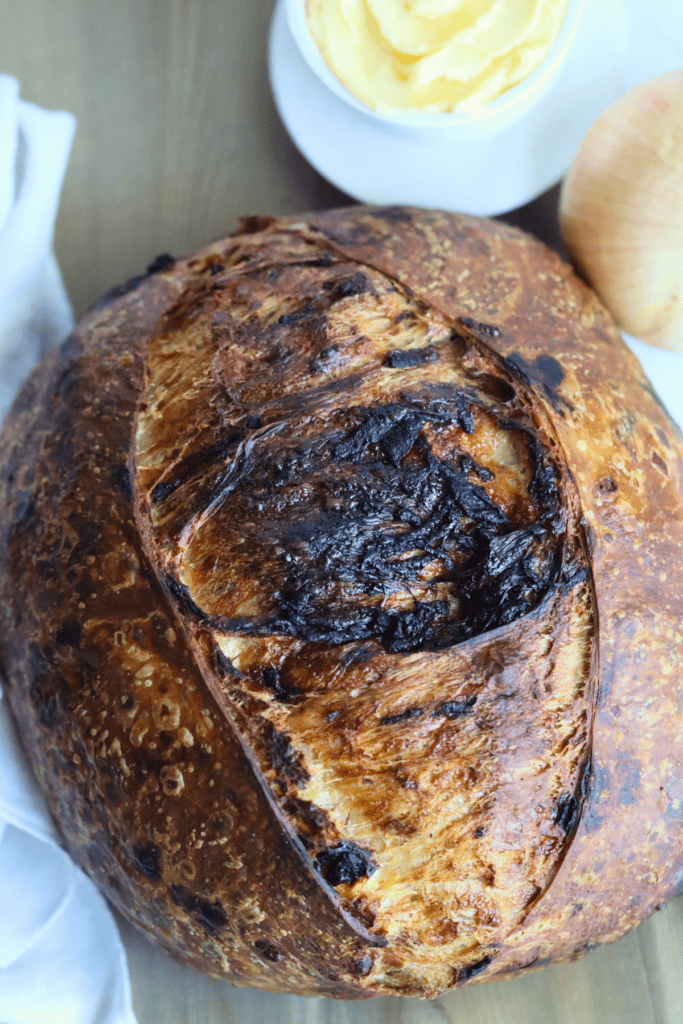
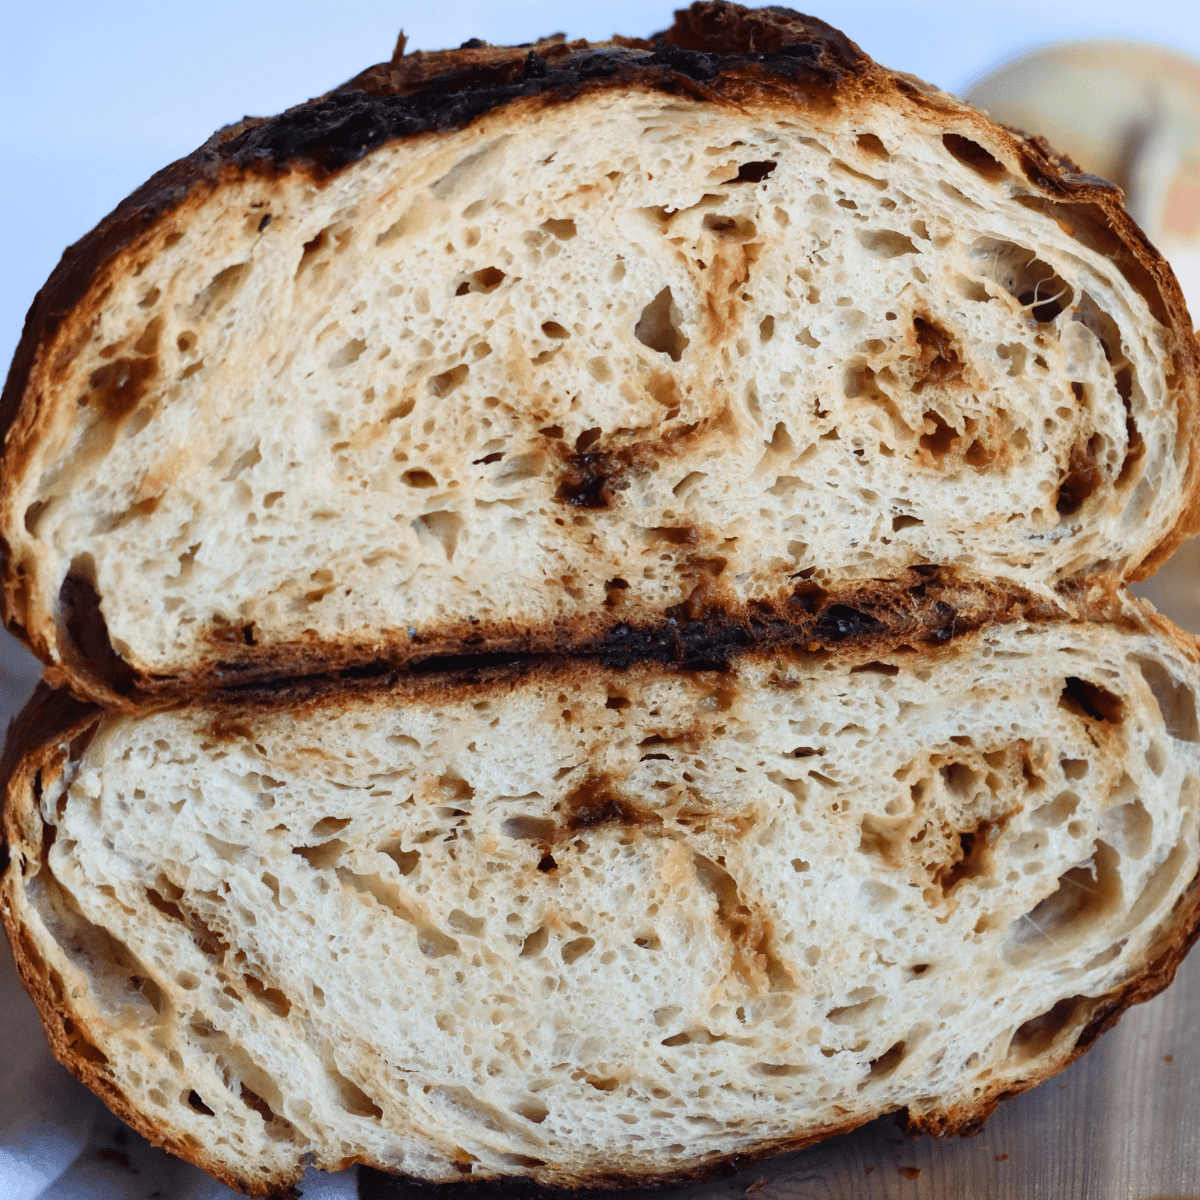
This Caramelized Onion Sourdough Bread is the kind of loaf that feels extra special without being complicated to make. With sweet caramelized onions, pockets of melted Gruyère cheese, and a crisp golden crust, every slice is packed with rich, savory flavor.
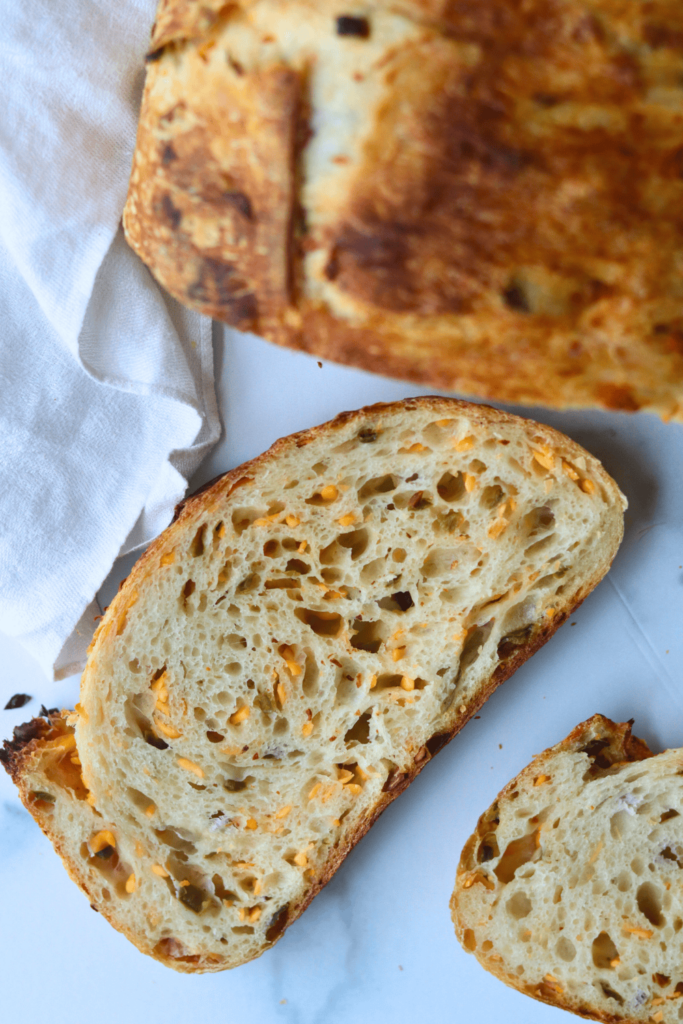
The onions add incredible depth without overpowering the bread, making it perfect for serving alongside soup, spreading with butter, or turning into the ultimate grilled cheese sandwich. And if you love savory sourdough mix-ins, my Roasted Garlic and Rosemary Sourdough Bread and this Jalapeño and Cheddar Sourdough Bread are two more recipes you’ll want to bake next.
Quick Look: Caramelized Onion Sourdough Bread
- Prep Time: 2 hours
- Bulk Fermentation: 3–4 hours
- Cold Proof: 8 hours
- Bake Time: 47 minutes
- Total Time: 14 hours 47 minutes
- Servings: 1 loaf
- Calories: ~3061 kcals per loaf (based on nutrition panel)
- Cook Method: Baked in a Dutch oven
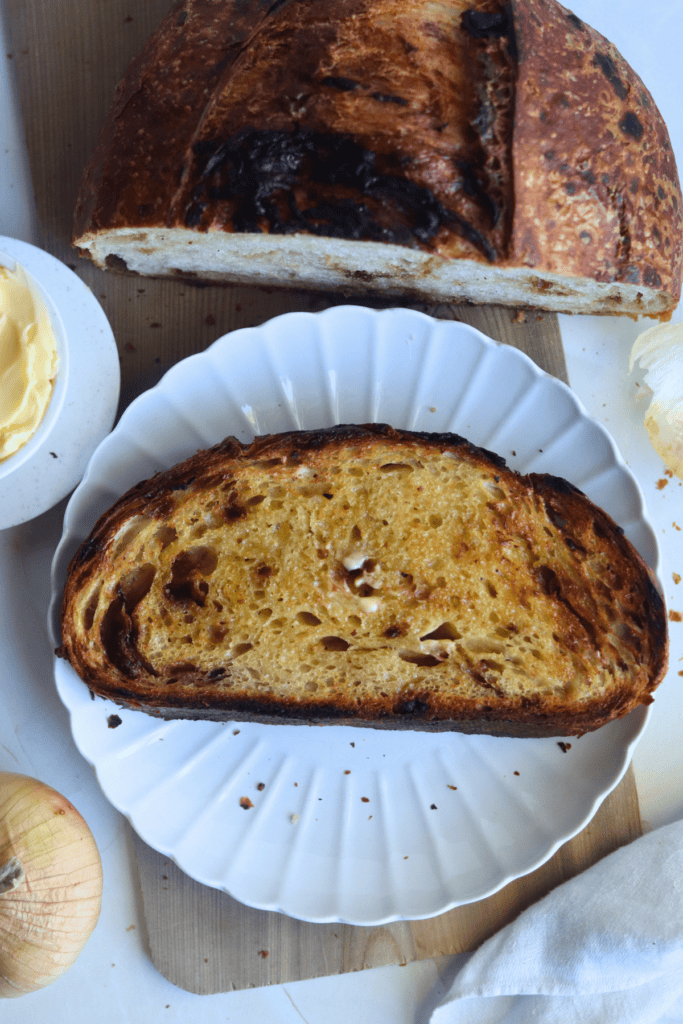
- Flavor Profile: Soft and chewy with a golden, blistered crust and a rich, savory crumb streaked with sweet caramelized onions and melty Gruyere cheese. Incredible sliced warm with butter or as a grilled cheese!
- Difficulty: Intermediate — A great recipe for bakers who have made a few sourdough loaves and are ready to experiment with flavorful mix-ins like caramelized onions and Gruyère cheese!
SUMMARIZE & SAVE THIS CONTENT ON
Why You’ll Love This Caramelized Onion Sourdough Bread
- Delicious smell and flavor — From the moment the sliced onions hit the pan to when the bread comes out of the Dutch oven, your kitchen fills with a sweet, savory, buttery, tangy aroma that’ll have everyone walking in to see what’s cooking. The Gruyere and sweet caramelized onions give this bread a rich, complex flavor that’s hard to describe until you taste it. This Sourdough Strata uses the same Gruyere and caramelized onions, but in a completely different way.
- Makes a delicious grilled cheese sandwich — The soft, open crumb and nutty Gruyere make this bread a natural for grilled cheese. You’ll want to make my Sourdough Grilled Cheese Sandwich again and again!
- Faster rise — This recipe uses 150g of active sourdough starter instead of the usual 50g, which speeds up the bulk fermentation and means less waiting around. You can also reduce it back to 50g for a longer overnight fermentation if you prefer.
Ingredients & Substitutions
* To find precise measurements, scroll to the bottom of this post to find the recipe card*
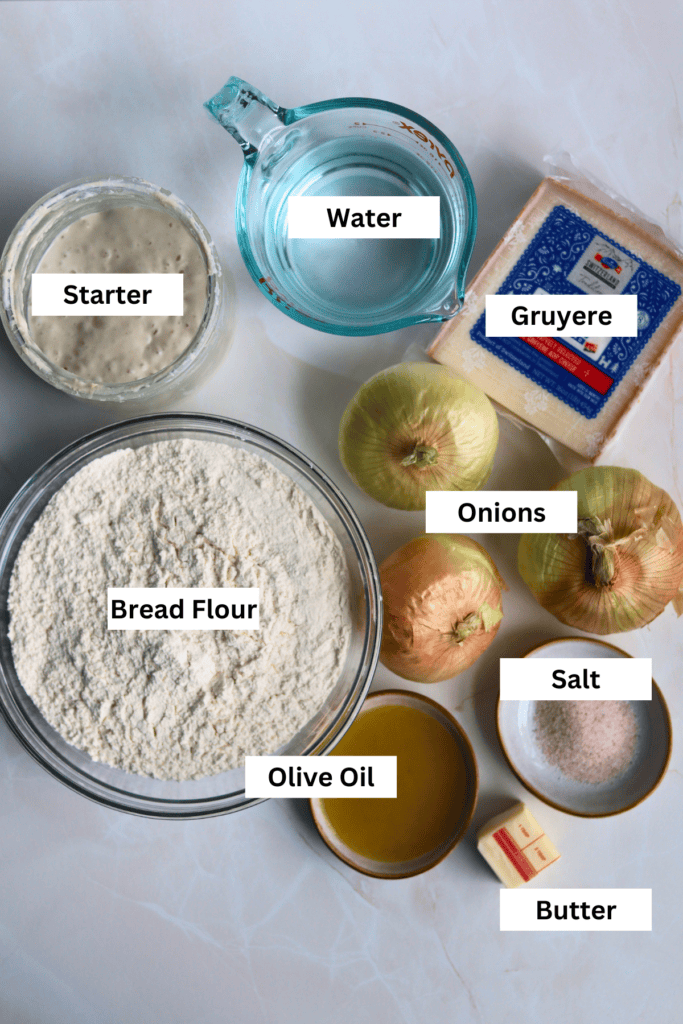
- Bread Flour — Bread flour is what I recommend for this recipe. The higher protein content builds a stronger dough that holds its structure well during fermentation. It makes for a better dough rise and crust.
- Onions — Yellow onions and Vidalia sweet onions are my top choices for this recipe. Their higher natural sugar content means they break down into a deeper golden brown and develop a sweeter, richer flavor when caramelized. White onions or red onions will work but won’t give you the same sweetness or color. If you want to save yourself some time, onion jam works as a substitute for the caramelized onions.
- Cheese – I love the cheesy flavor Gruyere Cheese brings to this sourdough bread, but you can substitute with any semi-hard cheese, like asiago, gouda or parmesan. You could even use a combination of some of your favorite cheeses. Freshly shredded cheese is best for melting.
- Sourdough Starter-A bubbly sourdough starter in this homemade bread gives you the best results. If you’re new to sourdough baking, I previously wrote a post to show you how to make your own sourdough starter from scratch.
Baking Time For Caramelized Onion Sourdough Bread
|
Time |
Process |
|---|---|
|
DAY 1 |
|
|
9:30 AM |
Mix the dough |
|
10:00 – 11:30 AM |
Perform stretch & folds and add mix-ins |
|
11:30 AM |
Bulk fermentation |
|
2:30 PM |
Preshape |
|
3:00 PM |
Shape and coldproof |
|
DAY 2 |
|
|
9:30 AM |
Bake |
How to Make Caramelized Onion Sourdough Bread
- Preheat a medium cast iron skillet to medium-high heat. Melt butter, then add in the sliced onions. Cook until the onions start to turn light brown, then turn the heat to low, cover with a lid and continue to cook for 15 minutes, stirring occasionally. Season with salt and set aside.
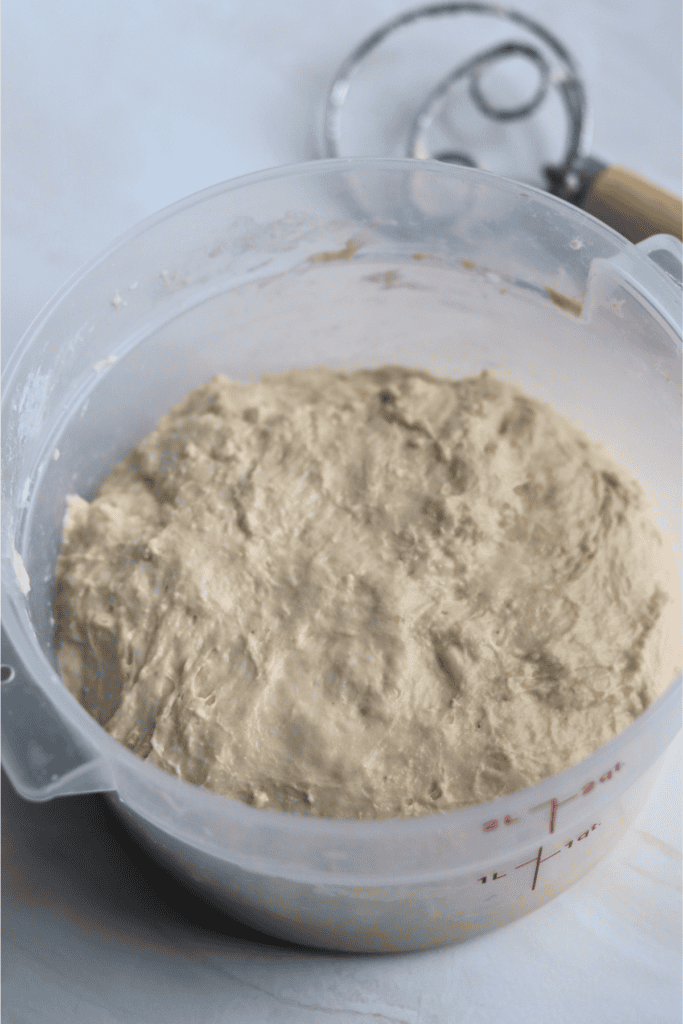
- Mix dough ingredients in a large bowl. Cover and let the dough rest for at least 30 minutes.
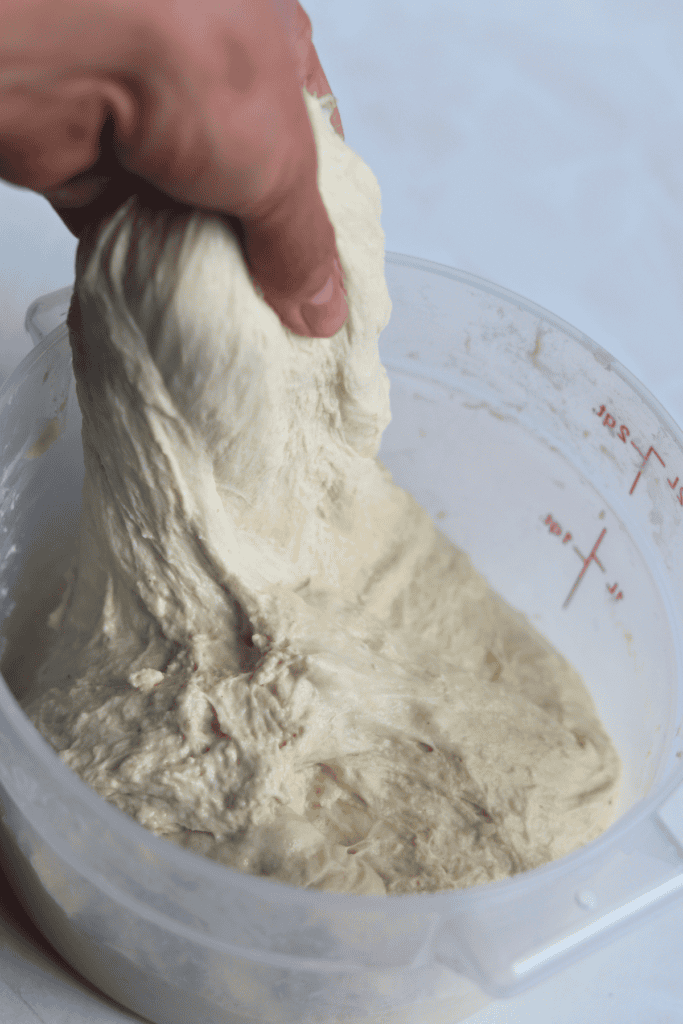
- Perform 4 sets of stretch and folds with 30 minutes of rest in between each round. Cover the dough during each resting period.
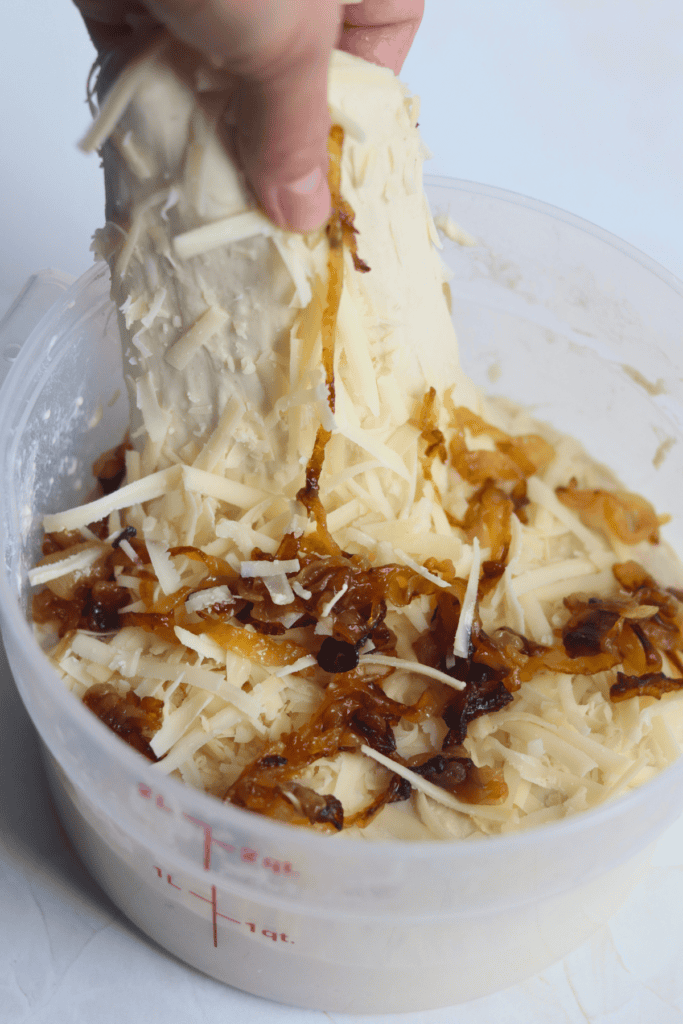
- Add the caramelized onions and gruyere cheese during the second round of stretch and folds.
- Allow the onion bread dough to complete its bulk fermentation (the first rise).
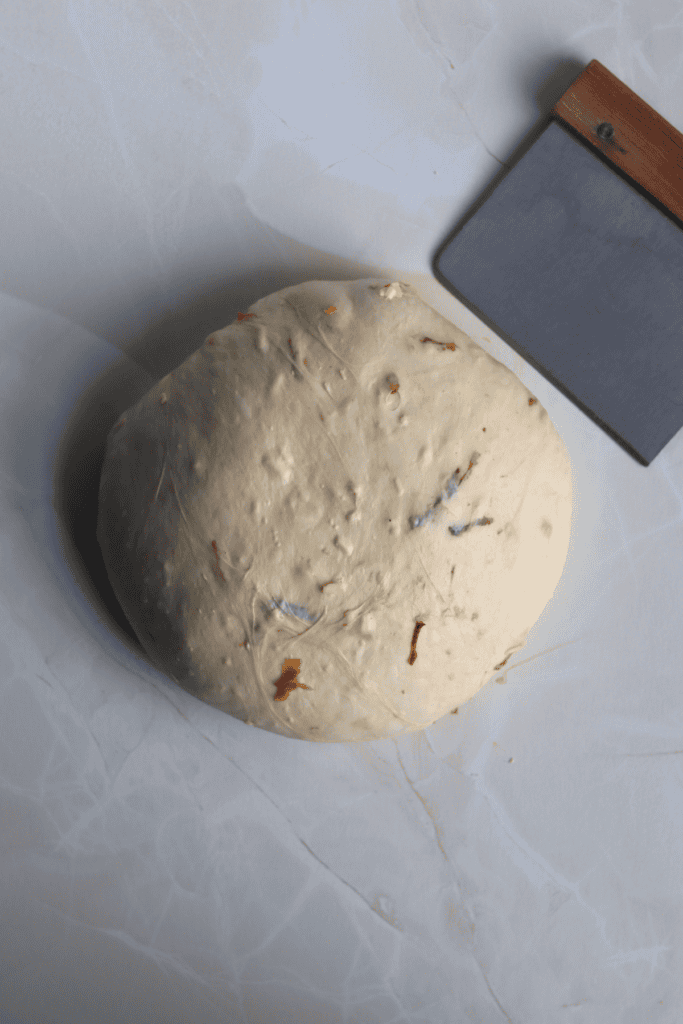
- Once risen, preshape the dough, cover and let rest for 30 minutes.
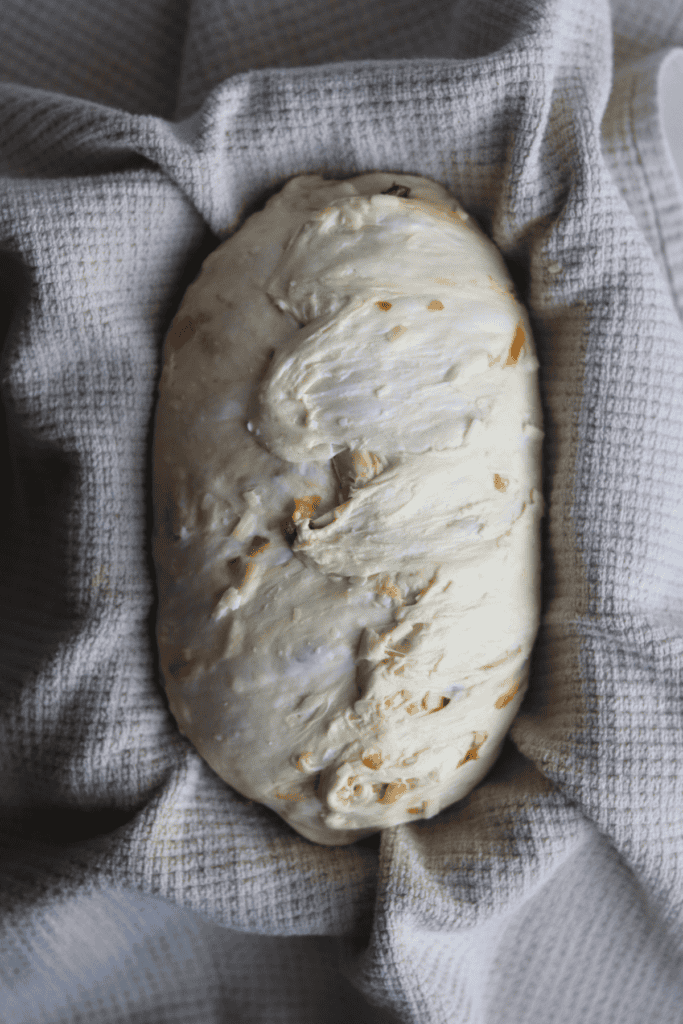
- Shape the dough into a boule or batard and place it into a prepared banneton. Cover and cold proof for at least 8 hours (final proof). The next morning, place the dough on a piece of parchment paper, score, and bake.
- Allow the onion bread to cool to room temperature before slicing and enjoy.
McKenna’s Helpful Tips
- Save yourself time and caramelize the onions a day in advance. Cover and store in the fridge until ready to use. Another idea: Someone suggested caramelizing balsamic red onions, then slow-roasting them in the oven, and storing them in a jar so you always have some ready to go whenever the urge to bake an onion loaf hits.
- For a same-day bake, leave the shaped sourdough to complete its second rise in the banneton, then score and bake as usual.
- Due to the sugar content of the caramelized onions, the top of the bread can brown pretty quickly, so check on it often and cover with foil if needed.
How to Store
Let the bread cool completely before storing. Keep it at room temperature in a bread bag, paper bag, bread box, or loosely wrapped in a clean kitchen towel for 1 to 2 days. For longer storage, slice the bread and freeze it in a freezer-safe bag for up to 3 months. Thaw at room temperature or toast slices directly from frozen.
Caramelized Onion Sourdough Bread FAQs
Gruyere works especially well because of its nutty flavor and strong melting quality. In this loaf it reminds me of French onion soup! Semi-hard cheeses like asiago, gouda, or parmesan also fit nicely, and mixing a couple of cheeses can add more depth.
Yes. If you’d like to save some prep time, onion jam can be substituted for the caramelized onions. Keep in mind that the flavor and sweetness of the loaf may vary a bit depending on the onion jam you use.
Due to the sugar content of the caramelized onions, the top and bottom of the bread can brown pretty quickly, so check on it often and cover with foil if needed.
A few easy fixes to try:
-Place a layer of parchment plus a small sprinkle of flour or cornmeal under the dough to create a tiny buffer.
-Set the Dutch oven on a baking sheet to help diffuse the direct heat from the bottom element.
-Lower the temperature by 15–25°F if your oven tends to run hot.


If you tried this Caramelized Onion Sourdough Bread recipe or any other recipe on my blog, please leave a 🌟 star rating and let me know how it went in the📝 comments below. Thanks for visiting!
Caramelized Onion Sourdough Bread Recipe
Enter your email below, and we’ll send it straight to your inbox! Plus, you’ll get my newest sourdough recipes and best tips every week!
Ingredients
Caramelized Onions
- 28 grams unsalted butter 2 Tablespoons
- 15 grams olive oil 1 Tablespoon
- 380 grams Vidalia onion large
- 3 grams salt 1/2 teaspoon
Dough
- 150 grams sourdough starter 3/4 cup
- 330 grams water 1 1/4 cups + 2 Tablespoons
- 500 grams bread flour 3 1/2 cups
- 12 grams salt 2 teaspoons
- 150 grams shredded gruyere, optional 1 1/2 cups
Instructions
Prepare the Onions
- Add the unsalted butter and olive oil to a pan over medium heat.28 grams unsalted butter, 15 grams olive oil
- While the pan is preheating, thinly slice the onions. Once the butter is melted, add the onions.380 grams Vidalia onion
- Cook until the onions start to turn light brown (about 5 minutes), stirring frequently. Then, turn the heat to low, cover with a lid and continue to cook for 15 minutes, stirring occasionally.
- Add a splash of water if the onions start to stick to the bottom of the pan or turning too dark.
- Once cooked, season with salt, stir and then remove the onions from the heat. You should be left with 100g of caramelized onions.3 grams salt
- Leave the caramelized onions to cool to room temperature. Or cover them and place them in the fridge to cool quickly.
Make the Dough
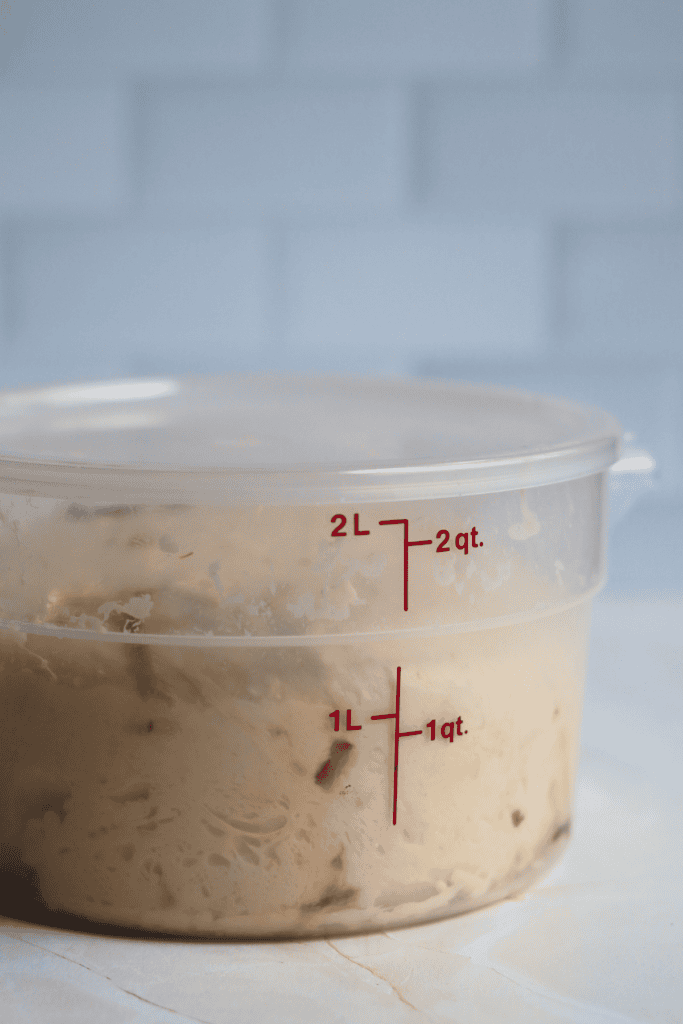
- In a straight-edged bowl, add active sourdough starter and room temperature, filtered water. Mix with a dough whisk or your hand until it looks like a milky liquid.I love using this straight-edge bowl because it clearly allows me to see when the dough is done rising.150 grams sourdough starter , 330 grams water
- To the wet ingredients, add the bread flour and salt. Be sure to mix until all of the flour is incorporated. The dough will look wet and sticky, not like a uniform dough ball.500 grams bread flour, 12 grams salt
- Cover the bowl with the cover or plastic wrap and let the dough rest for at least 30 minutes before you move on to the next step.
Stretch and Folds
- With slightly wet fingers, scrap a piece of the dough away from the bowl. Grab a section of the dough and stretch the bread dough above your bowl. Then fold over on top of the dough.
- Rotate your bowl clockwise a quarter of the way and repeat identical stretch and fold. Repeat the process until you come full circle, about 4-6 times. You will notice the dough will start to look much smoother than before.
- Cover the dough again and let it rest for another 30 minutes.
- Add a third of the caramelized onions and gruyere cheese on top of the dough, then perform the 2nd round of S&F. After a few stretches, add another third of the inclusions. After a few more stretches, add the rest of the inclusions and perform a few more S&Fs. Cover the dough and let it rest for 30 more minutes. You can add the mix-ins during any of the rounds of S&F, however, I prefer to add them during the 2nd round so that the mix-ins can continue to be incorporated during the following sets of S&F.150 grams shredded gruyere, optional
- Repeat the same stretch and folds for a total of 4 rounds with at least 30 minutes of rest in between each set. Cover the dough after each round of stretch and folds.
- Once you have completed the final set of stretch and folds, cover the dough and let it rest for the remainder of the bulk fermentation on your counter, about 3-4 more hours if the dough is kept at 70 degrees F.
Bulk fermentation
- Now this is the most finicky part of sourdough. There isn’t a set time for your bulk ferment. It is greatly dependent on the temperature of your environment and ingredients. The warmer it is, the faster your dough will ferment. The opposite is true for cooler temperatures.
- In an environment of 70 degrees, doughs will typically bulk ferment for 3-4 more hours after the stretch and folds, but again, you will have to look for the signs that your dough is done fermenting, rather than the clock. Warmer temperatures will be faster, while cooler temperatures will be slower.
- Here’s what to look for:-The dough should have increased in size by at least 75% and be domed on top.-The dough looks light, and jiggles when the bowl is shaken.-The dough should easily pull away from the bowl.-There should be visible bubbles in the dough and on top.-The dough doesn’t tear when you do a windowpane test
Pre-shape
- With slightly wet fingers, gently release the dough from the sides of the bowl. Be careful not to pop all of those lovely bubbles! Tilt the bowl and leave gravity to do the work to move the dough on the counter.
- Shape the dough by doing another round of stretch and folds until you have gone full circle.
- With a bench scraper or your hands, turn the dough upside down, so the seam is now on the counter. Cover the dough with the bowl and let it rest for 30 minutes.
- While you are waiting for the dough to rest, prepare your proofing basket. This can either be a banneton or a small mixing bowl lined with a tea towel. The purpose of this proofing basket is to keep the tight shape that you will create, so make sure you are using a standard bowl that is small enough to help keep the shape.
- Dust the banneton or the tea towel with flour (most will say to use rice flour, but I have used just regular all-purpose flour) to prevent sticking.
Final shape
- After 30 minutes of rest, flip the dough, with the seamed side up. Gently pull the bottom of the dough towards you, then fold it towards the center of the dough. Pull the right side of the dough out and fold towards the center. Repeat with the left side. Finally, stretch the top of the dough away from you and fold towards the center of the dough.
- Flip the dough over again, seam side down.
- Gently cup your hands around the dough ball. Turn the ball in a clockwise motion about a quarter turn and then softly pull the dough towards you. Do this repeatedly until you see the dough form a tighter and more round shape. Stop if the dough starts to tear.
- Carefully lay your dough into your floured proofing basket (seam side up) and cover it with a plastic bag or a shower cap.
Cold proof
- Place your proofing basket in the fridge to cold-proof for 8–72 hours.
- Placing your dough in the fridge slows down the fermentation process, which deepens the flavors of your loaf. It also gives you flexibility in when you want to bake your bread.
- But don’t wait too long! If left in the fridge for too long, your dough will over-ferment, causing the dough to not be able to rise while baking.
Score
- 30 minutes before baking, place the dough in the freezer. This helps with the scoring design.
- At the same time, place your Dutch oven in your oven and preheat to 500 degrees F. Allow the Dutch oven to preheat for at least 30 minutes.
- Place a piece of parchment paper on your workspace and gently flip the banneton upside down over the parchment paper. Since you dusted the banneton, your dough should slowly release and fall onto the parchment paper, landing in the middle with the floured side facing up.
- With a lame / razor blade or sharp knife, score a crescent moon shape on top of the dough. This is necessary for your bread to be able to expand while baking.
- Grab the corners of the parchment paper and carefully place the Caramelized Onion dough into your preheated Dutch oven and cover with the lid.
Bake
- Lower the oven to 450 degrees F and bake the bread covered for 30 minutes. Then remove the lid of the Dutch oven and continue to bake the bread for an additional 20-25 minutes with the lid off at 425 degrees F. If your crust is browning too quickly, cover the top with aluminum foil while you continue to bake.
- Once golden brown with the internal temperature at least 205 degrees F, remove the Dutch oven from your oven.
- Using the corners of the parchment paper, lift the sourdough bread out of the Dutch oven and place it onto a wire rack to cool.
- Allow your homemade bread to cool for at least 1 hour before cutting into it. (I know!! How can you possibly wait when it looks and smells so good?! But trust me, if you cut in too soon, your masterpiece will turn gummy.)
- Once the hour is up, slice into your work of art and slather on some butter and enjoy!
Notes
Tips:
- Save yourself time and caramelize the onions a day in advance. Cover and store in the fridge until ready to use.
- This recipe uses 150g of active sourdough starter instead of the usual 50g, which speeds up the bulk fermentation and means less waiting around. You can also reduce it back to 50g for a longer overnight fermentation if you prefer.
- For a same-day bake, leave the shaped sourdough to complete its second rise in the banneton, then score and bake as usual.
- Due to the sugar content of the caramelized onions, the top of the bread can brown pretty quickly, so check on it often and cover with foil if needed.
Ingredients & Substitutions
- Bread Flour — Bread flour is what I recommend for this recipe. The higher protein content builds a stronger dough that holds its structure well during fermentation. It makes for a better dough rise and crust.
- Onions — Yellow onions and Vidalia sweet onions are my top choices for this recipe. Their higher natural sugar content means they break down into a deeper golden brown and develop a sweeter, richer flavor when caramelized. White onions or red onions will work but won’t give you the same sweetness or color. If you want to save yourself some time, onion jam works as a substitute for the caramelized onions.
- Cheese – I love the cheesy flavor Gruyere Cheese brings to this sourdough bread, but you can substitute with any semi-hard cheese, like asiago, gouda or parmesan. You could even use a combination of some of your favorite cheeses. Freshly shredded cheese is best for melting.
- Sourdough Starter-A bubbly sourdough starter in this homemade bread gives you the best results. If you’re new to sourdough baking, I previously wrote a post to show you how to make your own sourdough starter from scratch.
