Sourdough Cheez Its Recipe (How to Make Homemade Crackers)
This post may contain affiliate links. Please read our disclosure policy.
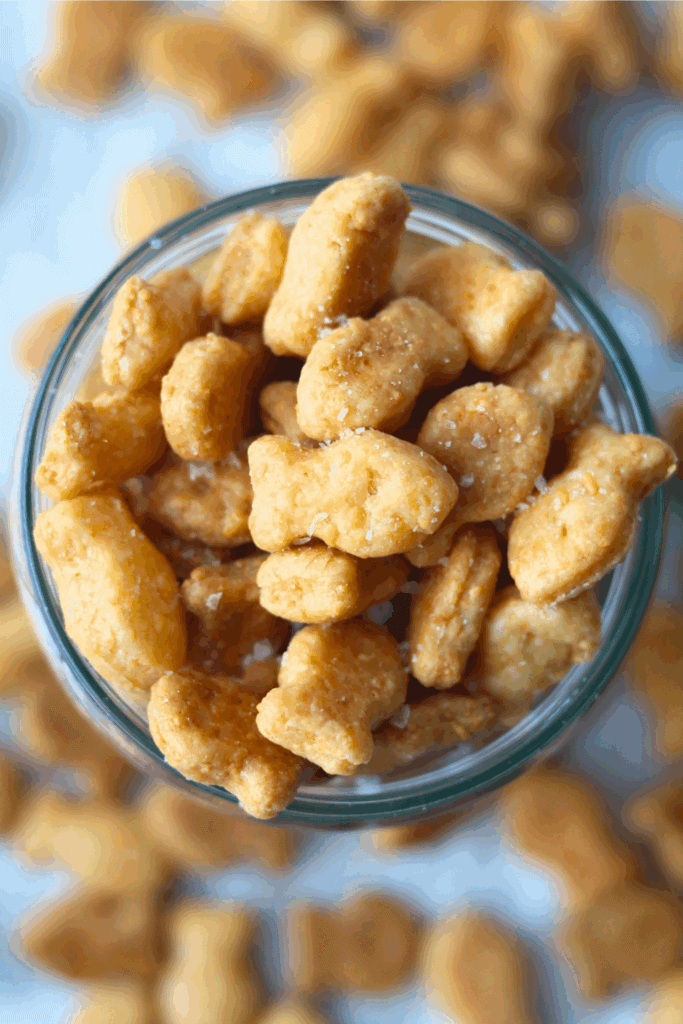
This homemade version of the classic Cheez-Its gives you little squares of cheesy, crunchy crackers, but now with the goodness of sourdough! Seriously, my whole family can’t get enough of this salty snack!
And just like my Sourdough Goldfish Crackers and Sourdough Ritz Crackers, these Sourdough Cheez Its are made with simple ingredients, they’re a breeze to whip up in the food processor and contain zero preservatives or artificial ingredients. I love that I can chill the dough ahead of time so it’s ready to roll and bake whenever I want – plus the chilling provides some extra gut-health benefits as well!
The result? Savory crackers loaded with real cheddar cheese and a subtle, pleasant tang. I bet this recipe will quickly become your family’s favorite.

MY LATEST VIDEO
Why You’ll Love This Recipe:
Here’s why I keep coming back to this simple recipe:
Wholesome ingredients and zero preservatives:
These kids-approved sourdough crackers are made from just a few pantry staples: cheddar, flour, butter, and sourdough starter. The best part is they don’t contain any preservatives or artificial flavors, so you can feel good knowing your little ones are eating real food.
After nailing these cheese-flavored sourdough crackers, try these sourdough graham crackers, these sourdough pretzel bites, or these cheesy cheddar sourdough goldfish crackers. I’ve even made whole wheat sourdough crackers, and they turned out great.
Easy-to-make, flexible recipe:
With a food processor and the recipe card below, you’ll have a batch of warm sourdough cheez-its cooling on the rack in no time. If you like fast results, the same-day recipe comes together in under 2 hours. For deeper flavor and a subtle sourdough tang, let the dough chill in the fridge overnight. You’ll wake up to the best homemade cheese crackers ever.
Sourdough starter:
This copycat cheez-it recipe relies on sourdough for a mild, distinctive flavor that sets it apart from classic cheez-its. For even more flavor and easier-to-digest crackers, try the long-fermented version. Overnight, the good bacteria in the starter continue to work, giving you irresistible crackers with a gentle tang. Here’s how I make my own sourdough starter using just filtered water and flour.
Here’s a bunch of other sourdough discard recipes if you’re curious to learn more.
Ingredients & Substitutions
* To find precise measurements, scroll to the bottom of this post to find the recipe card*
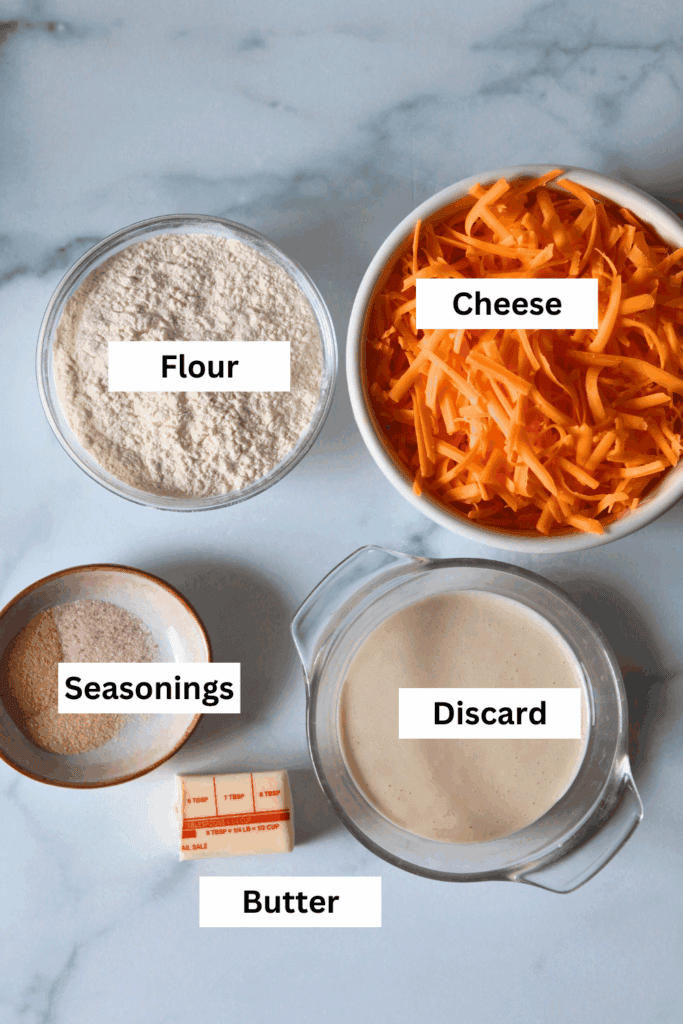
- Cheddar Cheese – For an extra cheesy bite, use sharp cheddar cheese. But feel free to add a variety of cheeses to the mix, such as parmesan cheese or asiago. Fresh cheese gives you the best flavor, so I’d skip the pre-shredded cheese if possible.
- Flour– I used all-purpose flour.
- Seasonings – Garlic powder, onion powder, and kosher salt give these crunchy crackers the perfect flavor.
- Butter – Use cold unsalted butter for the crunchiest crackers and reduce the salt by 1g (1/4 teaspoon) if you’re using salted butter.
- Sourdough Starter –You can use either an active sourdough starter or sourdough starter discard. Whichever you choose, make sure it’s the same amount in grams.
How to Make Sourdough Cheez Its
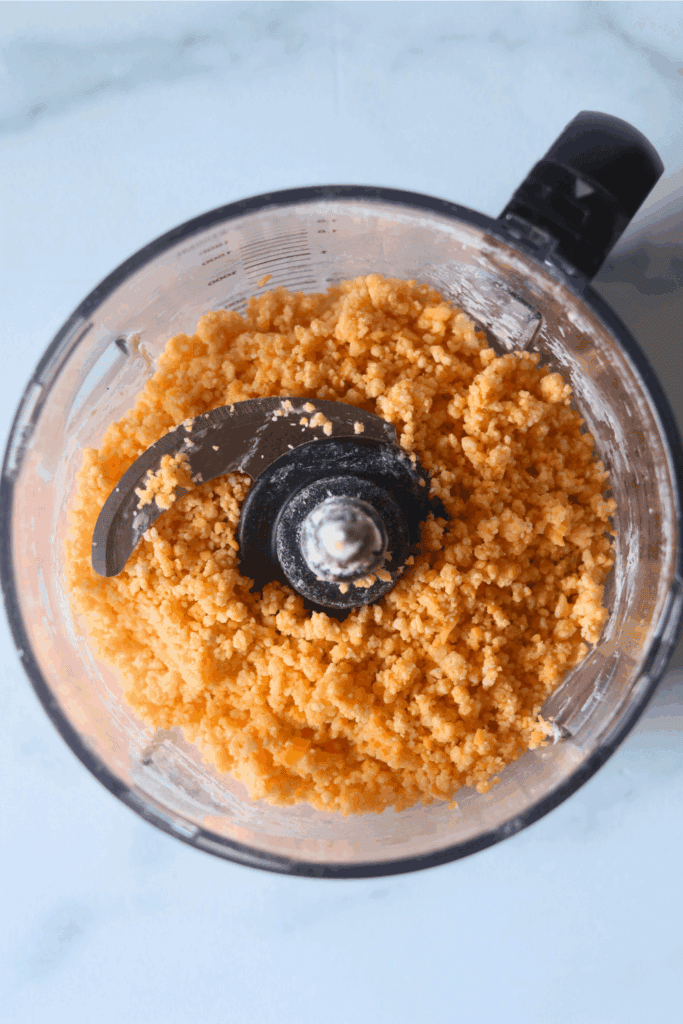
- To a bowl of a food processor, add all the ingredients except the flaky salt. Mix until a wet sand texture is formed.
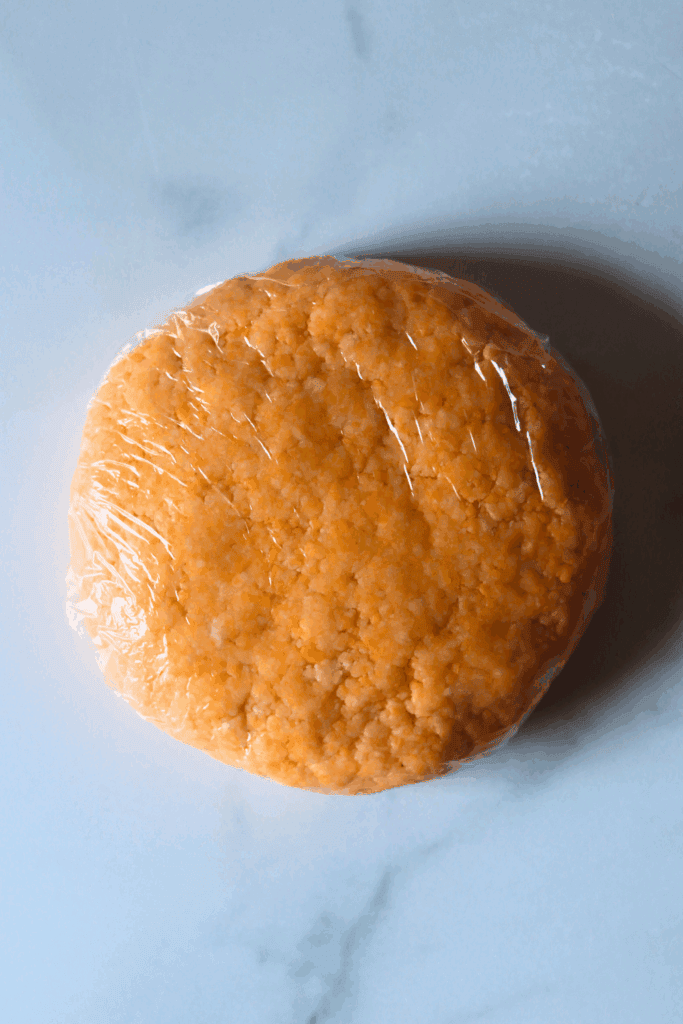
- Shape the dough into a flat disc, cover with plastic wrap, and chill for at least 30 minutes in the fridge; or store them in the fridge for up to 2 days to long-ferment.
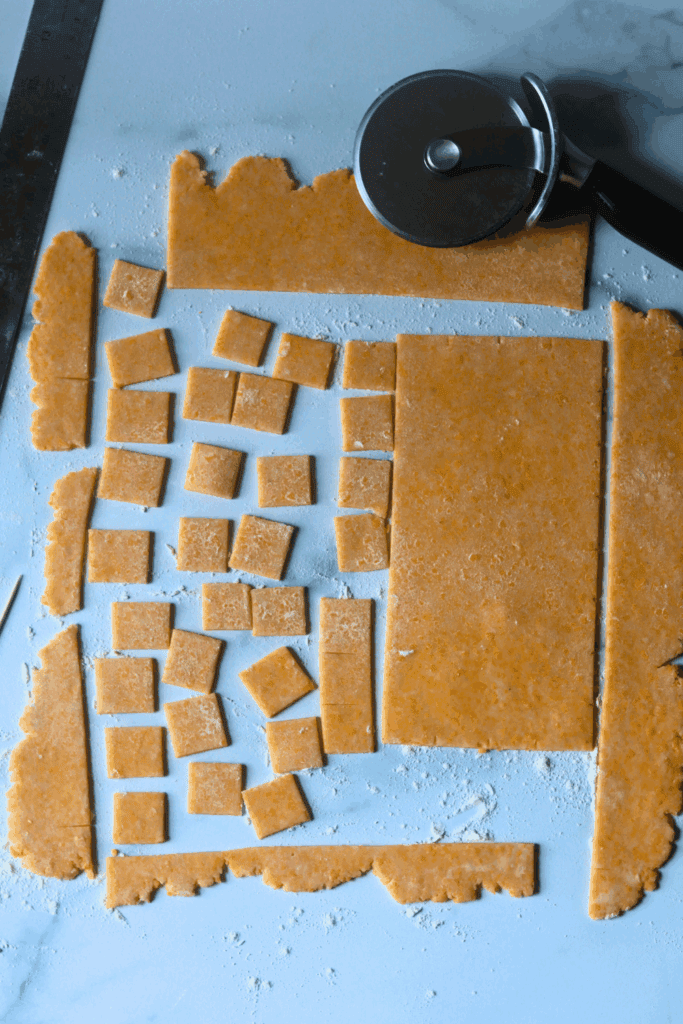
- On a lightly floured surface or a piece of parchment paper, roll the dough into a large rectangular shape that’s 1/16th of an inch thick. Use a pizza cutter or a sharp knife to cut the dough into 1-inch square-shaped pieces.
- Continue to re-roll the remaining dough until all of the crackers are cut. You’ll need to bake in batches.
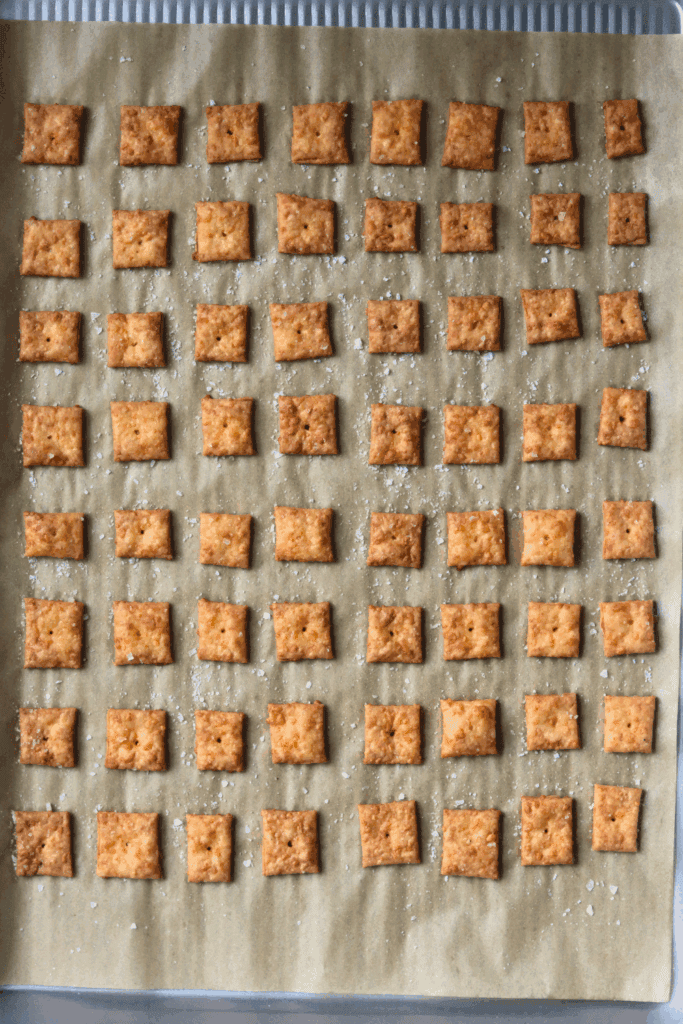
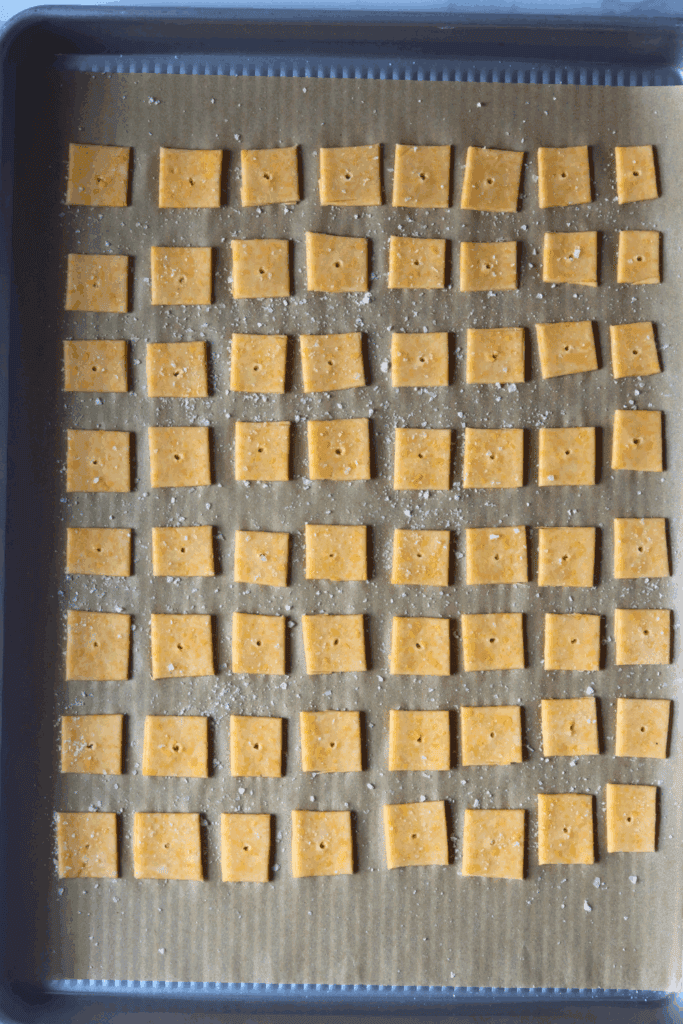
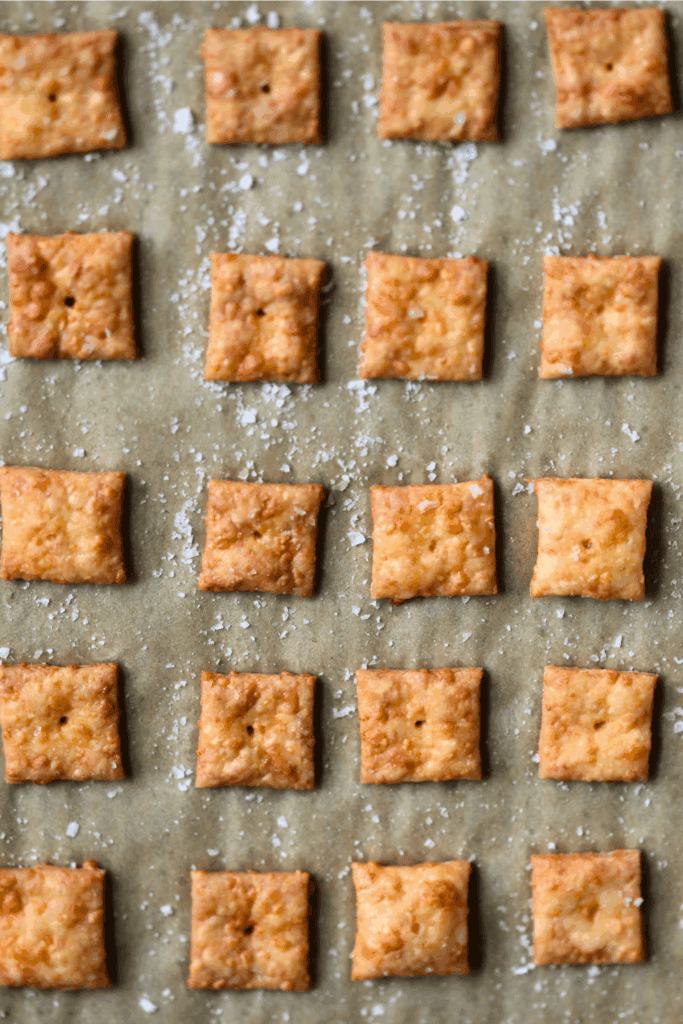
- Place the shaped cracker dough on the prepared baking sheet. Use a toothpick to poke a hole in the center of each cracker. Sprinkle the dough with flaky sea salt and bake the crackers for 15-20 minutes, or until they’re golden brown.
- Remove the crackers from the oven and cool slightly on a wire rack.
How to Store
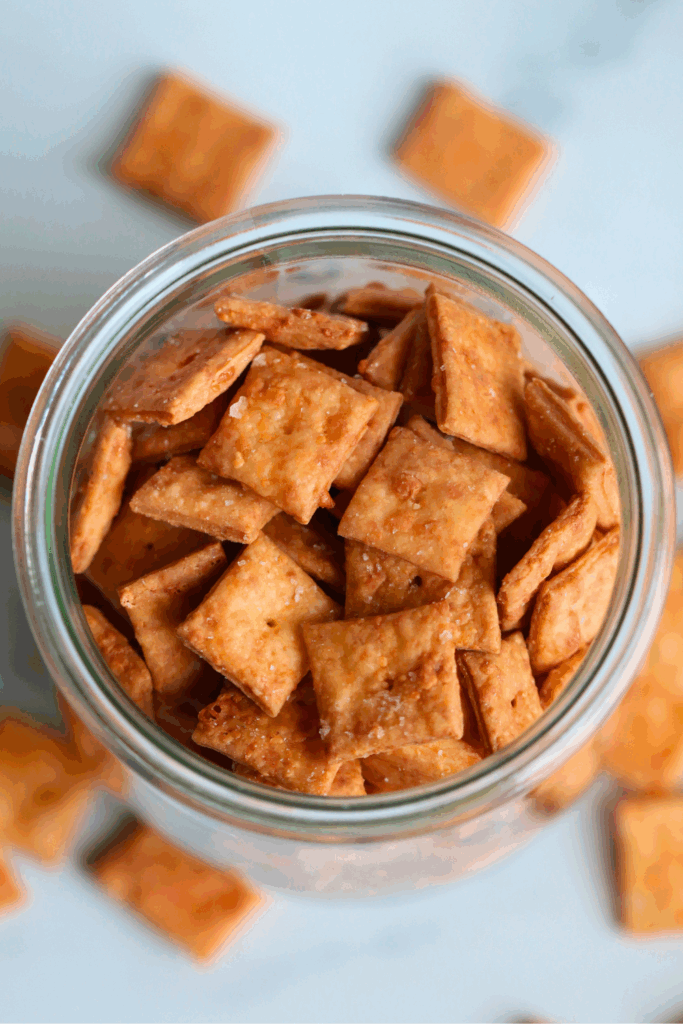
Let these sourdough discard cheese crackers cool completely, then store them in an airtight container. A glass jar with a lid works perfectly. Just fill it, seal it, and keep at room temperature in a cabinet or on the counter. They’ll stay fresh for weeks, though with little hands around, they rarely last more than a few days.
For longer storage, freeze the crackers for up to two months. After thawing, re-crisp them in a 300°F oven for a few minutes to bring back their crunch.
FAQs
Yes, an active starter can be used in the same amount by weight. I’ve found that using discard produces somewhat thinner, snappier crackers, so keep that in mind if you switch to active starter.
Thickness of the dough matters a lot. Roll the dough very thin about 1/16th of an inch thick. This thickness gives you exactly what you want: super crisp, flat crackers.
Yes. I like sharp cheddar, but any hard or semi-hard cheese should work, like parmesan, aged white cheddar, Colby, pepper jack, asiago, or even a cheese blend. I haven’t tested all of these myself, aside from parmesan and asiago, but I think they would add a slightly different flavor while still working well in the dough. Avoid fresh, high-moisture cheeses like mozzarella, which can make the dough too wet.
Yes, you can. Substitute some or all of the all-purpose flour with whole wheat. Using 100% whole wheat results in a nuttier flavor and slightly denser texture, while a mix with all-purpose keeps the crackers lighter and crispier.


Sourdough Cheez Its Recipe
Enter your email below, and we’ll send it straight to your inbox! Plus, you’ll get my newest sourdough recipes and best tips every week!
Ingredients
- 226 grams cheddar cheese, freshly shredded 8 ounces
- 100 grams sourdough discard 1/3 cup
- 42 grams unsalted butter, cold + cubed 3 Tablespoons
- 140 grams all-purpose flour 1 cup
- 1 gram garlic powder 1/4 teaspoon
- 1 gram onion powder 1/4 teaspoon
- 3 grams salt 1/2 teaspoon
- flaky salt if desired
Instructions
- To a bowl of a food processor, add all the ingredients except the flaky salt. Mix until a wet sand texture is formed. When you press a piece of the cracker dough together, it should stick to itself. It shouldn’t be dry.226 grams cheddar cheese, freshly shredded, 100 grams sourdough discard, 42 grams unsalted butter, cold + cubed, 140 grams all-purpose flour, 1 gram garlic powder, 1 gram onion powder, 3 grams salt
- Remove the dough from the food processor onto a clean work surface. Shape the dough into a flat disc, cover with plastic wrap and chill for at least 30 minutes in the fridge. You can also store the dough in the fridge for up to 2 days to long-ferment.If you long-ferment the dough, leave the dough at room-temperature for 15-20 minutes. This will help the dough be easier to roll.
- Preheat the oven to 350 degrees F and line a baking sheet with parchment paper. Set aside.
- On a lightly floured surface or a piece of parchment paper, roll the dough into a 9-inch rectangular shape that’s 1/16th of an inch thick. For the most consistent results, it is best to roll the dough as evenly as possible.
- Using a pizza cutter or a sharp knife, trim the dough to create an 8-inch square. Slice the dough into eight, 1-inch vertical strips, and then make 8 perpendicular slices, also 1-inch wide. You should be left with 64, 1-inch square-shaped pieces of cracker dough.
- Place the shaped cracker dough on the prepared baking sheet with spaces in between. Use a toothpick to dock a hole in the center of each cracker. This prevents the crackers from puffing up. Sprinkle the dough with flaky sea salt and bake the crackers for 18-22 minutes, or until they are golden brown.flaky salt
- While the first batch bakes, continue to re-roll and cut the remaining dough until all of the crackers are cut. You will need to bake in a few batches.
- Remove the baked Sourdough Cheez-It crackers from the oven and cool completely on a wire rack before serving. The crackers will become crunchier as they cool. Enjoy!
Notes
Ingredients & Substitutions
-
- Cheddar Cheese – For an extra cheesy bite, use sharp cheddar cheese. But feel free to add a variety of cheeses to the mix, such as parmesan cheese or asiago. Fresh cheese gives you the best flavor, so I’d skip the pre-shredded cheese if possible.
-
- Flour– I used all-purpose flour.
-
- Seasonings – Garlic powder, onion powder, and kosher salt give these crunchy crackers the perfect flavor.
-
- Butter – Use cold unsalted butter for the crunchiest crackers and reduce the salt by 1g (1/4 teaspoon) if you’re using salted butter.
-
- Sourdough Starter –You can use either an active sourdough starter or sourdough starter discard. Whichever you choose, make sure it’s the same amount in grams.
Tips
- For the most consistent results, it is best to roll the dough as evenly as possible.
- Don’t skip the chill time. This allows the dough to be rollable without being sticky. If you decide to long-ferment the dough, you will need to let the dough sit at room-temperature for 15-20 minutes to soften slightly.
- This recipe can easily be doubled.
- You can also freeze the dough for up to 3 months. Thaw in the fridge and allow the dough to sit at room-temperature for 15-20 minutes before rolling and baking as normal.

These were delicious!
My whole family loved them!
I want to try to make these again with Einkorn flour, do you think they would still turn out?
I’m so glad your family loved them! I haven’t personally tested them with einkorn flour, but I do think it could work. I’d probably start by substituting only part of the flour first to see how you like the result. If you try it, I’d love to hear how they turn out!
These are delicious! It’s hard to wait for them to cool before starting to eat them! Mine puffed up a little more than expected but biting into them, they still had flaky layers. Easy to make and yummy to eat!
This made me smile! A little puff can happen depending on how the dough is rolled or layered, but it sounds like they turned out just right. Thank you so much for sharing!
I must be blind because I do not see an oven tempersture?
350 degrees F
Forgot the salt on top and they are still super good and fairly easy!
I am so glad they still turned out delicious even without the extra salt on top! Thank you taking the time to leave a comment!
This turned out awesome!!! I don’t have a food processor but was able to get everything processed okay with a stand mixer and patience while creating the disc. These are going to be a staple!
That’s awesome to hear — thank you so much! ’m so glad they turned out great and that they’ll be a staple for you — thanks for taking the time to share!
What temperature do I bake them at?
350 degrees F
Thank you! I missed it in the recipe instructions and then found it! These turned out amazing and were a huge hit!
Is it possible to make these gluten free?
Great question! I haven’t tested this recipe with gluten-free flour, so I can’t guarantee results. Gluten-free flours behave quite differently, especially for crackers. If you do try it, I recommend using a 1:1 gluten-free flour blend with a binder like xanthan gum and being prepared to adjust the moisture slightly. If you give it a try, please let me know how it goes!
Fantastic!! I didn’t have sharp cheddar or flaky salt but I did have a LOT of discard that I didn’t know what to do with and enough mild raw cheddar on hand so I figured I’d give them a try with what I had and even then they were so good! My husband is requesting them every week now and my coworkers tried them and said they can’t stop thinking about them! I went and got flaky salt now so will be making them with all the ingredients and I’m sure they will be even better! This will be a snack staple for us while I struggle to manage my excess sourdough discard!
This makes me so happy to read! Thank you for taking the time to share this! Once you try them with sharp cheddar and flaky salt, you’ll get a little extra punch of flavor, but I’m thrilled to hear they’re already a weekly staple in your house. Thanks again for the kind words and for baking along with me!
Can I make this without a food processor?
Yes, you can absolutely make these without a food processor! Finely grate the cheese, then mix it with the flour and seasonings in a bowl. Cut the butter in using a pastry cutter or your fingertips until the mixture looks crumbly. Add the sourdough discard and mix just until a dough forms—be careful not to overwork it. Hope you love this recipe!
Love ‘em! Great flavor!
I roll them as thin as I possibly can—any thicker, and the final cracker can be 1/4”!
I add 1teaspoon of Tabasco to give them a little spiciness.
Great recipe!
I love this — thank you so much for sharing! Rolling them super thin really does make all the difference for that classic crispy cracker texture. And the Tabasco addition sounds amazing — such a fun way to add a little kick. I’m so glad you enjoyed the recipe and made it your own. Thanks for taking the time to leave such a great note!
Fantastic! I only had pre-shredded mild cheddar cheese on hand so that is what I used. My family thinks they are great! I will be trying these with better quality cheese and varying flavors!
Thank you so much — I’m thrilled your family loved them! Mild cheddar totally works, but you’ll definitely taste an upgrade when you try a sharper cheese. Can’t wait to hear what variations you try next!
Tried them tonight- my dough was super dry and crumbly and I couldn’t really get it to roll out? Do I need to use more sourdough starter?
Thank you for trying the recipe — I’m sorry you ran into that! If the dough is very dry and crumbly, it’s usually due to slightly too much flour or a thicker sourdough starter rather than needing more starter specifically. It’s always best to use a kitchen scale for the most precise measurements. You can add a small splash of water, 10 grams (1 teaspoon) at a time, until the dough comes together and is easier to roll. It should be soft and cohesive, not crumbly. I hope that helps for next time—I’d love to hear how they turn out if you try again!
Super cheesy and crunchy! My littles couldn’t get enough of these sourdough crackers.