Sourdough Discard Pizza Dough Recipe
This post may contain affiliate links. Please read our disclosure policy.
If you love homemade pizza but don’t always have time to wait on a long sourdough ferment, this sourdough discard pizza dough is for you. It’s based on my well-loved 100% sourdough pizza dough, but this version is ready in under 2 hours and is such a great way to use up extra discard.
The dough comes together easily in one bowl and bakes up light, airy, and chewy with crisp edges—yet sturdy enough to handle all your favorite toppings. You can make two medium pizzas, divide it into personal sizes so everyone gets exactly what they want, or prep it ahead and stash it in the fridge or freezer for busy nights!
Honestly, this is one of those recipes that makes pizza night feel doable again—no planning days ahead required.
MY LATEST VIDEO
Why You’ll Love This Sourdough Pizza Dough Recipe:
Soft, Chewy, and Crispy Crust
The crust is tender in the center with a chewy bite and a golden, crisp edge. Using bread flour or 00 flour (double zero grind) gives the dough structure while keeping it soft and stretchy. You’ll notice a similar texture in my Sourdough Pizza Dough and Sourdough Focaccia recipes.
Top It Your Way
I like to think of this dough as a blank canvas. You can top it with pre-cooked meats like sausage or chicken, and veggies like onions, peppers, or mushrooms, either raw or sautéed. This dough also works great for breakfast pizzas, like my Sourdough Breakfast Pizza!
Pizzeria-Style Pizza Right at Home
Preheating a baking stone to 500–550 degrees F gives the crust a crisp finish while the inside stays nice and soft. Using freshly shredded cheese allows it to melt evenly instead of clumping. The dough puffs and browns like a pro, giving it the appearance and texture of a pizzeria pizza.
Make-Ahead and Freezer Friendly
You can refrigerate the dough after the first rise for a few hours or up to 2 days. It also freezes well if divided into dough balls and lightly oiled before sealing in bags. This makes it super easy to have fresh homemade pizza any time you want.
Quick and Easy One-Bowl Recipe
This dough comes together in a single bowl, which means very little cleanup after and no messy counter full of ingredients.
Ingredients & Substitutions
* To find precise measurements, scroll to the bottom of this post to find the recipe card*
- Sourdough Discard – You can use fed or unfed sourdough starter. I used fresh, room temperature sourdough discard that was no more than 1-2 days old, but you can use discard that’s been sitting in your fridge for longer. It will bring a tangier flavor to the pizza crust. If using discard straight from the fridge, it’ll slow down the rise time since it is cold. Otherwise, you can swap in the same amount of active, bubbly starter, just be sure to use the same amount in grams.
- Water: Make sure the water isn’t boiling (no hotter than 120 degrees F), as this can kill the instant yeast and prevent your dough from rising.
- Instant yeast – This recipe calls for instant yeast, not active dry yeast. Active dry yeast needs to be dissolved in liquid to activate and takes longer to rise dough. Instant yeast, in contrast , can be added directly to dry ingredients, and it works much faster.
- Flour – I used bread flour for this recipe. Bread flour has a higher protein content than all-purpose flour, which gives you a chewier pizza crust. If you have it, you could also substitute the bread flour for 00 flour like Caputo flour.
- Pizza Sauce – Use your favorite store-bought pizza sauce or make some at home! We love a traditional red sauce, but we have also loved experimenting with white sauce and bbq sauce for chicken and bbq pizzas!
- Cheese – If you want the best homemade pizzas, don’t use pre-shredded cheese. This cheese is coated with an anti-caking agent which prevents the cheese from melting properly. It’s best to shred fresh cheese or top the pizzas with pieces of fresh mozzarella cheese.
- Salt – Enhances flavor and strengthens the gluten structure in the dough. It helps the crust develop a better chew and prevents the dough from tasting flat.
- Olive Oil – Helps tenderize the dough and prevents sticking during kneading and shaping. It also adds a subtle richness and helps the crust brown more evenly while baking.
- Toppings – Let your creativity shine here! My family loves topping ours with classic toppings like pepperoni and thinly sliced mushrooms, peppers and onions. Since the pizzas cook fast, you will need to use precooked meats, like pepperoni, sausage and/or chicken. If you prefer well done veggies, saute your onions and peppers beforehand.
Baking Time For Sourdough Discard Pizza Dough
|
Time |
Process |
|---|---|
|
4:00 PM |
Knead Dough |
|
4:15 PM |
First Rise |
|
5:15 PM |
Divide Dough & Second Rise |
|
5:45 PM |
Shape & Bake |
Make-Ahead/ Freezing Options:
Not ready to bake? Follow the directions below to enjoy your pizza later!
Refrigerate:
Once the dough has completed its first rise, you can cover the dough and place it in the fridge for a few hours or for up to 2 days. When ready to bake, pull the dough out of the fridge and allow it to come to room temperature and puff up. Since the dough is cold, this could take 1-2 hours.
Freezing:
After the first rise, divide the dough into 2 pieces (for two 12-inch pizzas) or into 4-6 pieces (for 8-9 inch personal pizzas) and shape into dough balls. Lightly coat the dough balls with oil and place them into individual zipped-top bags. Seal tightly and remove out all the air before storing in the freezer for up to 3 months. Thaw the frozen pizza dough in the fridge the night before. When ready to bake, pull the dough out of the fridge and allow it to come to room temperature and puff up. Since the dough is cold, this could take 1-2 hours.
How to Make Sourdough Discard Pizza Dough
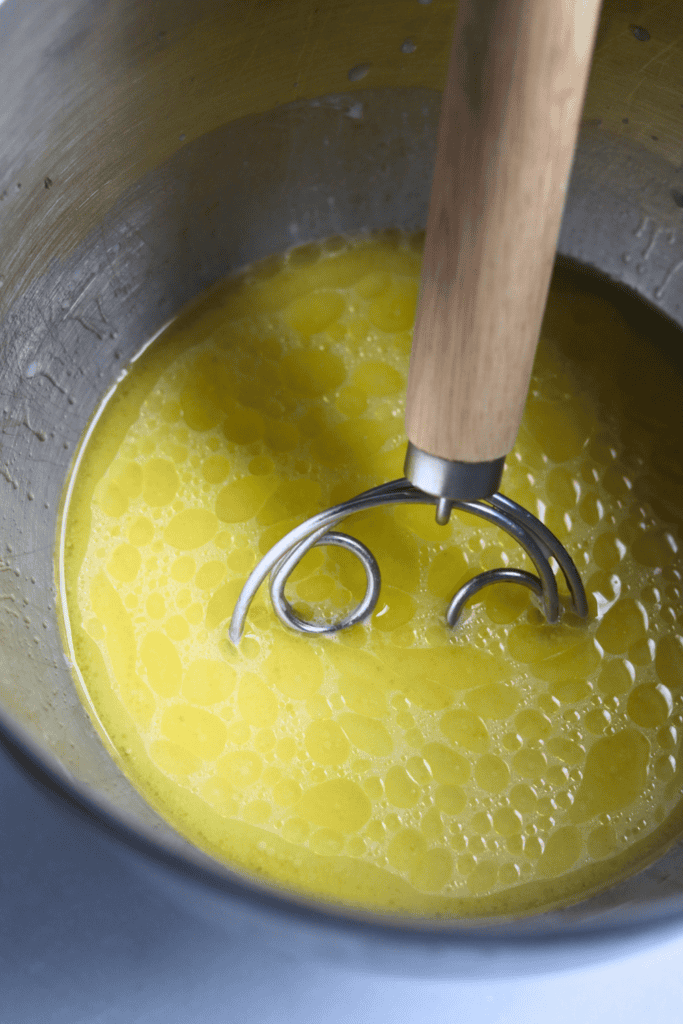
- In the bowl of a stand mixer with a dough hook, add water, sourdough discard, and olive oil. Use a Danish dough whisk to mix until fully incorporated. Add flour, instant yeast, and salt. Mix on low for about 2 minutes until a shaggy dough forms. This quick step ensures all ingredients are evenly combined before kneading.
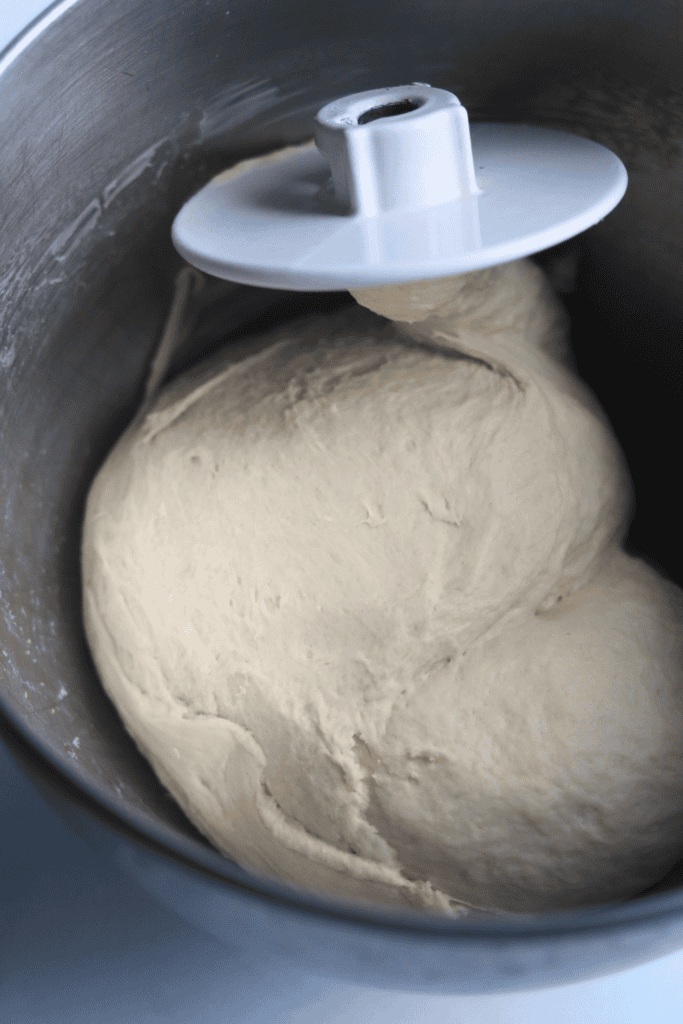
- Increase the speed to medium and knead for 6–8 minutes. The dough should pull away from the sides of the bowl and feel tacky but not sticky.
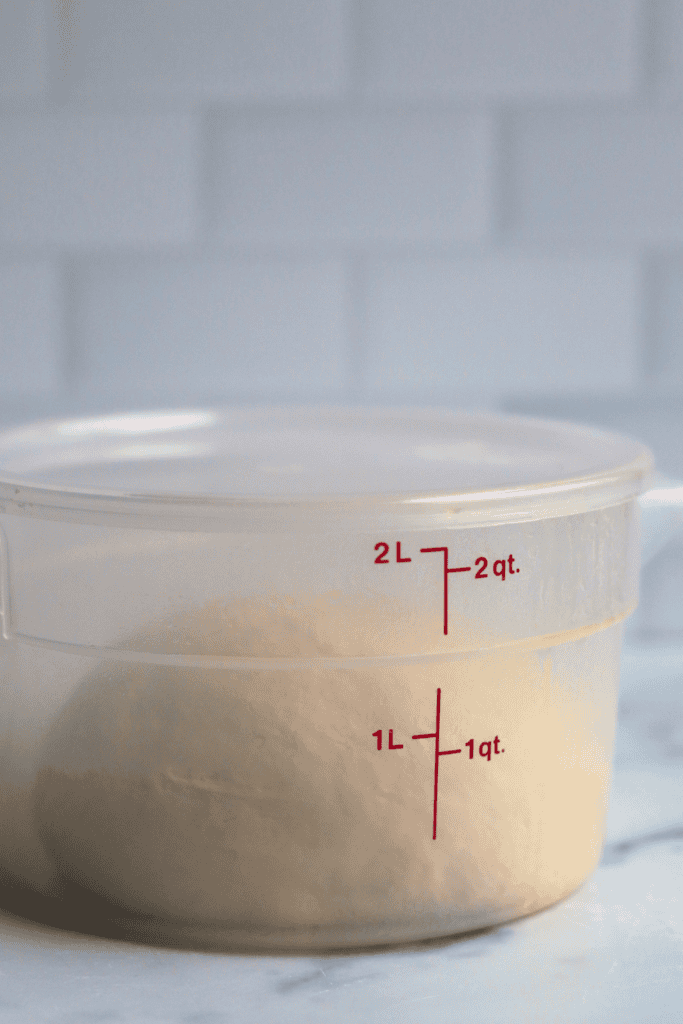
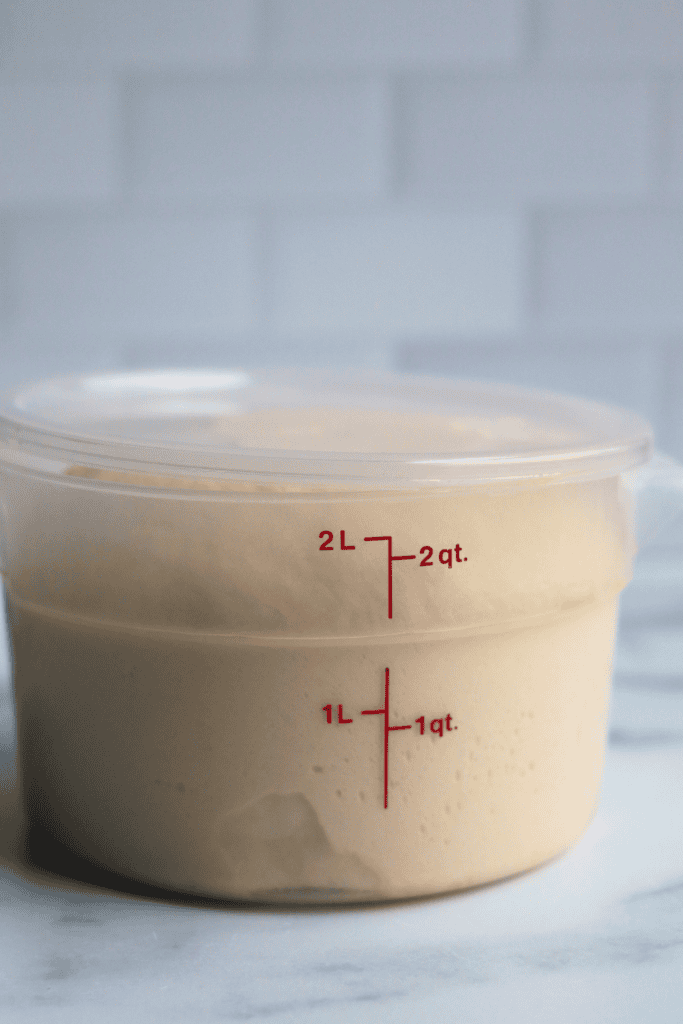
- Place the dough in a lightly greased bowl and cover. Leave it in a warm spot to double in size.
- While the dough rises, preheat a baking stone to 500–550°F for at least one hour.

- Turn the risen dough out onto a lightly floured surface. Use a bench scraper to divide the dough into 2 pieces for large pizzas or 4–6 pieces for personal pizzas. Shape each piece into a smooth dough ball by pulling the edges toward the center, pinching the seams together, and rotating clockwise to create tension. Cover the dough balls with a clean tea towel for a second rise, about 20–30 minutes.
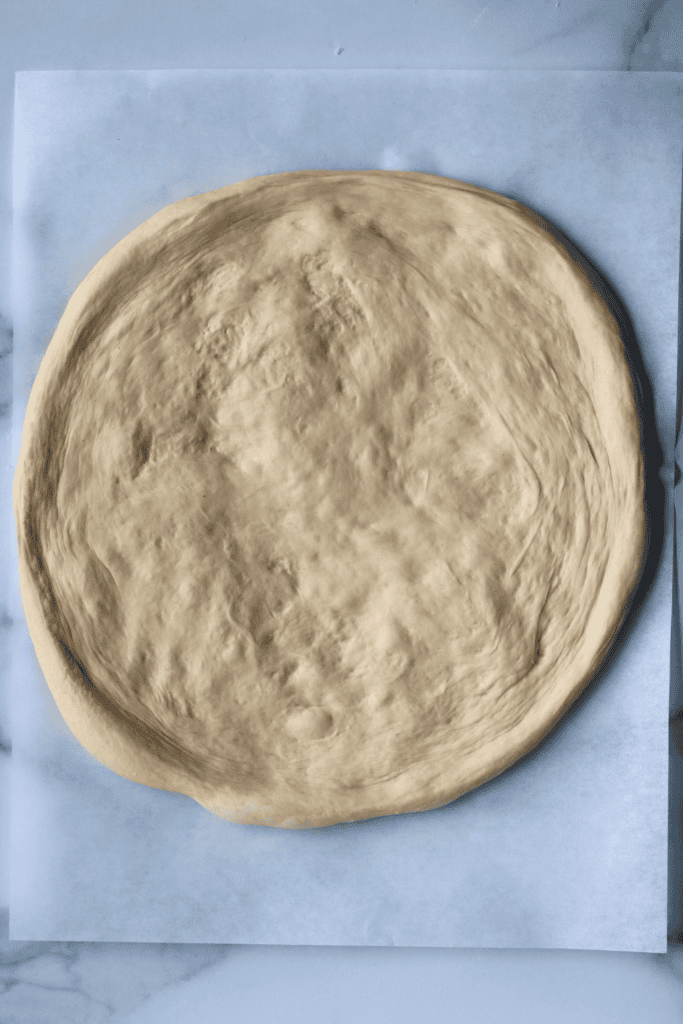
- Place one dough ball on a piece of parchment paper and gently shape it into a 12-inch round (8–9 inches for personal pizzas).

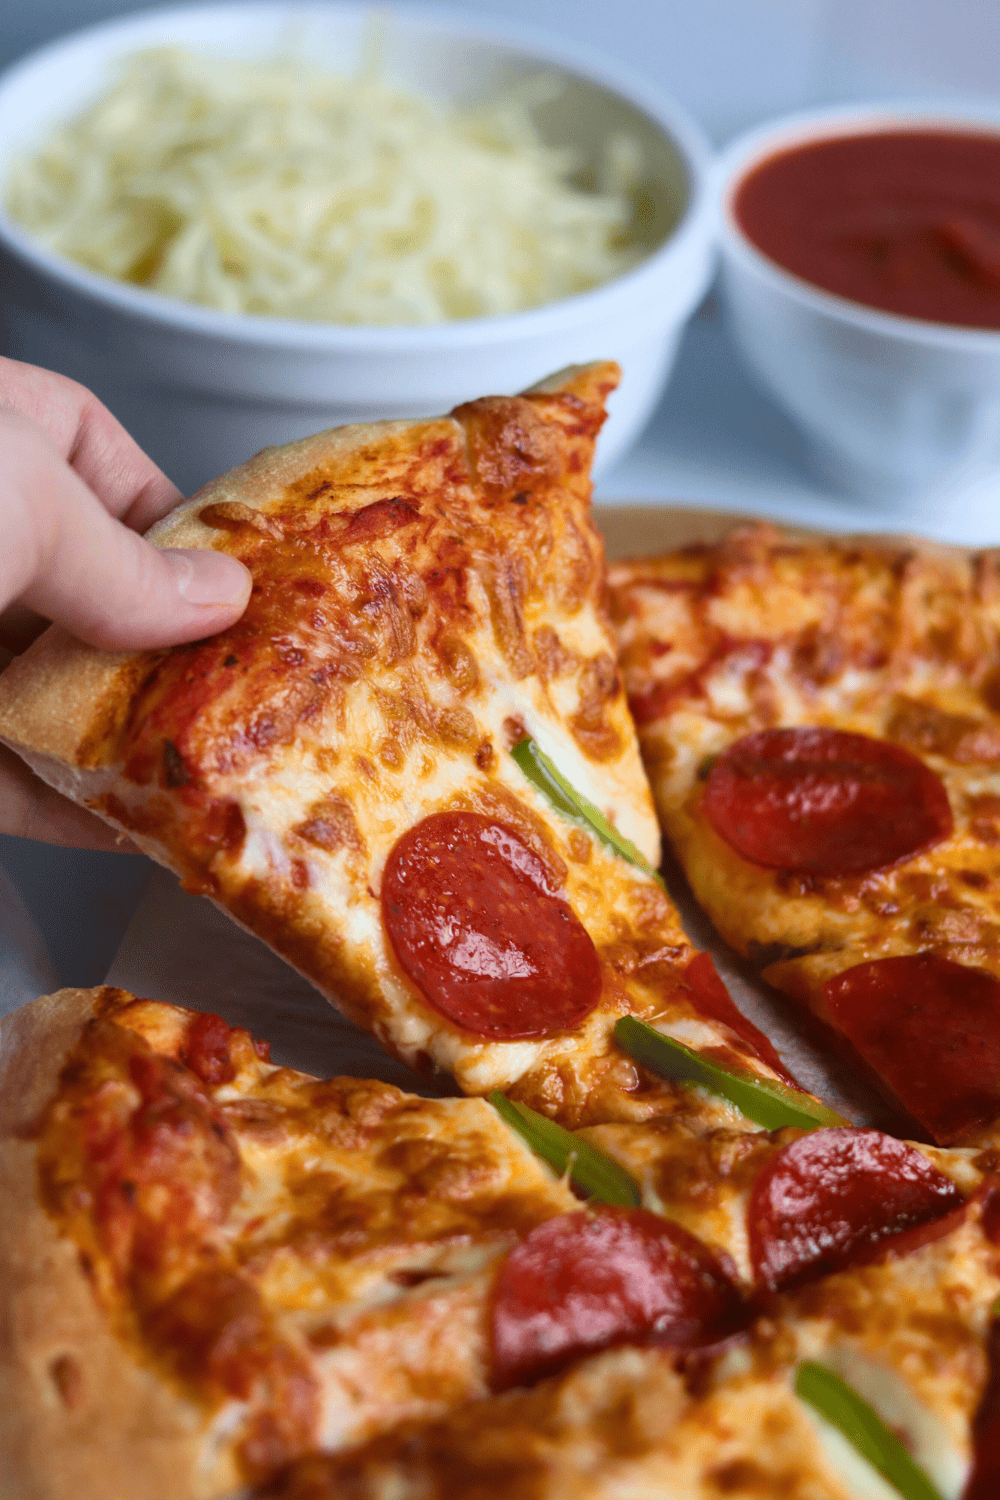
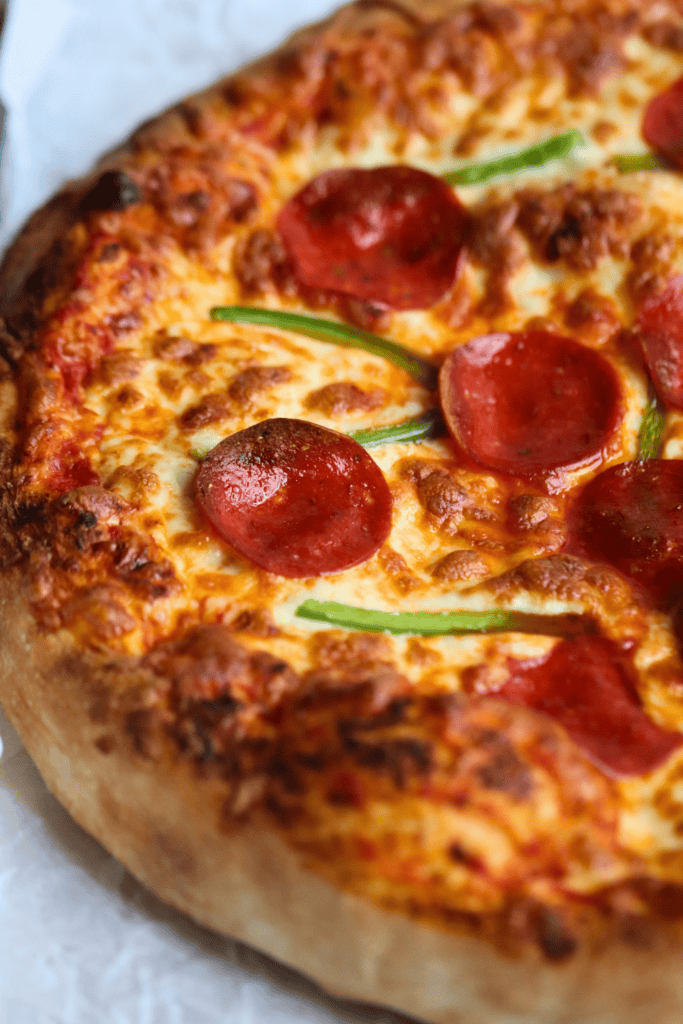
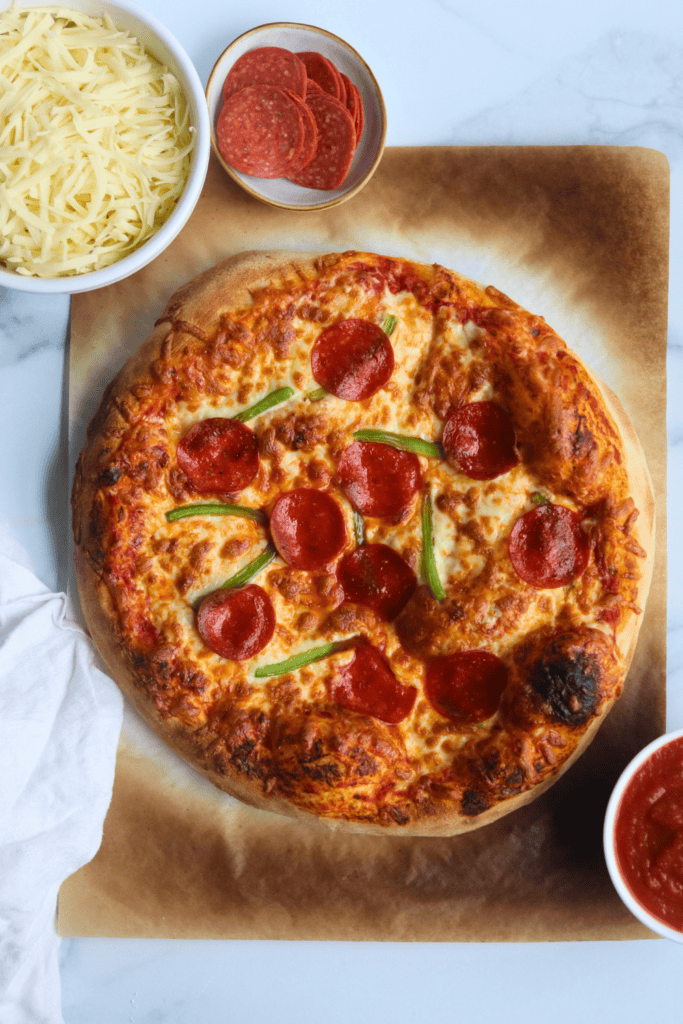
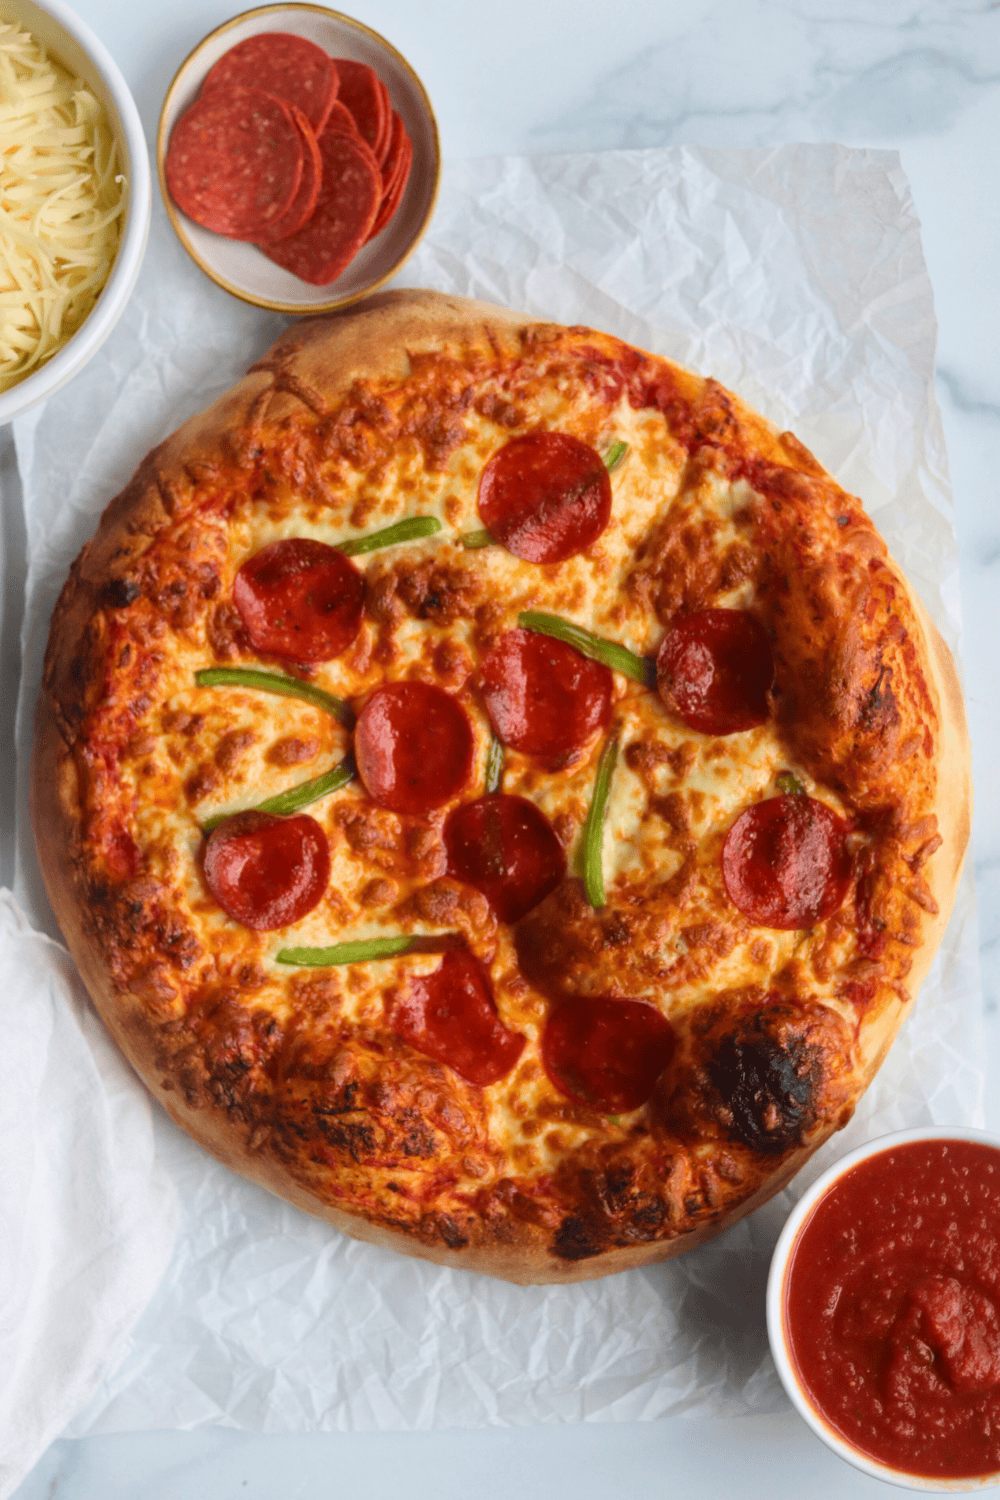
- Top with about ½ cup of sauce, 2 cups of cheese, and your favorite pizza toppings.
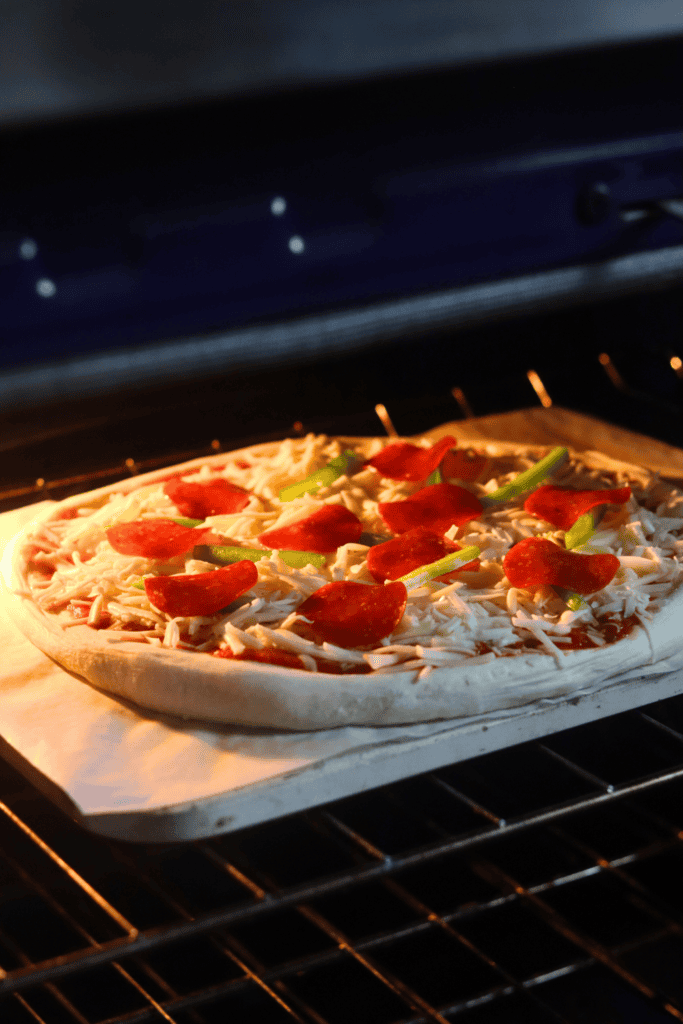
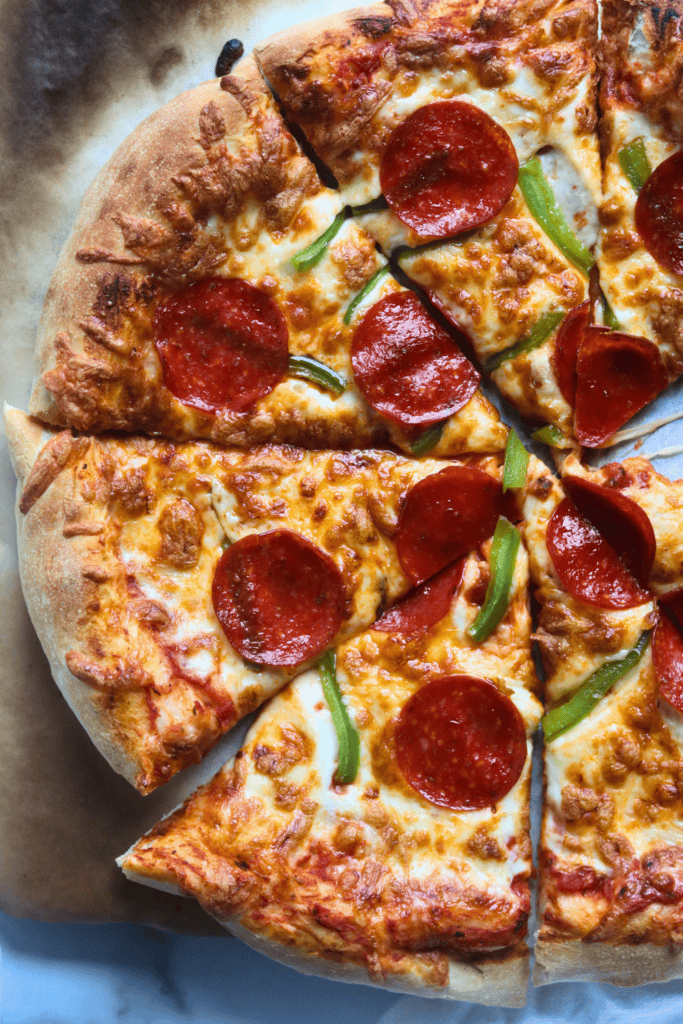
- Use a pizza peel to slide the parchment with the pizza onto the preheated baking stone. Bake 7–10 minutes, until the crust is golden brown and the cheese is fully melted.
- Carefully remove the pizza with a peel and allow it to rest a few minutes before slicing. This gives the crust time to finish setting and the cheese time to cool slightly. Serve hot and enjoy.
McKenna’s Helpful Tips
- Handle the dough gently once it’s risen – After the dough has proofed, try not to overwork it. Press it out with your fingertips instead of using a rolling pin so you don’t knock out all those air bubbles that give the crust its light, airy texture.
- Preheat your oven (and pan or stone) really well – A hot oven is key to good oven spring. If you’re using a pizza stone, steel, or even a sheet pan, let it preheat with the oven so the crust starts baking immediately when it hits the heat.
- Go easy on the toppings – This dough can handle toppings, but piling them on too heavily can weigh it down and prevent a good rise. A thin layer of sauce and evenly distributed toppings will give you the best texture.
How to Store
For short-term storage, place the dough in a lightly oiled bowl and cover tightly. Refrigerate for up to 3 days, then let it sit at room temperature for 30–45 minutes before shaping so it stretches easily. For freezing, divide the dough into individual balls, lightly coat each with oil, and place them in freezer-safe zipper bags. Be sure to press out as much air as possible, and freeze for up to 2 months. Thaw frozen dough in the refrigerator overnight, then bring it to room temperature before baking. Baked pizza is best served hot, but if you have leftovers, wrap them tightly and refrigerate for up to 3 days. Reheat in the oven or a skillet to crisp the crust back up.
FAQs
Yes, you can! Instead of a pizza stone or baking steel, you can use a 12-inch cast iron skillet. You could also cook the pizza dough on top of a baking sheet. Turn the baking sheet upside down and preheat it in the oven just like a pizza stone. Using parchment paper makes transferring the pizza easy and prevents sticking. The crust will still bake crisp on the edges and soft in the center, giving you a great pizza even without a stone.
You certainly can. After the first rise, cover the dough and refrigerate it for a few hours or up to 2 days. Cold dough takes longer to puff at room temperature, usually 1–2 hours. When ready, allow the dough to come fully to room temperature before shaping and topping. It will still bake into a soft, chewy center with a golden, crisp edge. This method also works if you plan to freeze the dough after the first rise.
Yes, you can, but active dry yeast must first be dissolved in warm water before adding it to the flour. Instant yeast can be added directly to the dry ingredients and rises faster. Dough made with active dry yeast will take longer to double in size, so timing must be adjusted. The texture may be slightly different, but the final pizza will still have a soft, chewy interior and crisp edges. Proper kneading and proofing will ensure a good crust every time.
Yes, use the same weight of starter as the discard. Fresh, active starter may rise faster, and refrigerated starter behaves like cold discard. You may need to adjust rising times slightly depending on the activity of your starter. The dough will still produce a tender interior and a golden, crisp crust. Flavor will remain slightly tangy, giving your pizza that classic sourdough taste.
Divide the dough into 4–6 pieces instead of 2 large pieces. Shape each piece into a smooth dough ball and allow a second rise under a towel for 20–30 minutes. Roll or stretch each ball into an 8–9 inch round and add your toppings. Bake for 7–10 minutes until the crust is golden and the cheese is melted. This method works well for families or when everyone wants their own toppings, and the dough bakes evenly every time.


Sourdough Discard Pizza Dough Recipe
Enter your email below, and we’ll send it straight to your inbox! Plus, you’ll get my newest sourdough recipes and best tips every week!
Ingredients
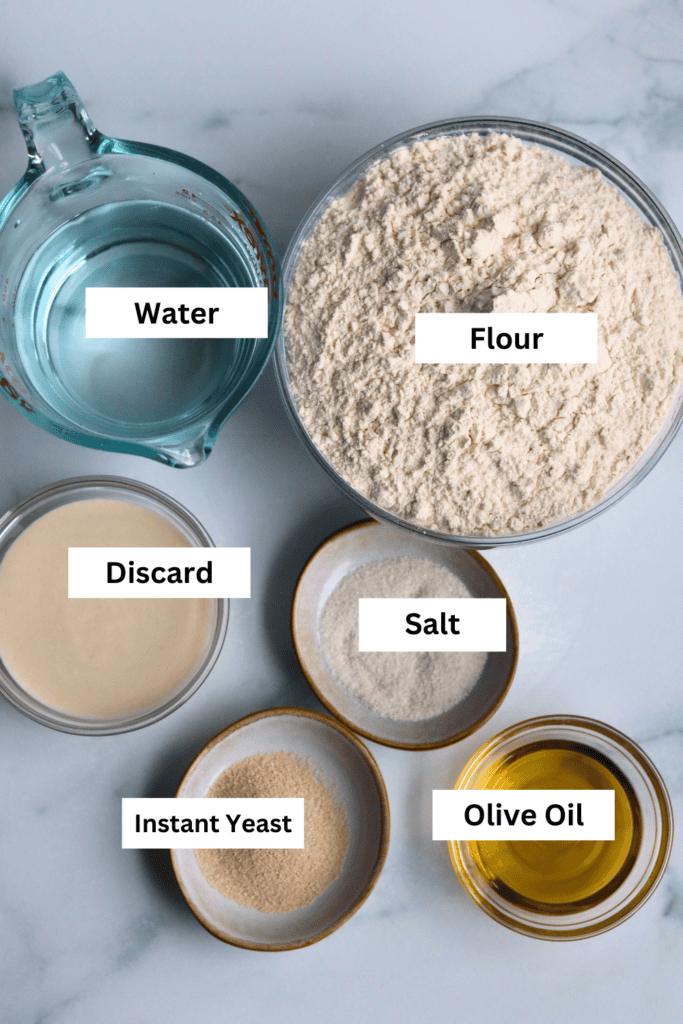
- 350 grams warm water scant 1 1/2 cups
- 100 grams sourdough discard, room temperature 1/3 cup
- 30 grams extra virgin olive oil 3 Tablespoons
- 575 grams bread flour 4 cups + 1 Tablespoon bread flour
- 7 grams instant yeast 2 teaspoon
- 10 grams salt 1 1/2 teaspoons
Instructions
Mix Dough
- In the bowl of a stand mixer with a dough hook, add the water, discard and olive oil. Use a Danish dough whisk to mix until incorporated. Add the flour, instant yeast and salt to the wet ingredients. Mix on low for about 2 minutes or until a shaggy dough forms.You can also mix and knead the dough by hand. Increase the kneading time by 5 minutes.350 grams warm water, 100 grams sourdough discard, room temperature, 30 grams extra virgin olive oil, 575 grams bread flour, 10 grams salt, 7 grams instant yeast
- Increase the speed to medium and knead the dough for 6-8 minutes more. The dough should pull away from the sides and feel tacky to the touch, but not sticky. If the dough is still sticky after being kneaded, add 15-30 grams (1-2 Tablespoons) of extra flour until the correct consistency is achieved.
- Place the dough in a lightly greased straight-edge bowl, cover and leave the dough in a warm place to double in size. In my 70 degree F kitchen, this took about 45-75 minutes.
- In the meantime, preheat your baking stone at 500-550 degrees F for at least an hour. See Notes below for alternative baking methods.
- Once the dough has doubled in size, pour the dough out on a work space that has been lightly dusted with flour. See Notes below for Make-Ahead and Freezing options.
- Using a bench scraper, divide the dough into 2 for two large pizzas (12-inches) or 4-6 pieces (8-inches) for personal-sized pizzas. Shape the pieces of dough into dough balls. To do so, pull the edges of the dough towards the center and pinch the seams together with your fingers. Turn the dough to be seam-side dough, then cup your hands on the sides of the dough, tucking the dough under and turning it clock-wise. This creates tension and a smooth ball shape. Repeat with the remaining pieces of dough.
- Cover the dough balls with a clean tea towel to puff up for its second rise. In my 70 degree F kitchen, this took about 20-30 minutes.
- Place one dough ball on a piece of parchment paper and carefully shape the dough into a 12-inch round (8-9 inch round for personal pizzas). If the dough feels tight and is resisting being shaped, leave it to rest for 5-10 minutes more. The gluten may need to relax a little more. If the dough rips, just press it back together. For 12-inch pizzas, top with about ½ cup of sauce, 2 cups of cheese and your favorite toppings.
- Slide the piece of parchment paper with the pizza on top of a pizza peel, then carefully slide the parchment paper onto the pizza stone. Bake for 7-10 minutes, or until the crust is golden brown and the cheese is melty.While the first pizza bakes, shape and prepare your next pizza!
- Use the pizza peel again to carefully remove the pizza from the oven. Wait a few minutes before slicing into pieces. Repeat the same process with the second pizza. Serve hot and enjoy!
Notes
Make-Ahead/ Freezing Options:
Not ready to bake? Follow the directions below to enjoy your pizza later! Refrigerate: Once the dough has completed its first rise, you can cover the dough and place it in the fridge for a few hours or for up to 2 days. When ready to bake, pull the dough out of the fridge and allow it to come to room temperature and puff up. Since the dough is cold, this could take 1-2 hours. Freezing: After the first rise, divide the dough into 2 pieces (for two 12-inch pizzas) or into 4-6 pieces (for 8-9 inch personal pizzas) and shape into dough balls. Lightly coat the dough balls with oil and place them into individual zipped-top bags. Seal tightly and remove out all the air before storing in the freezer for up to 3 months. Thaw the frozen pizza dough in the fridge the night before. When ready to bake, pull the dough out of the fridge and allow it to come to room temperature and puff up. Since the dough is cold, this could take 1-2 hours.Can I make this Sourdough Pizza without a Pizza Stone?
Yes, you can! Instead of a pizza stone or baking steel, you can use a 12-inch cast iron skillet. You could also cook the pizza dough on top of a baking sheet. Turn the baking sheet upside down and preheat just like the baking stone.Ingredients & Substitutions
- Sourdough Discard – You can use fed or unfed sourdough starter. I used fresh, room temperature sourdough discard that was no more than 1-2 days old, but you can use discard that’s been sitting in your fridge for longer. It will bring a tangier flavor to the pizza crust. If using discard straight from the fridge, it’ll slow down the rise time since it is cold. Otherwise, you can swap in the same amount of active, bubbly starter, just be sure to use the same amount in grams.
- Water: Make sure the water isn’t boiling (no hotter than 120 degrees F), as this can kill the instant yeast and prevent your dough from rising.
- Instant yeast – This recipe calls for instant yeast, not active dry yeast. Active dry yeast needs to be dissolved in liquid to activate and takes longer to rise dough. Instant yeast, in contrast , can be added directly to dry ingredients, and it works much faster.
- Flour – I used bread flour for this recipe. Bread flour has a higher protein content than all-purpose flour, which gives you a chewier pizza crust. If you have it, you could also substitute the bread flour for 00 flour like Caputo flour.
- Pizza Sauce – Use your favorite store-bought pizza sauce or make some at home! We love a traditional red sauce, but we have also loved experimenting with white sauce and bbq sauce for chicken and bbq pizzas!
- Cheese – If you want the best homemade pizzas, don’t use pre-shredded cheese. This cheese is coated with an anti-caking agent which prevents the cheese from melting properly. It’s best to shred fresh cheese or top the pizzas with pieces of fresh mozzarella cheese.
- Salt – Enhances flavor and strengthens the gluten structure in the dough. It helps the crust develop a better chew and prevents the dough from tasting flat.
- Olive Oil – Helps tenderize the dough and prevents sticking during kneading and shaping. It also adds a subtle richness and helps the crust brown more evenly while baking.
- Toppings – Let your creativity shine here! My family loves topping ours with classic toppings like pepperoni and thinly sliced mushrooms, peppers and onions. Since the pizzas cook fast, you will need to use precooked meats, like pepperoni, sausage and/or chicken. If you prefer well done veggies, saute your onions and peppers beforehand.

Made this tonight in our pizza oven. Didn’t change a thing. Fabulous crust.
So glad you enjoyed this recipe!
This made an excellent dough, but for thin crust lovers, you can probably get at least 4 12-inch pizzas from this recipe! I used part bread flour and part 00 pizza flour, so maybe that’s why it was so thick, but the flavor was really good. I also let it sit in the fridge overnight and took it out to warm up before shaping. I used two 12-inch cast iron preheated pans. I think I’ll try it again and maybe freeze half, because this does go a long way!
I love this feedback — thank you so much! And you’re absolutely right, if you’re going for a thinner crust you can definitely stretch it into more pizzas. Thanks for sharing your experience and tips! 🍕🤍
I made this 2/15/26 and omg it’s so good. Unfortunately I made mine a little overproofed but its still so delicious. It also doesn’t get hard when stored away it stays soft.
I’m so glad you loved it — thank you so much! I love hearing that it stayed soft after storing too — that’s such a win! Thanks for sharing your experience.
I’ve used many different pizza dough recipes, often with mixed results. This is one of the best I’ve used- quick and easy, good rise and flavor. I made three pizzas- had one the day I made it and put two in the fridge. Excellent rise with the cold proofed pizzas, too. This will be a regular go-to pizza dough recipe for me.
Wow, thank you so much for this amazing feedback! It truly means a lot, especially coming from someone who has tried so many pizza dough recipes. I’m so glad you loved the flavor and rise — and I love hearing that it worked well both same-day and with a cold proof.
Thank you for taking the time to share, and I’m honored it’s earned a spot as a regular go-to in your kitchen!
This is my family’s go-to recipe when we want pizza night fast! The dough is light, airy and so easy to prep.