The Best Sourdough Sandwich Bread Recipe (Soft & Fluffy)
This post may contain affiliate links. Please read our disclosure policy.
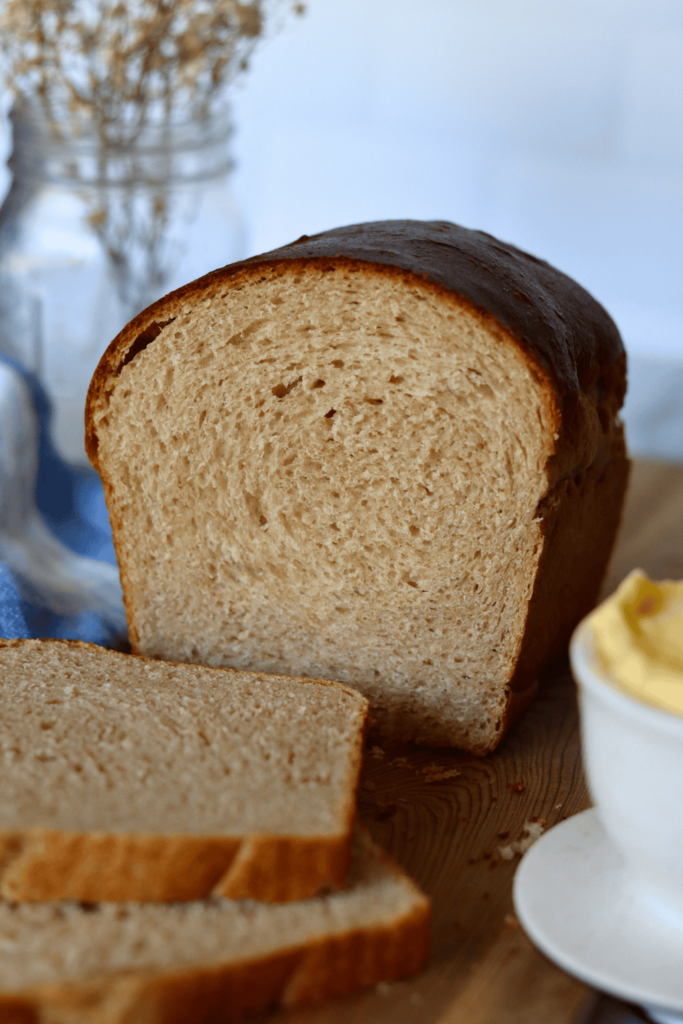
This Sourdough Sandwich Bread is the kind of everyday loaf I make again and again because it’s incredibly soft, fluffy, and completely naturally leavened with 100% sourdough starter. It has that perfect balance of flavor and texture that works for everything from toast in the morning to sandwiches packed for lunch.
Even though it’s fully fermented, the dough is simple to work with and bakes up beautifully every time. And if you’re short on time, my Easy Sourdough Discard Sandwich Bread Recipe is a great quicker option that’s ready to bake in just 2 hours.

Quick Look: Sourdough Sandwich Bread
- Prep Time: 10 minutes
- Rise Time: 12 hours
- Bake Time: 40 minutes
- Total Time: 12 hours 50 minutes
- Servings: 1 loaf
- Calories: ~ kcal per serving (based on nutrition panel)
- Cook Method: Baked
- Flavor Profile: Soft, fluffy, and lightly sweet with a subtle sourdough tang. Perfect for toasting at breakfast or building your favorite sandwich.
- Difficulty: Intermediate — A 100% sourdough loaf with a long bulk fermentation and two rises, but mostly hands-off and very beginner-friendly!
SUMMARIZE & SAVE THIS CONTENT ON
Why You’ll Love This Sourdough Sandwich Bread Recipe
- No Fancy Equipment Required: For the best results all you need is a tin loaf pan to bake a delicious loaf of bread. No fancy challenger bread pan or Le Creuset Dutch Oven is needed here. This makes it incredibly accessible, just like my Sourdough Discard Focaccia Recipe which bakes right in a 9×13 pan.
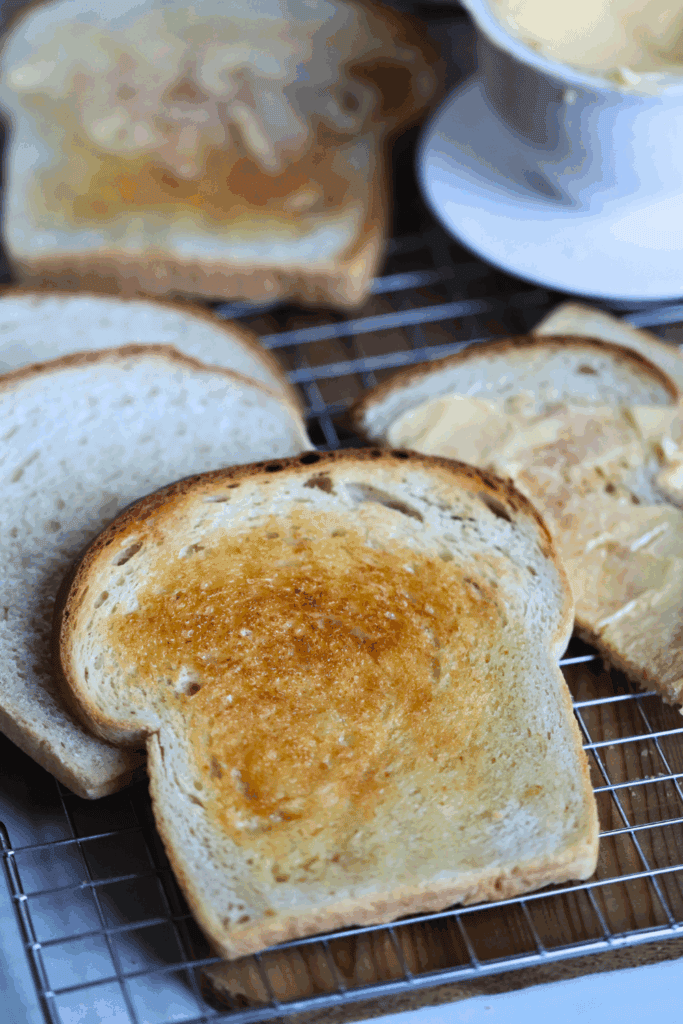
- Delicious and Soft Sourdough Bread: This sourdough sandwich bread recipe gives you soft and incredibly delicious bread with a beautiful crust. It will be the easiest swap, no one will notice the difference between this homemade bread and store-bought! It’s perfect for making a Crispy Sourdough Grilled Cheese Sandwich.
- Bare Minimum of Kneading: Only 20 seconds of kneading is required, that’s all! Can this recipe get simpler than that? Plus, I’ve included two baker’s schedules with step-by-step instructions. One schedule will even give your fresh bread all in one day. If you love simple kneading, you’ll also enjoy my Soft Whole Wheat Sourdough Sandwich Bread Recipe.
Ingredients & Substitutions
* To find precise measurements, scroll to the bottom of this post to find the recipe card*
- Active Sourdough Starter – No commercial yeast is needed for this recipe! Your active starter will do all the work to give you that soft and chewy slice of sandwich bread.
- Warm Water – Make sure that the water isn’t boiling, no hotter than 120 degrees F. This can kill your sourdough starter, causing the dough not to rise and instead be dense.
- Unsalted Butter, melted – Adding butter to this recipe makes this everyday bread so soft. You can substitute for a 1:1 ratio with olive oil if preferred.
- Sugar – For some sweetness and color! While the bread bakes, the crust will turn golden brown due to the Maillard reaction.
- Bread Flour – Bread flour has a higher gluten count, which helps this homemade sourdough bread keep its shape.
- All-Purpose Flour – Incorporating some white flour keeps the bread nice and soft.
- Salt – To enhance the overall flavor of the bread.
Bake the Same Day
|
Time |
Process |
|---|---|
|
9:00 AM |
Make the Dough |
|
10:00 AM |
Knead the Dough |
|
10:00 AM |
First Rise |
|
7:00 PM |
Shape |
|
7:00 PM |
Second Rise |
|
9:00 PM |
Bake |
Bake the Next Day
|
Time |
Process |
|---|---|
|
9:00 PM |
Make the Dough |
|
10:00 PM |
Knead the Dough |
|
10:00 PM |
First Rise |
|
NEXT DAY |
|
|
7:00 AM |
Shape |
|
7:00 AM |
Second Rise |
|
9:00 AM |
Bake |
How to Make Sourdough Sandwich Bread in a Loaf Pan:
- In a large mixing bowl, whisk together the starter, warm water, melted butter, and sugar. Add the flour and salt to the wet ingredients and mix with a Danish dough whisk until all the flour has been incorporated. The bread dough will be shaggy and a little sticky.
- Cover the bowl with a damp tea towel, a tied plastic bag, or plastic wrap. Let the dough rest for 30 minutes to an hour to allow the gluten to relax a little bit.


- First, wet your fingers so the dough doesn’t stick to them. Then, take a piece of the bread dough and pull it upwards.

- Then fold it towards the center of the dough. Push the heel of your hand into the dough.

- Turn the bowl clockwise a quarter turn and repeat the same motion. Continue to knead the dough for about 20 seconds. The dough should become more stiff and smooth looking. Grease another bowl with butter and place the dough with the seam side down

- Cover the bowl again and let the dough rise till doubled in size. The bulk rise will take anywhere from 8-10 hours.
- Once the dough has doubled in size, remove the bowl cover and punch the dough. Do so by placing your fist in the center of the dough and pushing it downwards. Punching the dough helps to release all the air bubbles. This creates a tighter crumb that you want for sandwich bread.

- Using a bench scraper, gently lift the sourdough bread dough and place it into a greased 9 x 5-inch (23 x 13 cm) loaf pan with the seam side down. Cover the dough for the final rise. This should only take 1-2 hours, or until the dough is 1″ above the rim of the pan.

- Preheat your oven to 375 degrees F. Place the pan in the hot oven on the middle rack and bake for 50-55mins.

- Remove from the oven and place the bread pan on a wire rack. Keep the pan loaf in the tin pan for an extra 5 minutes before removing it to cool.
- While it is still warm, melt butter all over the top of the bread for a super soft crust.
Cool for at least 1 hour before slicing.
McKenna’s Helpful Tips
- Create extra steam for a soft crust: To prevent the crust from tearing, place a cast iron skillet or baking sheet on the bottom rack with a cup of ice cubes while the bread bakes. This steam keeps the surface soft, allowing the bread to expand fully.
- Butter the top while warm: For an extra soft and delicious crust, melt butter all over the top of the bread immediately after removing it from the oven.
- Let it cool completely: Always cool your loaf for at least 1 hour on a wire rack before slicing. Cutting into hot bread can make the crumb gummy. If you’re new to sourdough baking, check out my Sourdough for Beginners guide for more essential tips.
- Freeze for later: This bread freezes beautifully! Once completely cooled, slice it up and store the pieces in a gallon-sized ziplock bag with small pieces of parchment paper between the slices so they don’t freeze together. Then you can just pop a slice in the toaster for The Best Easy Sourdough French Toast anytime!
How to Store
This sourdough sandwich bread will stay fresh for 3-5 days when stored in a plastic bag.
My favorite way of storing this bread is actually by freezing it. Once the bread has cooled completely, I will slice it up and store the pieces in a gallon-sized ziplock bag. I also like to place small pieces of parchment paper in between the slices so they don’t freeze together.
To refresh, I will either pull out some slices and bring them to room temperature or pop them into the toaster. Super simple, but still super tasty!

The Best Sourdough Sandwich Bread FAQs
A gummy line at the bottom of sourdough sandwich bread is usually caused by slight underproofing or underbaking. To prevent this, make sure the dough is fully risen and puffy before baking and allow the loaf to bake until the internal temperature reaches 200–205°F.
If the side of your sourdough sandwich bread exploded during baking, the dough was likely slightly underproofed. As the loaf rapidly rose in the oven, it burst through a weaker area of the dough instead.
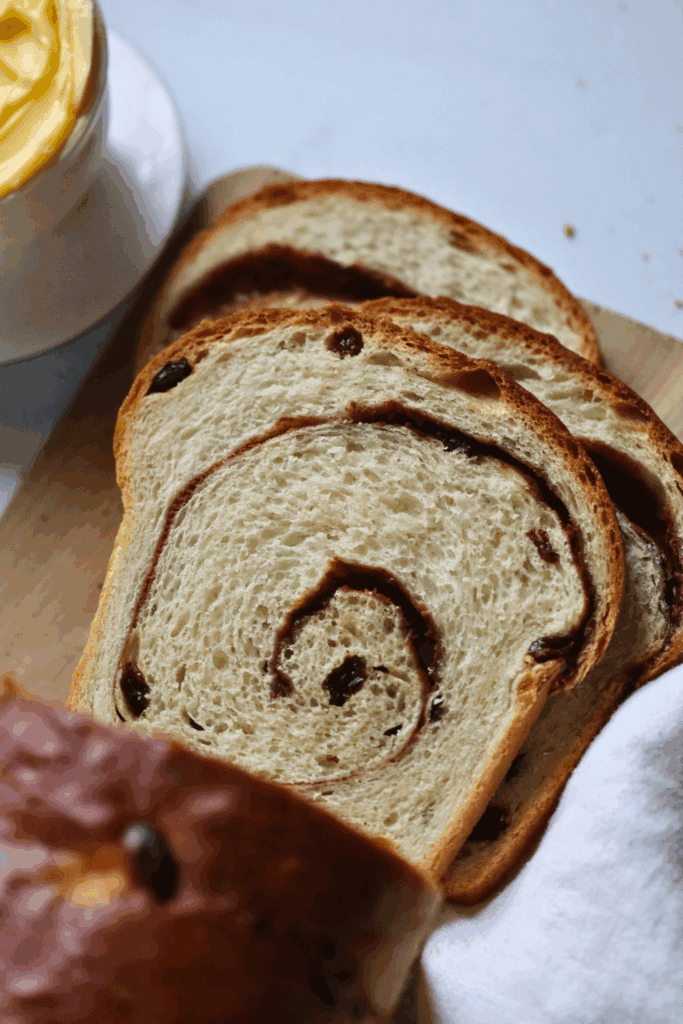
Though you can skip the sugar in this sourdough sandwich bread, if recommend keeping it because it helps keep the loaf stay soft, tender, and fresh for longer while also encouraging better browning during baking. If you prefer, you can substitute the sugar with the same amount (by grams) of honey! If you’re looking for an even sweet loaf, check out my Cinnamon Raisin Swirl Sourdough Sandwich Bread recipe!

If you tried this Sourdough Sandwich Bread recipe or any other recipe on my blog, please leave a 🌟 star rating and let me know how it went in the📝 comments below. Thanks for visiting!
FULL RECIPE TUTORIAL
Sourdough Sandwich Bread Recipe
Enter your email below, and we’ll send it straight to your inbox! Plus, you’ll get my newest sourdough recipes and best tips every week!
Ingredients
- 65 grams active sourdough starter heaping 1/4 cup
- 300 grams warm water 1 1/3 cups
- 57 grams unsalted butter, melted 4 Tablespoons
- 25 grams white sugar 2 Tablespoons see notes*
- 400 grams bread flour 2 3/4 cups + 1 Tablespoon
- 100 grams all-purpose flour 3/4 cup
- 9 grams salt 1 1/2 teaspoons
Instructions
Make the Dough
- In a large mixing, whisk together the starter, warm water, melted butter, and sugar. The water and butter shouldn't be hotter than 110 degrees F, otherwise this can kill the starter. For the best results, use a kitchen scale and measure ingredients by grams.65 grams active sourdough starter, 300 grams warm water, 57 grams unsalted butter, melted, 25 grams white sugar
- Add the flour and salt to the wet ingredients and mix with a Danish dough whisk or your hand until all the flour has been incorporated. The bread dough will be shaggy and a little sticky.400 grams bread flour, 100 grams all-purpose flour, 9 grams salt
- Cover the bowl with plastic wrap or a reusable shower cap. Let the dough rest for 30 minutes to an hour to allow the gluten to relax a little bit.
Knead the Dough
- First, wet your fingers so the dough doesn't stick to them. Then, take a piece of the bread dough, pull it upwards, and fold it towards the center of the dough. Push the heel of your hand into the dough.
- Turn the bowl clockwise a quarter turn and repeat the same motion. Continue to knead the dough for about 20 seconds. The dough should become more stiff and smooth looking and feel tacky to the touch.
- Grease a straight edge mixing bowl with butter and place the dough with the seam side down.I love using this straight-edge bowl because it allows me to clearly see when the dough has doubled in size.
Bulk Fermentation
- Cover the bowl again and let the dough rise till doubled in size. In my kitchen at 70 degrees F, the bulk rise will takes anywhere from 8-10 hours. If your kitchen is warmer, it will take less time. Check often and look for signs that your dough is done, rather than the time. The dough will have doubled in size, be domed on top, remove easily from the bowl and if you are using a glass bowl, you'll see bubbles all throughout the bottom of the dough.
Shape the Dough
- Once the dough has doubled in size, remove the cover and punch the dough. Do so by placing your fist in the center of the dough and pushing it downwards. Punching the dough helps to release all the air bubbles.
- Remove and stretch the bread dough into a large rectangle on your work surface, then roll the bread dough into a log, like you would a cinnamon roll. Curl the ends of the sourdough sandwich bread under itself and pinch the seams together.
Second Rise
- Using a bench scraper, gently lift the sourdough bread dough and place it into a greased 8.5 x 4.5 inch loaf pan with the seam side down.
- Cover the dough for the final rise. In my 70 degree F kitchen, this will typically take 3-4 hours. To speed this step, I like to place the dough in my proofing box at 90 degrees F or in an OFF oven with just the light on. This creates a toasty environment for the dough to rise quickly, about 1-2 hours. Don't rush this step, allow the dough to rise until it is 1″ above the rim of the pan. Otherwise, the loaf will bake up dense and gummy.
Bake
- Preheat your oven to 375 degrees F.
- Place the loaf pan in the hot oven on the middle rack and bake for 40-45 mins, or until golden brown on top and the internal is 190-200 degrees F. If you notice that the top is browning too much before the loaf has finished baking, place a piece of aluminum foil on top of the loaf. for the rest of the baking time.
- Keep the loaf in the tin pan for an extra 5 minutes before removing it to cool on a wire rack.
- While the loaf is still warm, spread butter all over the top of the bread for a super soft and shiny crust.
- Place the loaf on a cooling rack for at least one hour before slicing. Enjoy!
Notes
Recipe Tips
- To prevent the sourdough sandwich bread crust from tearing, I like to place a cast iron skillet or baking sheet on the oven rack below the bread with a cup of ice cubes. This creates extra steam in the oven while the bread bakes, which keeps the surface of the dough soft allowing the bread to expand and rise without tearing.
- Sourdough sandwich bread will stay fresh for 3-5 days when stored in a plastic bag.
- Sourdough sandwich bread freezes exceptionally well. Once the bread has cooled completely, slice and store the pieces in a gallon-sized ziplock bag. Place small pieces of parchment paper in between the slices so they don’t freeze together.

I’m very excited to try this recipe.
I hope you love it, Michelle! It’s a staple in our household.
Can you use this recipe to make dinner rolls?
You can absolutely use the sourdough sandwich bread dough to make rolls. If you want perfectly fluffy, pull-apart rolls, I actually have a specific sourdough dinner roll recipe that I’d recommend following instead—it’s tailored for smaller portions and ensures soft, tender rolls every time.
Hi, do we put it in the fridge at all or will the dough be out throughout the entire process?
Great question! The dough is at room temperature the entire process.
I made my first sourdough sandwich loaf. Thank you for all the instructions, pictures and recipe.
I’m so glad your first sourdough sandwich loaf was a success! It means a lot to hear that the instructions and pictures helped—happy baking and here’s to many more loaves!
Little confused, do you do only one stretch and fold?
Hi Andrea! After the first 30 minute rest, this recipe only calls for 20 seconds of kneading. After that, leave the dough to double in size before shaping! Hope this helps!
I started using this recipe from the beginning of my sourdough journey. You shared it in your stories and walked us through it. It’s is soooo easy to make. I even make it with discard straight from the fridge and it’s perfect EVERY TIME. I use it for a cinnamon sugar swirl loaf as well. I always have sliced up frozen loaves so I never run out. It really is the easiest and simplest recipe you will make. Thank you for sharing it!!!
That makes me so happy to hear! I love that this recipe has been with you since the start of your sourdough journey — and using it for a cinnamon sugar swirl loaf sounds amazing! Having a stash of sliced frozen loaves is such a smart idea, too. Thank you for sharing this and for baking along with me!
I love this recipe! I make it for my family probably once a week. However, I’ve been noticing that I get down to half way done with the loaf, when I cut it, the middle of the slice completely falls apart and isn’t a good enough slice for a sandwich. Any idea what I might be doing wrong?
Thanks so much! I’m glad your family enjoys it! When the middle of the loaf falls apart like that, it usually means it needed a bit more time to fully bake. You can check the internal temp — it should be around 200–205°F. Another factor could be slightly underdeveloped gluten or overhydrated dough, which can make the crumb fragile. Making sure your dough is well kneaded and fully proofed before baking usually helps it hold its shape better for slicing!
Can I use discard sterter?
This recipe uses active starter, so I’d recommend sticking with that for best results. You can use discard, but just keep in mind that it will take much longer to bulk ferment since it’s not as active.
I use discard all the time and it comes out perfect!!! I make 2 loaves every 2 weeks about and they always come out perfect!!
Thank you for sharing, Amy!
My loaf turned out amazing. I didn’t have bread flour but I used a high protein all purpose flour and it worked out great! I’ll be trying to make a cinnamon swirl bread next.
A high protein all-purpose flour is a great alternative! So glad you loved it and I hope you enjoy the cinnamon swirl just as much.
Due to time, I had to stick my loaf in the refrigerator before second rise. How do you advise I continue? Did I mess it up by doing that?
No worries at all—you didn’t mess it up! 😊 Refrigerating your dough before the second rise is actually a great way to slow down fermentation and can improve flavor. When you’re ready to bake, just take the loaf out of the fridge and let it come to room temperature and finish proofing until it’s puffy and almost doubled – just know that this will take longer because the dough will be cold. Then bake as usual. Hope you love this recipe!
I absolutely love all of your recipes. Thank you so much. 😊
This just made my day! So thrilled to hear that you are loving all of the recipes. Thank you so much for taking time out of your day to share this encouragement!
Do you have the nutritional context for this? If not it’s ok just curious!
I’m so sorry, I don’t at the moment! I’m hoping to add this information in the coming future!
THANK YOU for this recipe! I just made it and it turned out so beautifully! And easy to make!! I do have 1 question – along the bottom rim I have a gummy like dense texture, almost like raw dough. Very thin, gets worse as you cut into middle of loaf but stays right at the bottom rim. Any ideas? Thank you so much again! Truly enjoyed making this recipe and it will be my staple moving forward!
I’m so glad to hear the loaf turned out beautifully overall — and that it was easy to make! That totally makes my day. That thin, dense layer can come from a few things: underbaking, over- or under-proofing, or sometimes even the loaf staying in the pan too long after baking, which traps steam at the bottom.
You can try baking it for 5–10 extra minutes next time (tent with foil if the top is browning too quickly) and be sure to remove it from the pan within 5–10 minutes of coming out of the oven. A fully baked loaf internal temperature should be 205 degrees F. Also, shaping when the dough has just about doubled and feels airy helps a lot too. So glad to hear this recipe will be a staple for you — that’s the best compliment!
Thank you so much!!!!! Perfect timing of reading your response.. I’m fermenting my next loaf as we speak! 🙂
Amazing! I hope you absolutely love it!
My dough is so sticky I can’t roll it!
Sticky dough can definitely be tricky! This is usually a sign that the dough either over proofed or your environment is humid. If your kitchen is warmer than 70°F, the dough will ferment faster, so you will need to watch the dough, rather than the clock, and shape it once it has doubled in size. If your kitchen is humid, you might consider reducing the water in the recipe by about 25 grams next time. Hope this helps and you give this recipe another go!
I don’t have a ton of time in this season of my life to devote to sourdough but I love the taste and health benefits (and of course the fun of creating it). I have looked long and hard for an easy to follow recipe that didn’t require me to knead in my stand mixer for 20 min but still gave me a good structured, yet soft sandwich (toasting in my case) loaf. This is it! Next time I’ll try in the specific sized pan you mention and I can see how it will produce and even better loaf. My pan was a little wider than yours. So far every recipe I’ve tried of yours is a winner. No more decision fatigue (lol), I can come right to your page to look for my recipes going forward.
This means so much—thank you! I totally get not having tons of time, and I’m so glad this recipe fits into your season of life while still giving you that structure, softness, and flavor you’re looking for. I’m thrilled to hear it worked well even with a slightly different pan, and I can’t wait for you to try it again with the size I recommend—I think you’ll love the result even more. And “no more decision fatigue” made me smile—so honored to be your go-to!