

Honey Walnut Sourdough Bread Recipe (Sweet, Nutty & Spiced)
This post may contain affiliate links. Please read our disclosure policy.
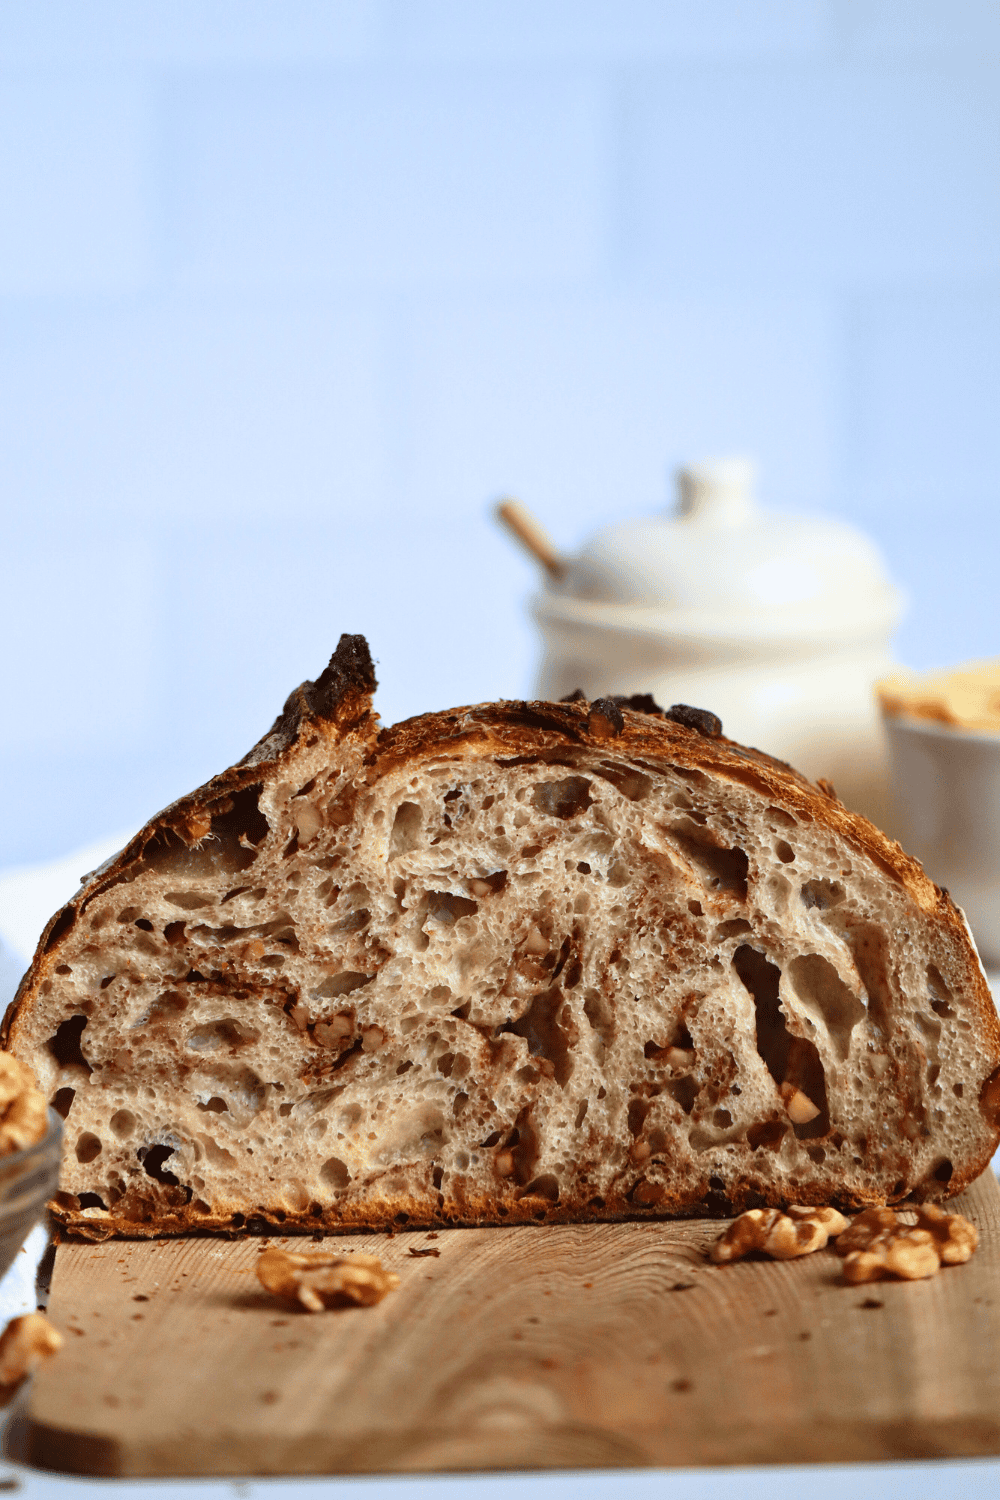
My Honey Walnut Sourdough Bread Recipe is a fragrant sourdough bread with local honey, crunchy walnuts, and cinnamon in every slice. I use bread flour and an active sourdough starter for a chewy crumb, much like my Honey Oat Sourdough Bread.
The gentle sweetness of honey and the warm spice make this round loaf a standout for toasting, blue cheese, or cream cheese. When I want a more heavily spiced loaf, I make my Sourdough Chai Bread.
Quick Look: Honey Walnut Sourdough Bread
- Prep Time: 9 hours
- Cold Proof: 8 hours
- Cook Time: 40 minutes
- Total Time: 17 hours 40 minutes
- Servings: 1 loaf
- Calories: 2,541 kcal (whole loaf) (based on nutritional panel)
- Cook Method: Baked in a Dutch oven
- Flavor Profile: Rustic and hearty with a sweet honey-kissed crumb, crunchy toasted walnuts, and a hint of cinnamon. Golden, crispy crust with a chewy, open interior!
- Difficulty: Advanced — A multi-day sourdough loaf with stretch and folds, mix-ins, shaping, and cold proofing. Best for bakers with some sourdough experience!out 30 minutes!
SUMMARIZE & SAVE THIS CONTENT ON
Why You’ll Love This Honey Walnut Sourdough Bread Recipe:
- Sweet, nutty depth without a dessert-like loaf: Local honey balances the sourdough tang while toasted walnuts and cinnamon add wonderful flavor in every slice. For a seasonal loaf with another fruit-and-nut flavor direction, I make my Sourdough Cranberry Orange Quick Bread.
- A flexible fermentation process: After bulk fermentation, you can cold-proof the shaped dough for 8 to 72 hours, which makes this sourdough bread easier to fit into my schedule. For a soft, sliceable alternative baked in a pan, try my Sourdough Sandwich Bread.
- A crisp crust and satisfying chew: Bread flour gives the dough structure, while honey supports a deeply golden brown crust and a chewy interior. If your looking to build confidence with artisan sourdough recipes, start with my Easy Sourdough Bread for Beginners.
Ingredients & Substitutions
* To find precise measurements, scroll to the bottom of this post to find the recipe card*
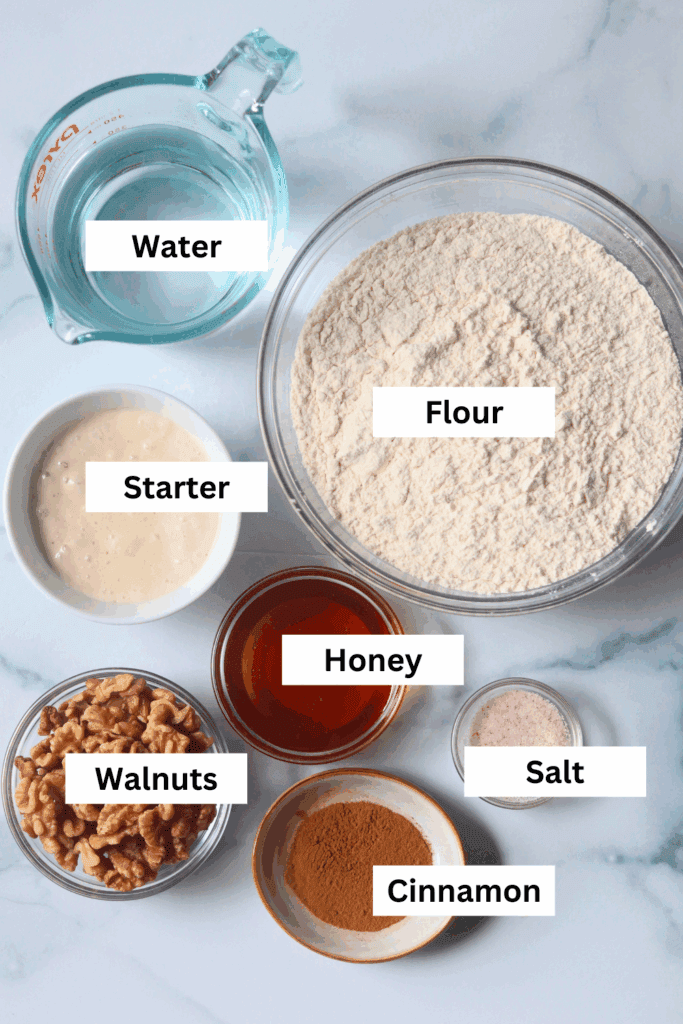
- Bread Flour – Bread flour is best when it comes to making sourdough bread. The higher protein percentage in flour gives the dough its strength so that it can rise to great heights and give you the best results. Some home bakers use white flour/all-purpose, whole wheat flour, spelt flour, or even rye sourdough, but bread flour gives me the best results.
- Honey – Using honey in this recipe not only slightly sweetens your sourdough bread, but it also makes your crumb extra chewy! Since honey is a sugar, be aware that your fermentation process can be faster than what you are typically used to. This loaf will also lead to a more dark brown exterior after baking. You can use any type of honey (that is, store-bought, local, wildflower, clove, raw), however, the darker honeys (local, wildflower, raw) will give a greater depth in flavor.
- Walnuts – To reduce the naturally bitter flavor of walnuts, I like to toast them, but this step is optional. You can also swap the crunchy walnuts for chopped pecans, almonds, pistachios, or any other nut or nut mix you have on hand. I’m even thinking of adding walnuts to this cranberry bread to see how much of an upgrade cranberry walnut bread really is.
- Cinnamon – I love the way cinnamon compliments the honey and walnuts in this sourdough bread recipe, however, keep in mind, cinnamon naturally slows yeast activity. So, be prepared for a slightly longer bulk fermentation.
Baking Time For Honey Walnut Sourdough Bread
|
Time |
Process |
|---|---|
|
DAY 1 |
|
|
9:30 AM |
Mix the dough |
|
10:00 – 11:30 AM |
Perform stretch and folds, Add mix-ins |
|
11:30 – 6:30 AM |
Bulk fermentation |
|
6:30 PM |
Preshape |
|
7:00 PM |
Shape & Cold proof |
|
DAY 2 |
|
|
9:30 AM |
Bake |
How to Make Sourdough Honey Walnut Sourdough Bread

- Mix dough ingredients in a large bowl. Cover and let it rest for at least 30 minutes.

- Perform 4 sets of stretch and folds with 30 minutes of rest in between each round.
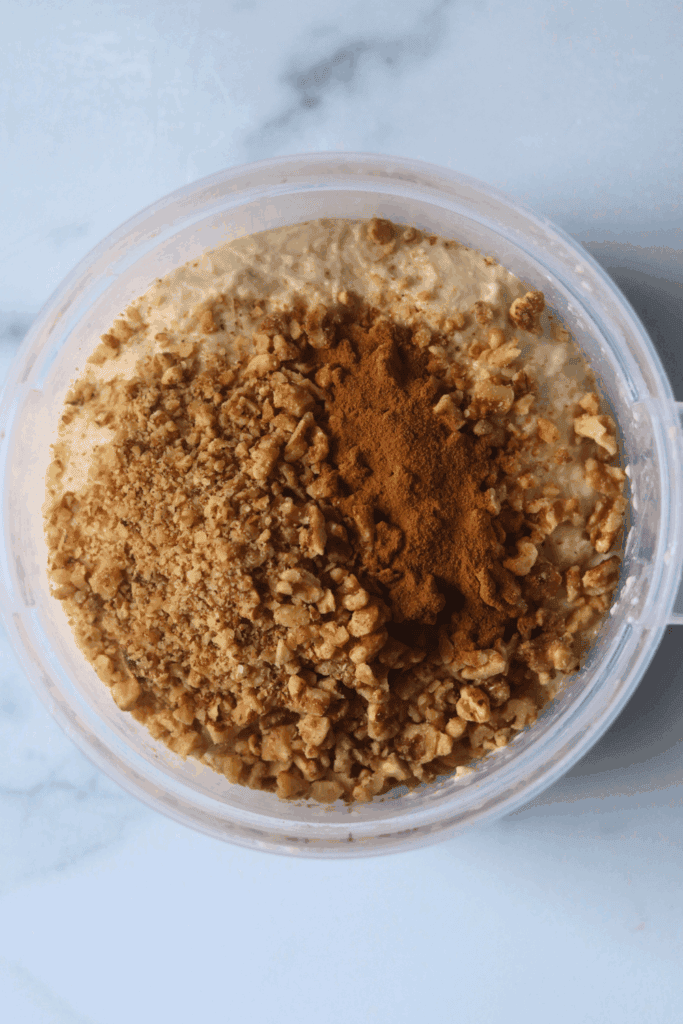
- Cover the dough during each resting period. Add the toasted walnuts and cinnamon during the 2nd round of stretch and folds.
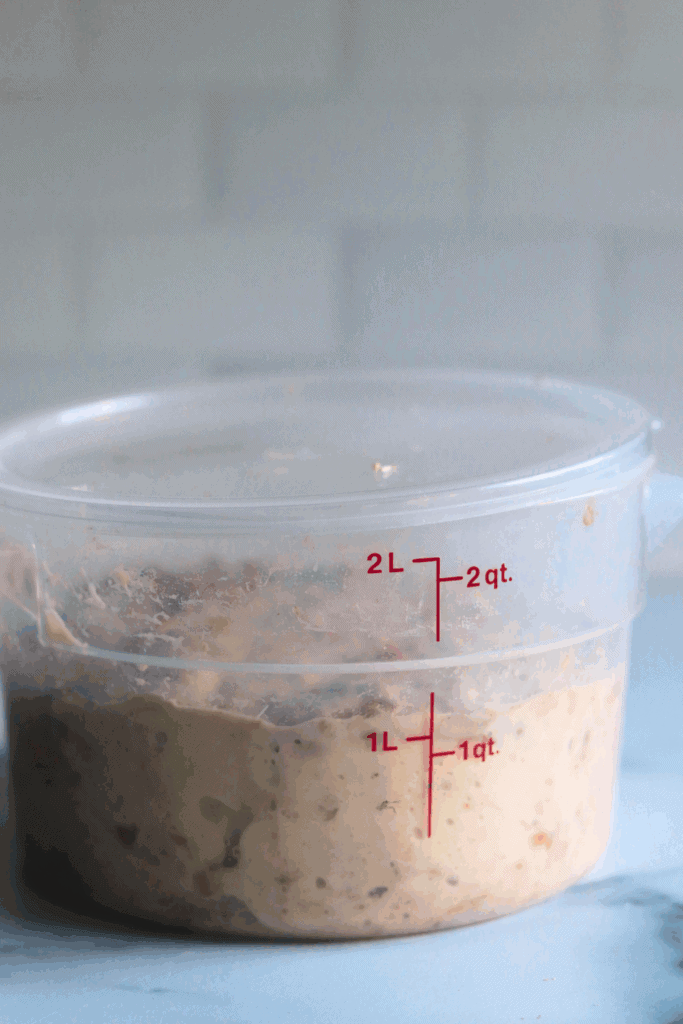
- Let the dough rise completely in a warm place for bulk fermentation.

- Once risen, preshape the dough, cover and let rest for 30 minutes.

- Shape the dough into a boule or batard and place it into a prepared banneton basket. Cover and cold proof the dough for at least 8 hours. Don’t have a Dutch oven or banneton? No problem! You can also bake this Sourdough Bread in a Loaf Pan!
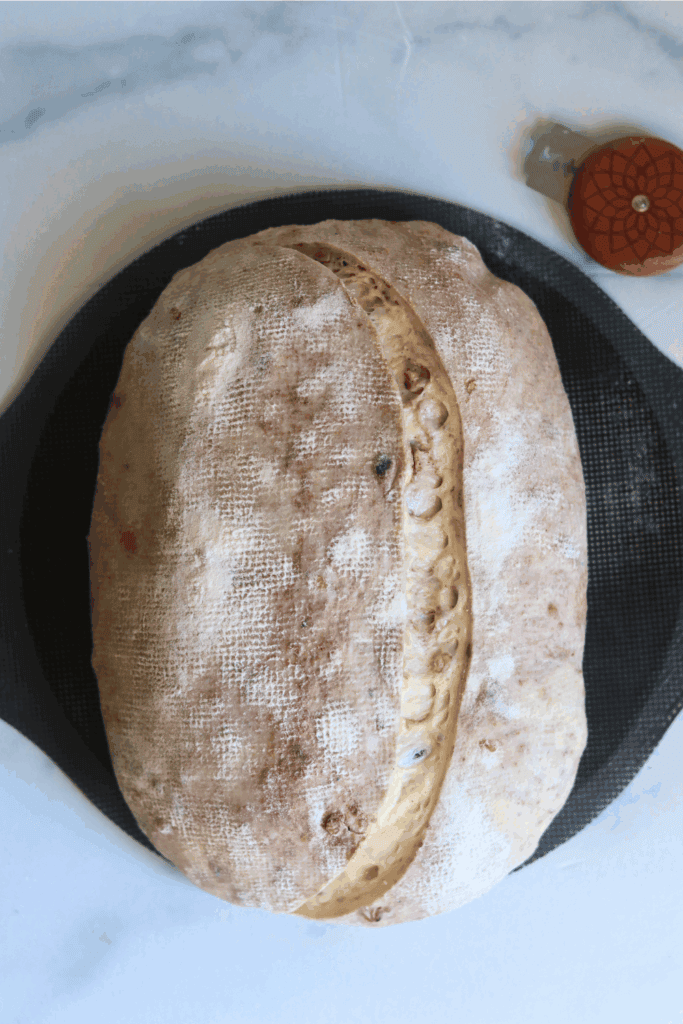
- The following day, place the dough on a piece of parchment paper, score and bake.
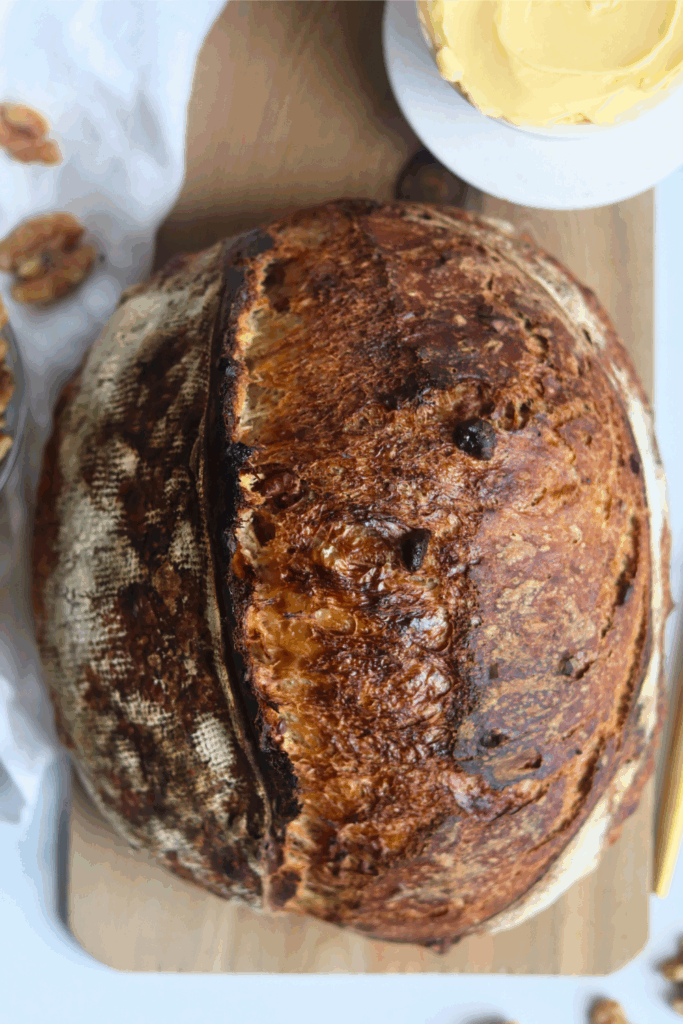
- Allow the loaf to cool to room temperature before slicing. Enjoy!
McKenna’s Helpful Tips
- Toast the walnuts first: toast the nuts before adding them to the dough to soften any bitter edge and highlight their richness. I use the same preference for toasted flavor in my Sourdough Apple Fritters.
- Watch the dough, not just the clock: Cinnamon can slow the fermentation process, so look for visible dough rise and a puffy feel before you shape. For another cinnamon-filled dough that benefits from patient proofing, try my Sourdough Apple Cider Cinnamon Rolls.
- Protect the crunchy crust: I let the loaf cool completely, then keep it cut-side down in a linen bread bag or under a tea towel instead of plastic wrap. I follow the same fresh-bread approach with my Honey Oat Sourdough Bread.
How to Store
After this honey walnut sourdough bread has cooled, it’ll stay fresh on the counter for 2–3 days if you wrap it in a clean towel or a linen bread bag and keep it cut-side down. Don’t bother with plastic, as it just makes the crust soft and moldy.
Because of the honey, the loaf holds onto moisture a little longer, but it’s really best eaten within 48 hours.
If you’ve got extra, slice it, wrap it tight, and stash it in the freezer for up to 3 months. When you’re ready to eat some bread, pop slices straight in the toaster oven or warm the whole loaf at 350°F for 10–15 minutes. A quick spritz of water before heating brings the crust back to life.
Honey Walnut Sourdough Bread FAQs
Yes. I pull my starter from the refrigerator and feed it before mixing the dough. Once it is bubbly and active, it is ready to use. For another loaf that uses an active starter, try my Soft Whole Wheat Sourdough Sandwich Bread.
Yes. I skip the cold proof and let the shaped dough complete a full second rise at room temperature until it is puffy and slightly jiggly. You will lose a little of the deeper flavor from the overnight rest, but I still get a delicious loaf.
Yes. you can leave the cinnamon out entirely, or you can divide the dough after bulk fermentation and add cinnamon to one portion while shaping, leaving the other portion plain. For a cinnamon forward sourdough treat, try my Sourdough Coffee Cake.
Yes. you can use pecans, almonds, pistachios, hazelnuts, cashews, or a mix of nuts, knowing that untested swaps may vary. I would toast the nuts first for the best flavor. For a nut free fall loaf with a different inclusion profile, try my Easy Sourdough Pumpkin Bread.
Save a few slices for a rich breakfast bake once the loaf is no longer at its freshest. My Sourdough French Toast Casserole is a make ahead way I use sourdough bread without waste.
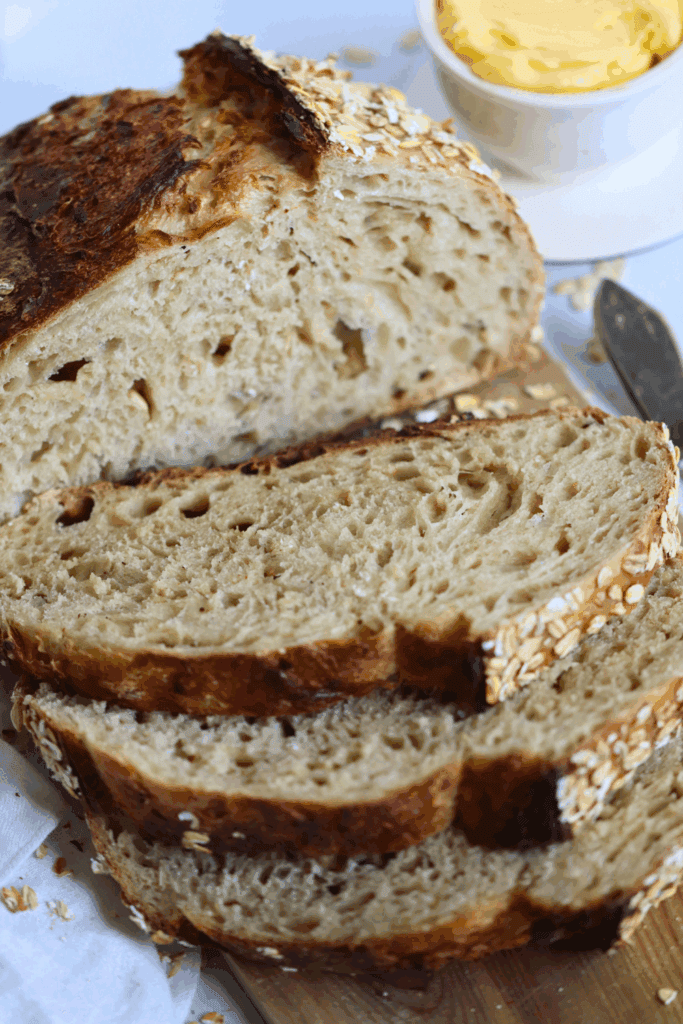
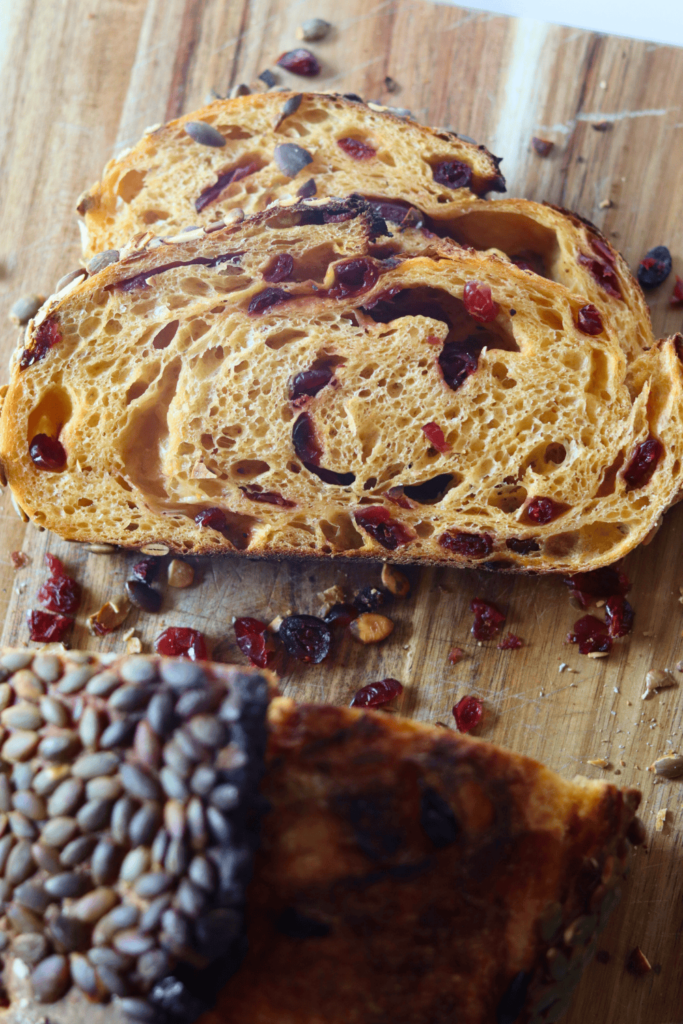


If you tried this Honey Walnut Sourdough Bread recipe or any other recipe on my blog, please leave a 🌟 star rating and let me know how it went in the📝 comments below. Thanks for visiting!
Honey Walnut Sourdough Bread Recipe
Enter your email below, and we’ll send it straight to your inbox! Plus, you’ll get my newest sourdough recipes and best tips every week!
Equipment
Ingredients
- 100 grams sourdough starter 1/2 cup
- 100 grams honey scant 1/3 cup
- 330 grams water 1 1/4 cups + 2 Tablespoons
- 500 grams bread flour 3 1/2 cups
- 12 grams salt 2 teaspoons
- 90 grams walnuts 3/4 cup
- 4 grams cinnamon 2 teaspoons
Instructions
Make the Dough
- In a large mixing bowl, add active sourdough starter, honey and room temperature, filtered water. Mix with a dough whisk or your hand until it looks like a golden, milky liquid.100 grams sourdough starter, 100 grams honey, 330 grams water
- To the wet ingredients, add the bread flour and salt. Be sure to mix until all of the flour is incorporated. The dough will look wet and sticky, not like a uniform dough ball.500 grams bread flour, 12 grams salt
- Cover the bowl with plastic wrap (I use a reusable shower cap) and let the dough rest for at least 30 minutes before you move on to the next step.
Stretch and Folds
- With slightly wet fingers, scrap a piece of the dough away from the bowl. Grab a section of the dough and stretch the bread dough above your bowl. Then fold over on top of the dough.
- Rotate your bowl clockwise a quarter of the way and repeat identical stretch and fold. Repeat the process until you come full circle, about 4-6 times. You will notice the dough will start to look much smoother than before.
- Cover the dough again and let it rest for another 30 minutes.
- Before the next set of S&F, prepare the mix-ins. Bring a small skillet to medium-low heat, then toast the walnut for about 5 minutes or until fragrant, stirring often. Be sure to keep and eye on the walnuts! They burn easily. Remove the walnuts from the heat and allow them to come to room temperature. Give them a rough chop. Set aside.90 grams walnuts
- Pour the chopped walnuts and ground cinnamon on top of the dough, then perform the 2nd round of S&F. Cover the dough and let it rest for 30 more minutes. You can add the mix-ins during any of the rounds of S&F, however, I prefer to add them during the 2nd round so that the mix-ins can continue to be incorporated during the following sets of S&F.4 grams cinnamon
- Repeat the same stretch and folds for a total of 4 rounds with at least 30 minutes of rest in between each set. Cover the dough after each round of stretch and folds.
- Once you have completed the final set of stretch and folds, cover the dough and let it rest for the remainder of the bulk fermentation on your counter, about 7-9 more hours if the dough is kept at 70 degrees F.
Bulk fermentation
- Now this is the most finicky part of sourdough. There isn’t a set time for your bulk ferment. It is greatly dependent on the temperature of your environment and ingredients. The warmer it is, the faster your dough will ferment. The opposite is true for cooler temperatures.
- In an environment of 70 degrees, doughs will typically bulk ferment for 7-9 more hours after the stretch and folds, but again, you will have to look for the signs that your dough is done fermenting, rather than the clock. Warmer temperatures will be faster, while cooler temperatures will be slower.
- Here’s what to look for:
- -The dough should have increased in size by at least 75% and be domed on top.-The dough looks light, and jiggles when the bowl is shaken.-The dough should easily pull away from the bowl.-There should be visible bubbles in the dough and on top.-The dough doesn’t tear when you do a windowpane test
Pre-shape
- With slightly wet fingers, gently release the dough from the sides of the bowl. Be careful not to pop all of those lovely bubbles! Tilt the bowl and leave gravity to do the work to move the dough on the counter.
- Shape the dough by doing another round of stretch and folds until you have gone full circle.
- With a bench scraper or your hands, turn the dough upside down, so the seam is now on the counter. Cover the dough with the bowl and let it rest for 30 minutes.
- While you are waiting for the dough to rest, prepare your proofing basket. This can either be a banneton or a small mixing bowl lined with a tea towel. The purpose of this proofing basket is to keep the tight shape that you will create, so make sure you are using a standard bowl that is small enough to help keep the shape.
- Dust the banneton or the tea towel with flour (most will say to use rice flour, but I have used just regular all-purpose flour) to prevent sticking.
Final shape
- After 30 minutes of rest, flip the dough, with the seamed side up. Gently pull the bottom of the dough towards you, then fold it towards the center of the dough. Pull the right side of the dough out and fold towards the center. Repeat with the left side. Finally, stretch the top of the dough away from you and fold towards the center of the dough.
- Flip the dough over again, seam side down.
- Gently cup your hands around the dough ball. Turn the ball in a clockwise motion about a quarter turn and then softly pull the dough towards you. Do this repeatedly until you see the dough form a tighter and more round shape. Stop if the dough starts to tear.
- Carefully lay your dough into your floured proofing basket (seam side up) and cover it with a plastic bag or a shower cap.
Cold proof
- Place your proofing basket in the fridge to cold-proof for 8–72 hours.Placing your dough in the fridge slows down the fermentation process, which deepens the flavors of your loaf. It also gives you flexibility in when you want to bake your bread.But don’t wait too long! If left in the fridge for too long, your dough will over-ferment, causing the dough to not be able to rise while baking.
Score
- 30 minutes before baking, place the dough in the freezer. This helps with the scoring design.
- At the same time, place your Dutch oven in your oven and preheat to 500 degrees F. Allow the Dutch oven to preheat for at least 30 minutes.
- Place a piece of parchment paper on your workspace and gently flip the banneton upside down over the parchment paper. Since you dusted the banneton, your dough should slowly release and fall onto the parchment paper, landing in the middle with the oat side facing up.
- With a lame / razor blade or sharp knife, score a crescent moon shape on top of the dough. This is necessary for your bread to be able to expand while baking.
- Grab the corners of the parchment paper and carefully place the Honey Walnut dough into your preheated Dutch oven and cover with the lid.
Bake
- Lower the oven to 450 degrees F and bake the bread covered for 30 minutes. Then remove the lid of the Dutch oven and continue to bake the bread for an additional 10-15 minutes with the lid off at 425 degrees F. If your crust is browning too quickly, cover the top with aluminum foil while you continue to bake.
- Once golden brown with the internal temperature at least 205 degrees F, remove the Dutch oven from your oven.
- Using the corners of the parchment paper, lift the sourdough bread out of the Dutch oven and place it onto a wire rack to cool.
- Allow your homemade bread to cool for at least 1 hour before cutting into it. (I know! How can you possibly wait when it looks and smells so good? But trust me, if you cut in too soon, your masterpiece will turn gummy.)
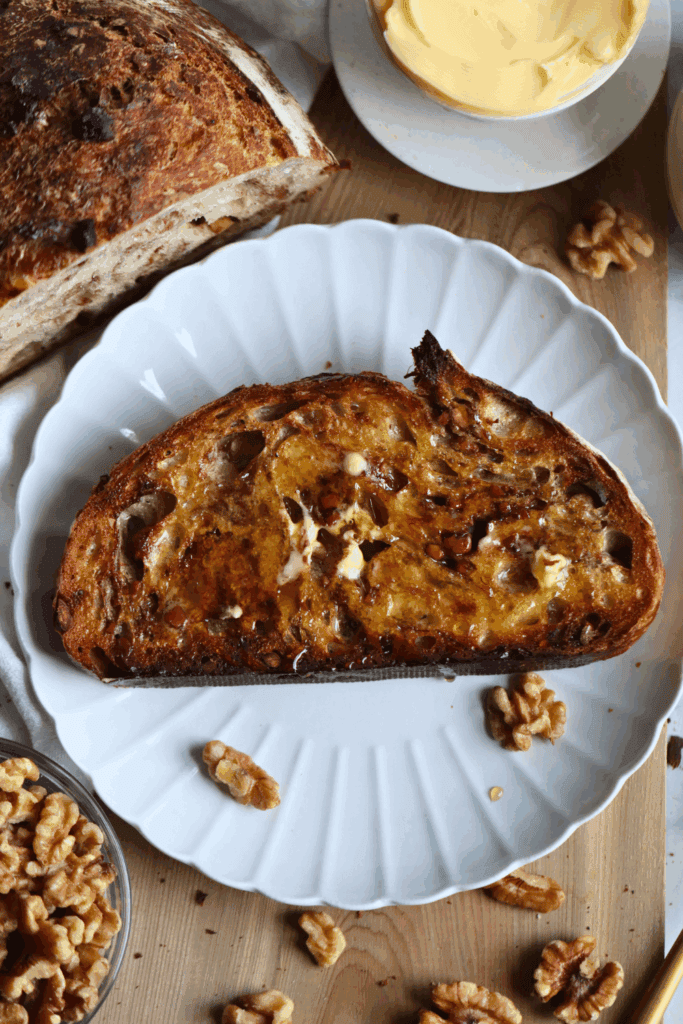
- Once the hour is up, slice into your work of art and slather on some butter with a drizzle of honey, and enjoy!
Notes
Ingredients & Substitutions
- Bread Flour – Bread flour is best when it comes to making sourdough bread. The higher protein percentage in flour gives the dough its strength so that it can rise to great heights and give you the best results. Some home bakers use white flour/all-purpose, whole wheat flour, spelt flour, or even rye sourdough, but bread flour gives me the best results.
- Honey – Using honey in this recipe not only slightly sweetens your sourdough bread, but it also makes your crumb extra chewy! Since honey is a sugar, be aware that your fermentation process can be faster than what you are typically used to. This loaf will also lead to a more dark brown exterior after baking. You can use any type of honey (that is, store-bought, local, wildflower, clove, raw), however, the darker honeys (local, wildflower, raw) will give a greater depth in flavor.
- Walnuts – To reduce the naturally bitter flavor of walnuts, I like to toast them, but this step is optional. You can also swap the crunchy walnuts for chopped pecans, almonds, pistachios, or any other nut or nut mix you have on hand. I’m even thinking of adding walnuts to this cranberry bread to see how much of an upgrade cranberry walnut bread really is.
- Cinnamon – I love the way cinnamon compliments the honey and walnuts in this sourdough bread recipe, however, keep in mind, cinnamon naturally slows yeast activity. So, be prepared for a slightly longer bulk fermentation.

This is an incredible loaf of bread. It took a bit longer to rise, so overnight it went…
Crumb is beautiful. Definetly a favorite!
I’m so glad it turned out so well! Thank you so much for taking the time to leave a review!
One of my favorites! Toast, butter & honey!! Holy Cow. Thanks for sharing.
Seriously!! Toasted with butter and honey is hard to beat. I’m so glad this has become one of your favorites. Thank you so much for taking the time to leave a review!
Okay, this is seriously sooooo yummy! I have to give away half of each loaf that I bake because I have no self control when it is in the house! My family and friends are thrilled. Thank your for your amazing recipes!
This made my day! I’m so glad you love it that much! Thank you so much for the sweet review and for making my recipes.
Mine did not rise at all was very gummy after baking😟
I’m sorry this one didn’t turn out for you! If the loaf didn’t rise and was gummy after baking, the most likely causes would be an underactive starter or the dough needing more time to bulk ferment and proof before baking. Temperature can make a big difference with sourdough, so if your kitchen was on the cooler side, the dough may simply have needed longer. Thank you for giving the recipe a try. I hope your next loaf turns out much better!
Baked this morning. Ate a slice while still warm, spread with some salted butter. So good! Love it! Thank you for your amazing recipe ❤️
There’s nothing better than a warm slice of fresh bread with salted butter. I’m so glad you loved the recipe! Thank you so much for taking the time to leave such a sweet review.
delicious bread
appreciate the detailed instructions
i did add 4 T softened butter at the start and craisins with the walnuts and cinnamon.
I’m so glad you enjoyed the bread and found the instructions helpful! The butter and craisins sound like such delicious additions, especially with the walnuts and cinnamon. Thanks so much for sharing!
Loved this recipe! I think dried cranberries would be a good addition. Do you think they would need to be hydrated before adding? Would any other changes be needed? Appreciate any suggestions.
I’m so glad you loved the recipe! Dried cranberries would be such a delicious addition. I don’t think you would need to hydrate them first. I would add them right along with the walnuts! If your cranberries are especially dry and you do choose to soak them, just be sure to drain and pat them dry well so they don’t add too much extra moisture to the dough. I wouldn’t make any other changes to the recipe. Thanks so much for the great idea and for taking the time to leave a review!
This was amazing sourdough bread!
I’m so glad you loved it, Melissa! Thank you for taking the time to leave such a kind review.
Not only was this a super sticky/messy dough but my dough turned purple! Had to use a lot of “bench” flour to get it to actually form into something other than goop. It ended up baking beautifully and huge, but it was a hassle and almost went into the garbage a few different times!
Trying your honey oat right now! Fingers crossed it comes together!
I’m so glad it baked up beautifully in the end! And don’t worry, the purple color is actually a normal reaction between the walnuts and the acidity in the sourdough dough. It’s completely harmless! This dough is naturally a bit stickier than some of my other bread recipes because of the honey and mix-ins, but I’m so happy you stuck with it. I hope you love the Honey Oat recipe too. I’d love to hear how it turns out!
I will have to agree with the goopy mess! I’m currently making it and wowza, I’m going to add some flour on my stretch and folds as well. Idk why I’m having so much trouble. It is only 29g higher in flour than my own recipe. It must be the honey. It is raising the hydration.
Thank you for sharing your experience! The honey can definitely make the dough feel a bit stickier and softer, especially depending on the flour you’re using and how it absorbs moisture. If your dough is feeling unusually loose, adding a small amount of flour during the stretch and folds can help, but I’d add it gradually so the loaf doesn’t become too dry.
Sourdough dough can vary quite a bit from kitchen to kitchen, so sometimes a little adjustment is needed. I hope it comes together for you, and I’d love to hear how the finished loaf turns out!
This looks delicious! Excited to try it!
I hope you love it!