

The Best Sourdough Bagels (Easy Homemade Bagel)
This post may contain affiliate links. Please read our disclosure policy.
With a soft and chewy texture and that classic sourdough tang, each bite will have you wondering why it took you so long to make these Sourdough Bagels! This sourdough bagel recipe is incredibly simple and only requires 5 basic ingredients that you probably already have in your pantry. The secret is a quick honey-sweetened boil bath before baking — that’s what gives these bagels their signature glossy, chewy crust and that golden-brown finish you only get with a proper New York-style bagel.
Whether you eat them straight out of the oven, toasted with butter, or smothered with your favorite cream cheese shmear, I guarantee you will be making these again and again. Once you’ve got this base recipe down, you’ll want to try my Sourdough Blueberry Bagels for a fruity twist, or whip up a faster batch with my Sourdough Discard Blueberry Bagels when you’re short on time.

Quick Look: Sourdough Bagels
- Prep Time: 1 hour
- Rise Time: 8 hours
- Bake Time: 20 minutes
- Total Time: 9 hours 20 minutes
- Servings: 8 bagels
- Calories: ~270 kcal per serving (based on nutrition panel)
- Cook Method: Boiled, then baked
- Flavor Profile: Soft and chewy with a slightly crisp exterior and classic sourdough tang. Delicious plain or topped with everything bagel seasoning, sesame seeds, or cheese.
- Difficulty: Intermediate — Simple ingredients and mostly hands-off, but requires an overnight rise and a boiling step before baking.
SUMMARIZE & SAVE THIS CONTENT ON
Why You’ll Love This Sourdough Bagel Recipe
- Incredible Chewy Texture—Be forewarned, once you make homemade bagels, there’s no going back! From the classic chewy crust to the soft and airy inside, these sourdough bagels will ruin all other bagels due to their superior taste and texture. They have that authentic New York style bagel chew that you just can’t get from store-bought. For a fun twist on the classic version, you can also try my Sourdough Pumpkin Bagel recipe!
- Surprisingly Easy to Make—Better yet, this recipe is mostly hands-off! After a short kneading time and an easy shaping method, this recipe is the easiest way to enjoy delicious bagels at home.
- Endlessly Versatile—I love a plain sourdough bagel, but they are also the perfect canvas for all of your favorite flavor options. From sesame, cheese, garlic, jalapeño and cheddar, to everything bagel seasoning, you can have fun experimenting with different toppings. You can even use leftovers to make my Easy Sourdough Bagel Chips!
Ingredients & Substitutions
* To find precise measurements, scroll to the bottom of this post to find the recipe card*
- Active Sourdough Starter – An active and bubbly starter will give you the best rise for these chewy bagels.
- Water – Use room temperature, filtered water for consistent results.
- Bread Flour – You technically can use all-purpose flour for this recipe, but I highly suggest making it with bread flour, as it has a higher protein percentage. This allows the dough to rise at great lengths for a more chewy and enjoyable Sourdough Bagel.
- Sugar – I used white sugar for a touch of sweetness, but you can use alternate sugars like cane or coconut sugar.
- Salt – Any unrefined salt will do, but my favorite is Redmond’s unrefined salt for some extra minerals!
- Honey – Adding a little bit of honey to the boil bath gives your Sourdough Bagels the perfect golden brown, chewy crust once they are baked. This can be substituted with brown sugar or maple syrup as well.
Baking Time For Sourdough Bagels
|
Time |
Process |
|---|---|
|
8:00 PM |
Make and knead the dough. Cover the bowl and let rest for 1 hour. |
|
9:00 PM |
Knead bagel dough for 30 seconds, cover, and let rest overnight for 8-12 hours. |
|
7:00 AM |
Remove dough from bowl and cut into 8 equal pieces. Roll and shape them into small dough balls, poke holes in the middle, and stretch them to shape. Cover and let them rest for 20-60 mins until puffed up. |
|
8:00 AM |
Boil bagels for 30 seconds on each side. Dip into seasonings of choice. Bake for 20-25 minutes at 425 degrees. |
How to Make Sourdough Bagels
Make the Dough
- In a large bowl, add your active starter, warm water, and sugar. Mix until it looks like a milky liquid. Next, add the bread flour and salt to the dough. Mix until fully incorporated.
- Next, pull a small section of bagel dough above the rest, fold it over on top, and push into the dough with the heel of your hand. Repeat this motion while turning the bowl of dough clockwise for 5-6 minutes.
- Cover the dough and let it it rest for 60 minutes.
Stretch and Fold
- After 1 hour of resting, repeat the same “stretch, fold and push” routine with the heel of your hand for 30 seconds.
- Cover the bowl with a reusable shower cap and place dough in a warm place to double in size.

Shape
- Once the dough has at least doubled in size, gently remove the sourdough bagel dough from the bowl and place it in your work surface – no flour dusting needed.

- Stretch and shape the dough into a large rectangle, about 1/2 of an inch high. With a bench scraper or a sharp knife, cut the dough into 8 equal triangle pieces ( about 115g each).

- To shape, grab one piece of dough and pull the corners of the triangles towards the center. Then roll the dough until formed into a smooth ball. Repeat with the remaining pieces of dough.

- One at a time, use your thumb to punch a hole in the middle of the dough ball. Stretch the dough ball with both thumbs, about 2 inches.
Second Rise
- Place your shaped bagels on a parchment-lined baking sheet and cover them fully with a damp tea towel so they don’t dry out.
- Let them rest until puffed up in a warm place, about 20-60 minutes.
Boil Bath
- Fill a large pot of water. Add honey and whisk until well mixed. Bring the water to a boil.
- Carefully drop 2-3 bagels into the boiling water and boil for 30 seconds on each side.
- Using a slotted spoon, scoop the bagels and place them on the cooling rack. Repeat until all bagels have been boiled.
Toppings
- After all the bagels have been boiled, you can sprinkle some of your toppings on a small plate and dip the top of the bagel. The bagels will be slightly sticky to the touch, which will help the toppings stick.
Bonus tip – If you are topping your bagels with cheese, dip the bottom side as well. This will create a crunch bite on the bottom – so good!
Bake
- Bake the Sourdough Bagels for 20-25 minutes at 425 degrees F, or until golden brown.
- Remove the bagels from the oven and allow them to cool on a wire rack.
- Enjoy warm with your favorite toppings!
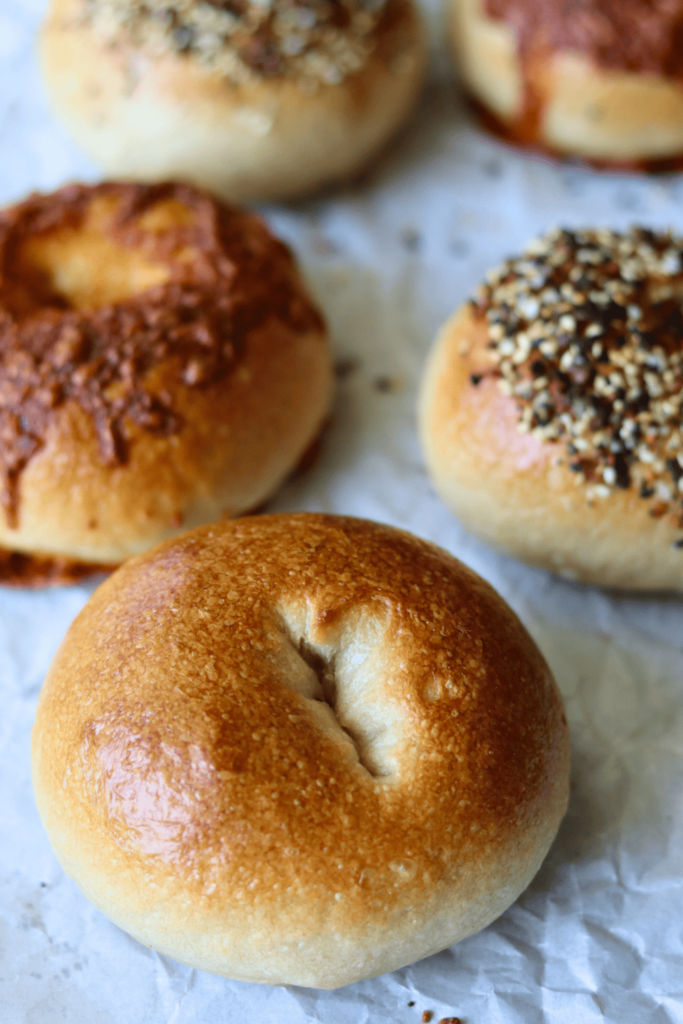
Topping Suggestions:
- Everything seasoning – a mixture of white and black sesame seeds, onion and garlic flacks, sea salt
- Poppy seeds
- Sesame Seeds
- Garlic flakes
- Onion flakes
- Cheese – for example, shredded Asiago cheese – so yummy! Put on top AND bottom for a crunch bite.
- Cinnamon Crunch – a mixture of brown, white, and course sparkling sugar, cinnamon, flour, vanilla, and butter
Other Ways to Eat Sourdough Bagels:
Looking for a few creative ways to enjoy your Sourdough Bagels? How about giving one of these a try?
- Bagel Chips: Normally we don’t have many bagels that last past 2 days in our house, but if you do, my easy sourdough bagel chip recipe only takes 10 minutes to make and the crunch is addicting.
- Egg Sandwich: Over-medium eggs, cast iron skillet bacon, avocado spread, and a little salt and pepper on a homemade sourdough bagel… now that’s a way to start your morning!
- Burger Buns: You’ve got to try this! Will beat store-bought buns any day! I like to toast mine in the skillet I cooked my burgers in to soak up those flavorful juices – killer.
- Adult “Bagel Bites”: Spoon on some marinara, sprinkle with cheese and your favorite toppings, and then bake it in the oven. Brings back all those childhood memories with this delicious rendition.
McKenna’s Helpful Tips
- Use an active, bubbly starter: For the best rise and that perfect chewy texture, make sure your sourdough starter is at its peak activity before mixing your dough. If you’re short on time and only have discard, try my Easy Sourdough Discard Bagels instead.
- Stick with bread flour: While you technically can use all-purpose flour, I highly suggest using bread flour. The higher protein content is what gives these bagels their signature chew. I use the same rule for my Homemade Sourdough Cinnamon Raisin Bagels.
- Don’t skip the honey in the boil bath: Adding a little bit of honey to the boiling water is the secret to getting that beautiful golden brown, chewy crust once they are baked. You can substitute brown sugar or maple syrup if needed.
- Weigh your dough pieces: For perfectly uniform bagels that bake evenly, use a kitchen scale to weigh your 8 pieces of dough (they should be about 115g each).
- Dip both sides in toppings: If you are topping your bagels with cheese or everything bagel seasoning, dip the bottom side as well as the top. This creates an amazing crunchy bite on the bottom!
How to Store
If you are like my family, these homemade sourdough bagels won’t make it to see the next day! They are that good! But if you do find yourself with a few bagels left over, they are best stored in a plastic bag at room temperature for 2-3 days.
These bagels also freeze really well! Place in a gallon-sized plastic bag either sliced or whole for up to 3 months.
To reheat, warm the bagel up for 10 seconds in the microwave or leave on the counter to thaw until room temperature. Slice in half and toast in the toaster.

Sourdough Bagels FAQs
The biggest difference between homemade sourdough bagels and regular bagels from the store is the leaven, or what helps to make the bagels rise. These Sourdough Bagels use a sourdough starter (a wild yeast) to get that airy and chewy bite, whereas, unless labeled as sourdough, other bagels use commercial yeast.
It may seem like a hassle to bring a whole pot of water to boil for such a short cooking time, but trust me, you won’t want to skip this step! Boiling the bagels helps to achieve that chewy exterior we love so much. Believe me, once you bite into these homemade sourdough bagels, it will all be worth it. I use this same boiling technique for my Sourdough Blueberry Bagels too!
Some loss is normal, but those steps should help it stick much better! Try adding the seasoning immediately after boiling while the bagels are still very wet, or lightly brush the tops with egg wash before adding the seasoning to help it adhere better during baking.
Absolutely! Add all of the ingredients into the bowl of a stand mixer and knead on low for 5-6 minutes or until the dough is smooth and tacky to the touch. I do the same method for my Sourdough Discard Bagels recipe!
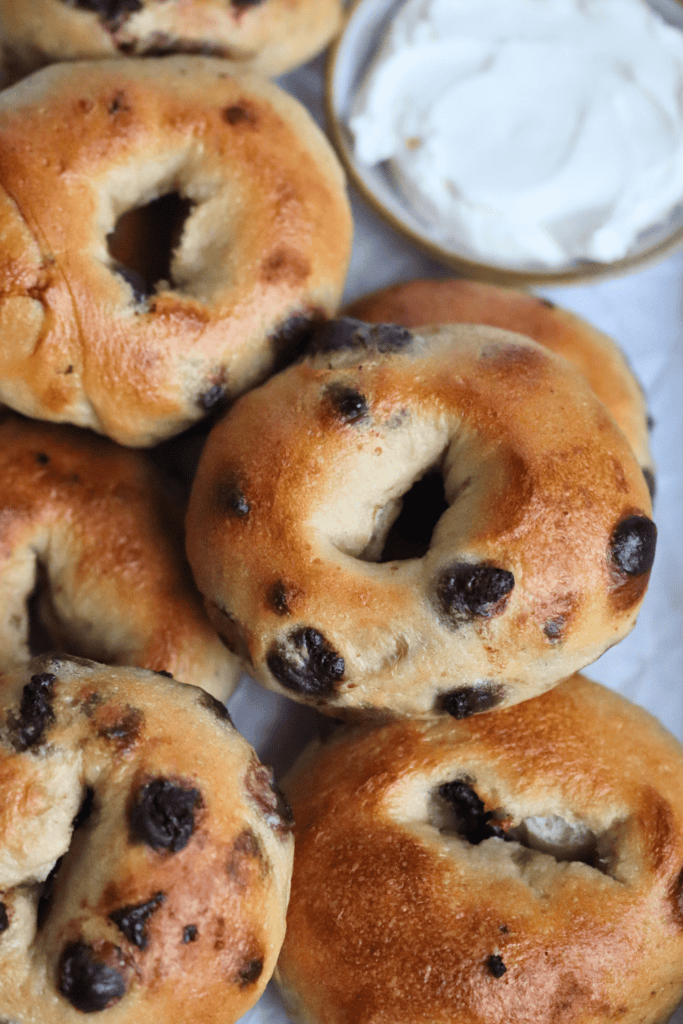
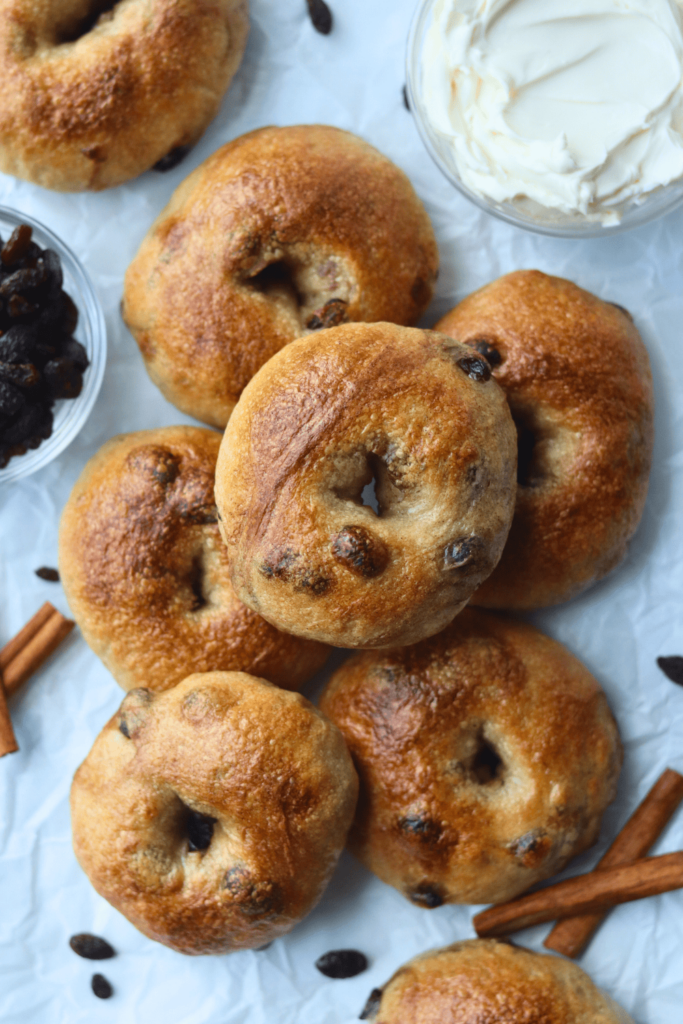
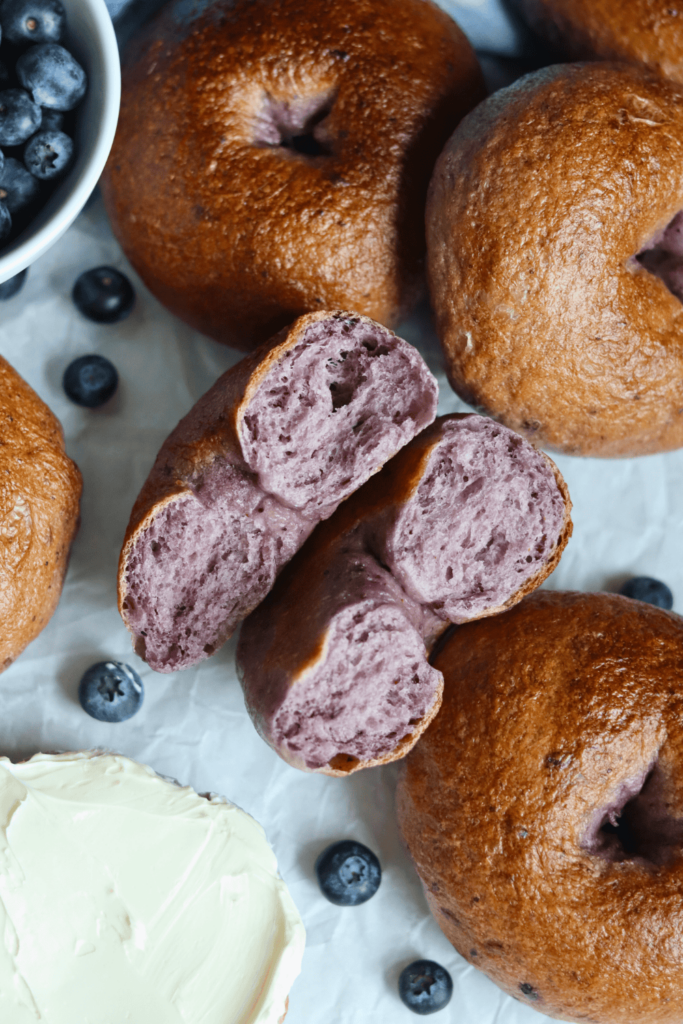
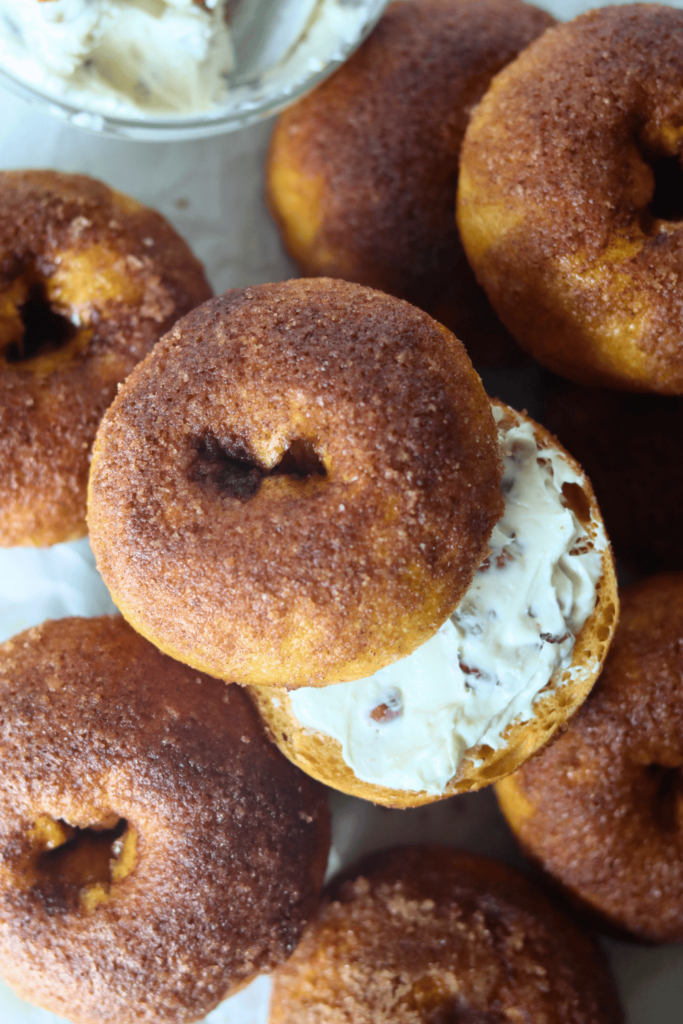
If you tried this Sourdough Bagels recipe or any other recipe on my blog, please leave a 🌟 star rating and let me know how it went in the📝 comments below. Thanks for visiting!
FULL RECIPE TUTORIAL
Sourdough Bagels Recipe
Enter your email below, and we’ll send it straight to your inbox! Plus, you’ll get my newest sourdough recipes and best tips every week!
Equipment
- Large Pot
Ingredients
- 150 grams active sourdough starter 3/4 cup
- 250 grams warm water 1 cup + 1 Tablespoon
- 500 grams bread flour 3 1/2 cups
- 40 grams sugar 3 Tablepoons
- 12 grams salt 2 teaspoons
- 20 grams honey for the boil bath
Instructions
*Find a Sample Baking Schedule below*
MAKE THE DOUGH :
- In a straight-edge bowl, add active starter, warm water, and sugar. Mix by hand (or use a Danish dough whisk (one of my favorite sourdough tools!) until it it looks like a milky liquid.I love using this straight-edge bowl so I can clearly see when the dough has doubled in size.150 grams active sourdough starter, 250 grams warm water, 40 grams sugar
- Next, add the bread flour and salt to the wet ingredients. Mix until fully incorporated.500 grams bread flour, 12 grams salt
- Next is a small labor of love, but trust me when I say, it is all worth it. Knead the dough for 5-6 minutes. I’ve tried using a stand mixer, but my bagels never taste as soft and chewy as when I do it by hand. So it is still my preferred method. To do so, pull a small section of bagel dough above the rest, fold it over on top, and push into the dough with the heel of your hand. Repeat this motion while turning the bowl of dough clockwise for 5-6 minutes.As you knead, you will notice the dough will become pretty stiff and a little bumpy looking – this will be a stiff dough, so totally normal.
- Cover the dough with the plastic top and let it it rest for 60 minutes.
STRETCH AND FOLD :
- After one hour of resting, repeat the same “stretch, fold and push” routine with the heel of your hand for 30 seconds.You’ll notice the dough is a little less stiff and now the dough ball is smoother. Cover the bowl again and place dough in a warm place to rise.
BULK RISE :
- Leave the dough to double in size. In my 69 degree kitchen, this typically takes anywhere from 8-12 hours. If your kitchen is warmer, it will be less time and the opposite is true if it is colder.
SHAPE :
- Once the dough has doubled in size, gently remove the sourdough bagel dough from the bowl and place it in your work surface – no flour dusting needed.
- Stretch and shape the dough into a large rectangle, about 1/2 of an inch high. Now, with a bench scraper or a sharp knife, cut the dough into 8 equal triangle pieces. (I cut it like I would a pizza.)You can weigh the pieces of dough on a kitchen scale to verify that they are all equal ( about 115g), otherwise, just eyeball it and call it a day!
- To shape, grab one piece of dough and pull the corners of the triangles towards the center. Then roll the dough until formed into a smooth ball. Repeat with the remaining pieces of dough.
- One at a time, use your thumb to punch a hole in the middle of the dough ball. Stretch the dough ball with both thumbs, about 2 inches apart. The dough will shrink back a bit after, but that’s okay.
SECOND RISE :
- Place your shaped bagels on a parchment-lined baking sheet and cover with a plastic cover or plastic wrap so the dough doesn't dry out.
- Let them rest until puffed up in a warm place, about 20-60 minutes.
- Not ready to bake? Cover the shaped bagels and place them in the fridge for up to 24 hours. Pull them out of the fridge when ready to bake, and continue with the recipe as normal. The second rise will take longer since the dough will be cold from being in the fridge.
BOIL BATH :
- While your bagels are rising, preheat your oven to 425 degrees F.
- Fill a large pot of water, about 10 cups. Add the honey and whisk until well mixed. Bring the water to a boil.20 grams honey
- Once the bagels have risen, it’s time to set up your station. I like to place a kitchen towel on the counter and a cooling rack on top to help for minimal cleanup later.
- Carefully drop 2-3 bagels into the boiling water and boil for 30 seconds on each side.
- Using a slotted spoon, scoop the bagels and place them on the cooling rack. Repeat until all bagels have been boiled.
TOPPINGS :
- After all the bagels have been boiled, it’s time to talk toppings! To be honest, eating these homemade sourdough bagels plain is heavenly, but adding toppings can bring some fun creativity to your bagels.
- To do so, sprinkle some of your toppings on a small plate and dip the top of the bagel. The bagels will be slightly sticky to the touch, which will help the toppings to stick. Place the bagels on a parchment-paper lined baking sheet.
- *Bonus tip – If you are topping your bagels with cheese, dip the bottom side as well. This will create a crunchy bite on the bottom – so good!
BAKE :
- Bake the Sourdough Bagels for 20-25 minutes, or until golden brown with an internal temperature of 200 – 210 degrees F.
- Remove the bagels from the oven and allow them to cool on a wire rack.
- Once they are cool enough to handle, I highly recommend slicing into one while it is still warm and spreading a slab of butter on top. That chewy, buttery bite will be out of this world, I promise. Enjoy!

My family loves these so much, I’ve been making them weekly. I’ve done all the topping flavors after boiling but how would I do a blueberry bagel? That is my current request!
I’m so glad your family is loving them! You’re in luck! I actually already have a 100% Sourdough Blueberry Bagels and Sourdough Discard Blueberry Bagels recipe. Hope you love them just as much!
This recipe was awesome. They baked up perfectly! I made a double batch and made everything, asiago, cinnamon crunch, and wild blueberry bagels. Thank you so much. My son (28yo) and husband have been devouring them. LOL
I love that you made such a variety! And if your husband and 28-year-old son are devouring them, I’d say that’s the ultimate seal of approval. Thank you for taking the time to share this!
Have you ever froze them uncooked? Thaw in fridge overnight and then boil and bake? I have 32 bagels to make for a bridal shower.
So honored you are using my recipe for your bridal shower! I haven’t personally tried freezing them before boiling and baking, so I can’t say for sure how the texture would turn out. I’d recommend either baking them ahead and freezing the fully baked bagels (I do this all the time and they are excellent!) or refrigerating the shaped bagels overnight and baking fresh the next day. Hope everyone loves these bagels!
How do you make the Cinnamon Crunch topping for the bagels? I see the ingredients. What measurements and process do you use?
I can’t wait to try. Thanks!
Great question! In a small bowl, melt 57g of unsalted butter. Brush 14 grams (1 Tablespoon) worth of the melted butter on top of the boiled bagels. To the remaining butter, mix in 50g sugar, 110g light brown sugar and 8g of ground cinnamon until combined. Top each boiled pumpkin bagel with an even amount of the sugar mixture. I hope you love these!
Made these today… They were AMAZING! Bagel shop bagels have long given me stomach issues. These did not and I loved that the crust was a bit thinner.
This makes me so happy to hear—thank you for sharing! I’m especially glad they were easier on your stomach—that’s such a big win with sourdough. I really appreciate you taking the time to leave this!
Can I stick the dough in the fridge overnight? If I make the dough at 4:30pm let it sit on the counter for a few hours and stick it in the fridge? and make the bagels in the morning
Great question—you’re right on track with that plan! Yes, you can absolutely refrigerate the dough overnight. I’d just make sure it has enough time at room temperature first to bulk ferment and at least double (or get very close) before going into the fridge. Just be sure that they dough has doubled in size before shaping the bagels. Hope you love this recipe!
My first SUCCESSFUL attempt at making sourdough bagels! I used 1/2 bread flour and 1/2 fresh milled white wheat. I will see if I can increase the fresh milled wheat a little at a time although I don’t want to make them too grainy tasting. While I love 100% FMF loaf bread, I don’t prefer my bagels to have that stronger flavor as it is not too tasty with cream cheese. Thank you for the recipe!
Thank you so much! A successful sourdough bagel first try is a big win! I love the idea of doing half fresh milled flour—that’s such a great balance for flavor and texture. It sounds like you found a really sweet spot!
These are hands-down the best bagels I’ve ever made—I’ve baked this recipe three times now (once as a single batch, once making three batches for a party, and again just for fun), and the flavor and texture have been consistently amazing every time.
The only issue I keep running into is with the everything seasoning. Right after the boil, it sticks perfectly and looks great going into the oven. But after baking, even a light touch causes most of the seasoning to fall off. I’ve tried really pressing the bagels into the seasoning, but it doesn’t seem to help once they’re baked.
Has anyone found a trick to help the seasoning stay put after baking? I’d love to get that same perfect adhesion all the way through because otherwise, this recipe is absolutely flawless!
Thank you so much for making them so many times — that truly means a lot! That’s a great question this definitely happens! A couple things that can help: try adding the seasoning immediately after boiling while the bagels are still very wet, or lightly brush the tops with egg wash before adding the seasoning to help it adhere better during baking.
Some loss is normal, but those steps should help it stick much better! I appreciate you sharing your experience—it’s really helpful for others too.
The dough is extremely hard and tough. Is it suppose to be? I did the 5 minutes of kneading and it’s tough.
Yes — this is a lower hydration dough, so it is supposed to feel firmer than most sourdough breads. Bagel dough should be stiff and a bit tough after kneading — that’s what gives you that classic chewy texture! If it feels dry and crumbly rather than smooth and elastic, you can add a tiny splash of water (1 teaspoon at a time), but a firm dough is completely normal for this recipe. Keep kneading until it becomes smooth and slightly elastic.
Hi! I came across this recipe, and I absolutely loved it! It’s comforting to know you have a similarly temped kitchen, which has helped my sourdough baking process so much! I added a cinnamon sugar mixture and topped some other bagels with cheddar, and they are so heavenly and divine. I look forward to mornings now. Loved this so much! I will be coming back!
This absolutely made me smile — thank you so much for sharing this! And cinnamon sugar and cheddar?! That sounds like the perfect bagel lineup. I’m so honored it’s something you look forward to in the mornings — that’s the best compliment ever!
Amazing, easy, and delicious! My family loves them!
Thank you so much! I am so glad you found them easy to make and that your family loved them. That is exactly what I hope for with this recipe. I appreciate you taking the time to leave a comment!
No complaints about this recipe! Just a big fat WOW! Little crust on the outside so soft and chewy inside as promised. The only thing I changed was cutting the bagel dough into triangles I used a pizza cutter…. smooth! Great instructions. This recipe is a keeper. I did use my mixer, no time to kneed. Can’t imagine them turning out any better. Thank you MCKENNA PULDA for sharing.
Wow — thank you so much for this amazing comment! So glad the bagels turned out soft and chewy just as promised. Thanks again for making the recipe and taking the time to share your experience
I followed your recipe to a T and even pulled them out at 18 min and they are solid and hard, what did I do wrong?
I’m sorry that happened. If bagels turn out very hard, it’s usually related to fermentation. If the dough didn’t bulk ferment long enough, the bagels won’t develop enough gas and can bake up dense and firm.
I’d recommend making sure the dough has visibly risen and feels slightly puffy before shaping. Kitchen temperature can also affect timing, so sometimes it takes longer than the written time. I hope your next batch turns out much softer!
These bagels never fail me! So delicious – they are always gone within a couple days!
That makes me so happy to hear — thank you! Bagels disappearing in a couple days is always the best sign!
This was first time making sourdough bagels and this recipe came out beautiful. Light, fluffy & the taste was so delicous!
This makes me so happy to hear — especially for your first time making sourdough bagels! Thank you so much for trying the recipe and taking the time to leave such a sweet comment!