Soft and Fluffy Sourdough Dinner Rolls Recipe
This post may contain affiliate links. Please read our disclosure policy.
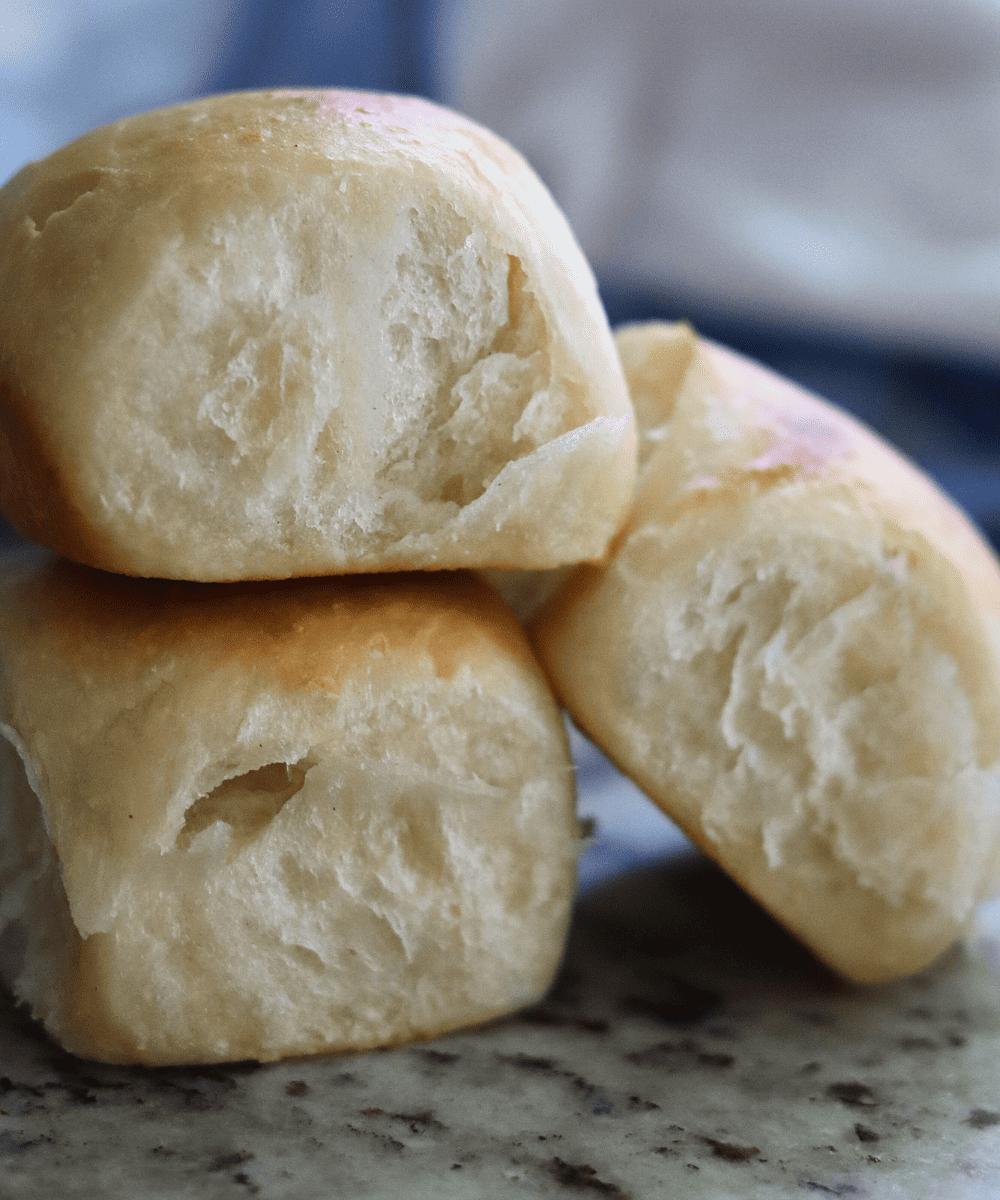
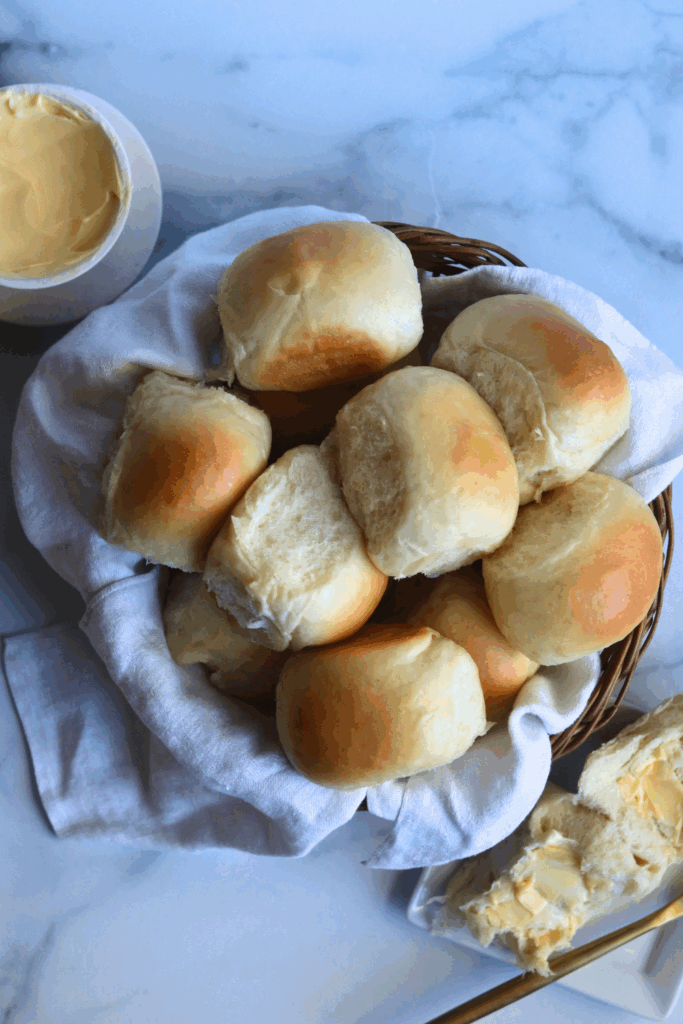
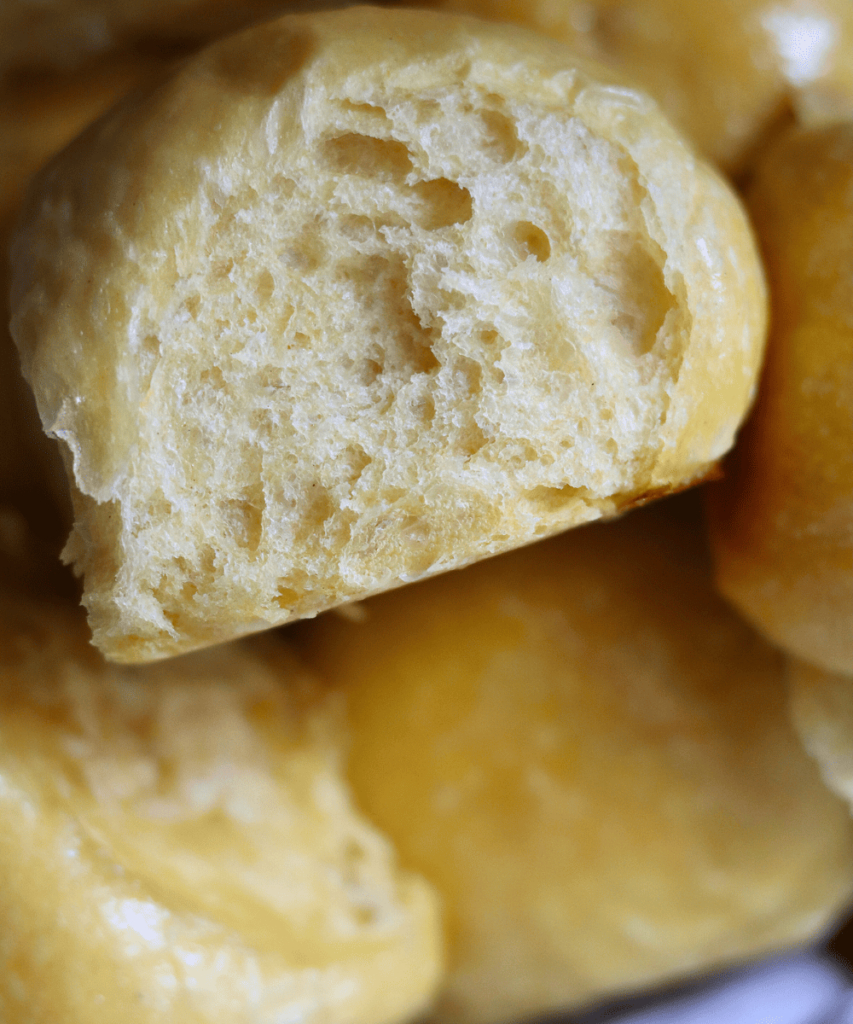
Soft, pull-apart sourdough dinner rolls make for the perfect addition to Sunday dinner or any holiday gathering. With a golden, soft crust and fluffy interior, these dinner rolls are irresistible when slathered with quality butter and a drizzle of honey.
These soft, pull-apart sourdough dinner rolls are great for Sunday dinner or holiday meals. They bake up golden on top with a fluffy, tender inside and taste best warm with butter and a little honey. The flavor is lightly sweet with a mild sourdough tang, and the texture is soft with a little chew, the kind you get from good homemade rolls and not the tough chew of crusty bread. If you’ve made my Sourdough Sweet Potato Rolls, this dough will feel pretty similar, just without the sweet potato folded in. A stand mixer makes mixing easy, and most of the time is hands-off while the dough rises. They come out warm, soft, and ready to pass around the table.
MY LATEST VIDEO
Why You’ll Love This Recipe:
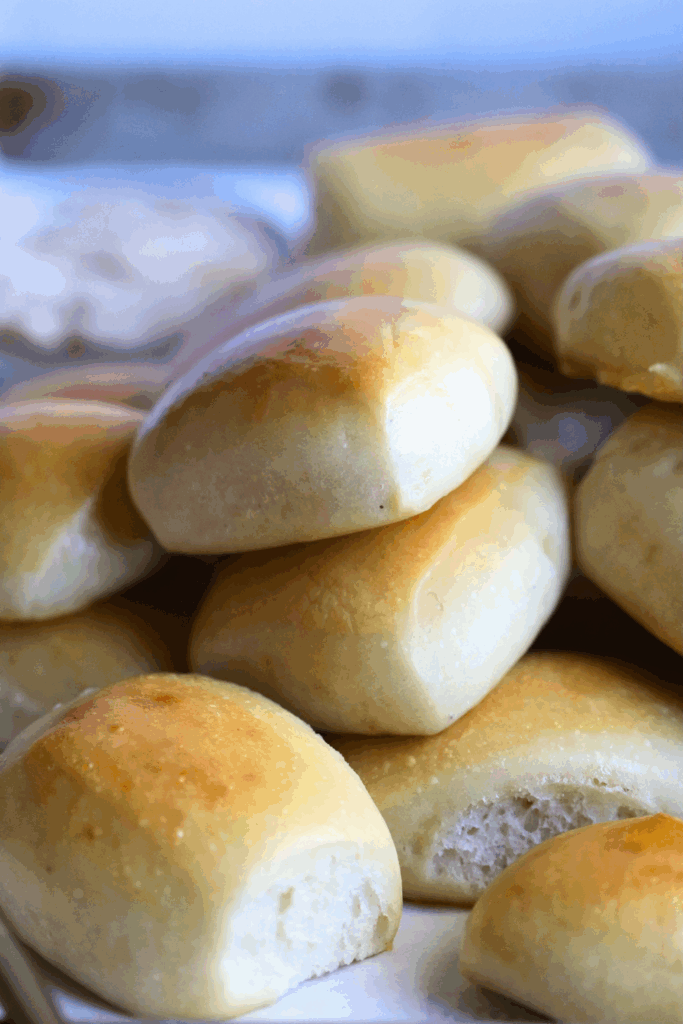
- Soft and Delicious: I’ll never tire of crusty sourdough bread, but this is the perfect recipe when we are in the mood for pull-apart rolls. With a golden crust and fluffy crumb, sourdough dinner rolls are great for feeding a crowd at Sunday dinner or any holiday get-together.
- Same-Day Recipe: This is one of my family’s favorite bread recipes because you can make it start to finish in a single day. Mix the dough in the morning, and you’ll have fresh, warm sourdough dinner rolls ready by dinner. If you want to try other rolls, you can make Sourdough Crescent Rolls, Sourdough Discard Cinnamon Rolls, or Sourdough Texas Roadhouse Dinner Rolls. They’re all soft, fluffy, and perfect for sharing.
- Easy to Make: With the help of a stand mixer, kneading the dough is a breeze. Knead with a dough hook attachment for 10-15 minutes to build strength for soft sourdough dinner rolls. If you do not have a stand mixer, knead the dough by hand for the same amount of time.
Ingredients & Substitution
* To find precise measurements, scroll to the bottom of this post to find the recipe card*

- Milk-Milk is used instead of water to make the dough softer and richer. It also helps the rolls brown better and keeps the crumb tender instead of dry.
- Butter-Butter adds flavor and keeps the rolls soft as they cool. It also helps create a fluffy texture instead of a tough, bread-like crumb.
- Active sourdough starter-The starter is what makes the rolls rise and gives them their mild sourdough tang. It also improves texture through fermentation and makes the dough easier to digest.
- Sugar-Sugar adds just a little sweetness so the rolls don’t taste plain. It also feeds the yeast in the starter and helps the crust brown in the oven.
- Egg-The egg makes the dough richer and helps give the rolls structure. It keeps them soft while still letting them hold their shape.
- Bread flour-Bread flour has more protein than all-purpose flour, which helps build strong gluten. That strength lets the rolls rise well and stay tall instead of spreading out.
- Salt-Salt slows fermentation so the dough doesn’t overproof. It also brings out the flavor of the butter, flour, and starter.
- Honey-Used on the finished rolls for sweetness and shine. It pairs well with the sourdough flavor and adds moisture when brushed on warm rolls.
- Butter or olive oil (for greasing the bowl and pan)-Butter or olive oil keeps the dough from sticking during the rise and makes the rolls easier to remove after baking. It also helps protect the dough surface from drying out.
- Egg wash, milk, or melted butter (for brushing before baking)-Brushing the tops before baking helps control how the crust forms. Egg wash makes the rolls shiny and deeply golden, milk keeps the crust soft with light color, and melted butter adds flavor and gentle browning.
- Melted butter (for brushing after baking)-Brushing the rolls after baking adds flavor and keeps the crust tender as they cool. It also gives the rolls a finished look and richer smell when served warm.
How to Make Sourdough Dinner Rolls

- Heat the butter and milk in a small saucepan on the stove or in a small bowl in the microwave until warm, but not hot. If the liquid is too hot, it can kill the sourdough starter. I like to heat and then cool slightly before adding to the dough.

- Meanwhile, add the bubbly sourdough starter, egg, and sugar to the bowl of a stand mixer with a paddle attachment. Mix on low speed until combined, then gradually add the warm milk and melted butter.

- To the wet ingredients, add the flour and salt and mix again on low speed. Stop to scrap the sides of the bowl to incorporate all the dry ingredients and then continue to mix on low for 1-2 minutes.

- The dough will look thick and sticky, like a batter. Cover with plastic wrap, a tea towel, or what I like to use – a shower cap, and allow the dough to rest for 30 minutes. This allows the gluten to rest before kneading.

- After 30 minutes, remove the cover and knead the dough with the dough hook attachment for 10 – 15 minutes. You’ll know the dough has been kneaded completely when it is smooth and shiny. The dough will completely pull away from the sides of the bowl when it is being kneaded and it will pass the windowpane test. This means when you stretch a small section of dough into a thin film, the light will be able to pass through without the dough tearing. If this is accomplished, the dough has been properly kneaded.

- Remove the dough and place it in a lightly greased bowl. I like to use butter or olive oil. Cover it again.
- Place the dough in a warm place in your kitchen. The first proof should last about 3-4 hours. The bulk fermentation time greatly depends on the temperature of your kitchen. If you have a cold kitchen, like mine, the rise time will take longer. If your kitchen runs warm, the first rise will take less time. A warm spot may be on top of your refrigerator, in a cabinet, or in the oven with the light on.

- Once the dough has doubled in size, punch the top of the dough to remove all the air bubbles. Then, place the dough on a lightly floured work surface.

- Gently stretch the dough into a large rectangle shape. With a bench knife or serrated knife, cut the dough into 14-16 equal pieces. You can weigh them for consistency, each should be about 80g or so, or eyeball it and call it a day.

- Pull the corners of the dough towards the center, flip, and then roll each piece of dough into a round, tight ball. Repeat until all the rolls are shaped.

- Lightly grease a 9×13 baking dish, round pan, or cast iron skillet. Place the shaped rolls into the baking dish and let the dough rest for its second rise. The final rise can take about an hour or so. You will know the final proof is complete when the dough balls have grown and look puffy.

- Heat the oven to350°F. Before placing them into the oven, brush the top of the rolls with a pastry brush with an egg wash, milk, or melted butter. Bake for 30-35 minutes or until the homemade sourdough rolls are golden brown. You will know the rolls are completely cooked when the internal temperature is 190°F.
- Serve the sourdough rolls warm or at room temperature.
McKenna’s Helpful Tips
- Keep your starter bubbly and active. A sluggish starter can make dense rolls, so feed it or let it sit longer if needed.
- Heat milk and butter until just warm. Too-hot liquid can kill the starter, while slightly warm helps the dough come together.
- Don’t rush the rises. Full bulk fermentation and proofing develop flavor and texture, giving you softer, fluffier rolls even in a cold kitchen.
- Shape the rolls gently but tightly. Pull corners to the center and roll smooth balls so they rise evenly and bake with consistent texture.
How to Store:
Sourdough dinner rolls stay fresh for 2–3 days in an airtight container or zip-top bag. They also freeze really well. Let the rolls cool to room temperature before putting them in a large freezer bag, squeeze out the air, and seal it. Label the bag with the date and store in the freezer for up to 2–3 months. To enjoy, thaw the rolls on the counter until they reach room temperature, and you’ll have soft, ready-to-eat rolls anytime.

FAQs
Most store-bought or bakery dinner rolls use commercial yeast, while sourdough rolls get their rise from a starter. A starter is a mix of natural yeast and bacteria that naturally leavens the dough and adds flavor.
Sourdough uses a starter instead of commercial yeast, and the long fermentation helps break down phytic acid naturally found in flour. This makes it easier for your body to absorb nutrients and can make the gluten easier to digest.
Yes! You can swap all-purpose flour for bread flour 1:1. The rolls might be a little less chewy, but they’ll still turn out soft and tasty.
FULL RECIPE TUTORIAL

Sourdough Dinner Rolls Recipe
Enter your email below, and we’ll send it straight to your inbox! Plus, you’ll get my newest sourdough recipes and best tips every week!
Ingredients
- 240 grams milk, warm 1 cup
- 57 grams unsalted butter, melted 4 Tablespoons
- 200 grams active sourdough starter heaping 1 cup
- 1 egg room temperature
- 24 grams sugar 2 Tablespoons
- 450 grams bread flour 3 cups + 3 Tablespoons
- 9 grams salt 1 1/2 teaspoons
Instructions
Make the Dough:
- Heat the butter and milk in a small saucepan on the stove or in a small bowl in the microwave until warm, but no hotter than 110 degrees F. If the liquid is hotter than 120 degrees F, it can kill the sourdough starter.240 grams milk, warm, 57 grams unsalted butter, melted
- Meanwhile, add the bubbly sourdough starter, room temperature egg, and sugar to the bowl of a stand mixer with a paddle attachment. Mix on low speed until combined, then gradually add the warm milk and melted butter.200 grams active sourdough starter, 1 egg, 24 grams sugar
- To the wet ingredients, add the flour and salt and mix again on low speed. Stop to scrap the sides of the bowl to incorporate all the dry ingredients and then continue to mix on low for 1-2 minutes. You can also mix the dough by hand if you're not using a stand mixer.450 grams bread flour, 9 grams salt
- The dough will look thick and sticky, like a batter. Cover with plastic wrap, a tea towel, or what I like to use, reusable shower cap, and allow the dough to rest for 30 minutes.
Knead:
- After 30 minutes, remove the cover and knead the dough with the dough hook attachment at medium speed for 10 – 15 minutes. You'll know the dough has been kneaded when it is smooth and shiny. The dough will completely pull away from the sides of the bowl when it is being kneaded and it will pass the windowpane test.This can be done by hand. Knead the dough for the same amount of time, or until the dough passes the windowpane test.
- Baking Tip: This means when you stretch a small section of dough into a thin film, the light can pass through without the dough tearing. If this is accomplished, the dough has been properly kneaded.
- Remove the dough and place it in a lightly greased straight-edge bowl. I like to use butter or olive oil. Cover it again.I like to use this straight edge bowl because it allows me to clearly see when the dough has doubled in size.
Bulk Fermentation:
- Place the dough in a warm place in your kitchen to double in size. In my 70 degree F kitchen, the first proof takes about 3-4 hours. The bulk fermentation time greatly depends on the temperature of your dough and kitchen. If you have a colder kitchen, the rise time will take longer. If your kitchen runs warm, the first rise will take less time.See Notes below for 'Make-ahead Options
Shape:
- Once the dough has doubled in size, punch the top of the dough to remove all the air bubbles. Then, place the dough on a clean work surface.
- Gently stretch the dough into a large rectangle shape. With a bench knife or serrated knife, cut the dough into 14-16 equal pieces. You can weigh them for consistency, each should be about 55 grams or so, or eyeball it and call it a day.
- Pull the corners of the dough towards the center, flip, and then roll each piece of dough into a round, tight ball. Repeat until all the rolls are shaped.
- Lightly grease a 9×13 metal baking pan, round pan, or cast iron skillet. Place the shaped rolls into the baking dish, cover them with plastic wrap, and let the dough rest for its second rise. In my 70 degree F kitchen, the final rise takes about 2 hours. You will know the final proof is complete when the dough balls have grown in size and look puffy.
- Not ready to bake these on the same day?No worries! Cover the unbaked rolls on a with plastic wrap and store it in the fridge overnight. Before you’re ready to bake them, pull the dinner rolls out of the fridge and allow the dough to rise. This will take longer since the dough is cold from the fridge. You could also flash freeze the shaped rolls and freeze for up to a week. Thaw at room temperature or in the fridge overnight, allow them to rise at room temperature and then bake!
Bake:
- Heat oven to 350 degrees F. Before placing them into the oven, brush the top of the rolls with an egg wash with a pastry brush. To make the egg wash, beat 1 egg with a splash of milk.
- Bake for 30-35 minutes or until the homemade sourdough rolls are golden brown. You will know the rolls are completely cooked when the internal temperature is 190 degrees F.
- Remove the rolls from the oven and top with more butter. Serve the sourdough rolls warm or at room temperature. Enjoy!
Notes
Recipe Tips
-
-
- Looking for the same great tasting dinner rolls, but need them quickly? Check out my Sourdough Discard Dinner Rolls recipe! Soft, fluffy and ready in 2 hours!
- This sourdough roll recipe is great for making larger buns as well! Instead of making 14-16 individual rolls, I will divide the dough into 8-12 larger buns. Bake at 350 for 25-30 minutes or until golden brown.
- Sourdough dinner rolls will last for 2-3 days when stored in an airtight container or ziplock bag.
-

when placeing the shaped balls on bakeing tray. do you leave a space In between each bun?
That’s correct! I leave just a little space between them when placing them on the baking tray. As they rise and bake, they’ll expand and touch each other, which helps create those soft, pull-apart sides that dinner rolls are known for. Enjoy!
I’m new to sourdough baking so any help or advice would be appreciated! Your recipe is the only one I came across that calls for 200g of starter vs. the more standard 100g I see often. Is this for taste or faster fermentation?
Such a great question—and welcome to sourdough baking! The higher amount of starter is mainly to speed up fermentation and make this a same-day recipe. More starter means more active yeast and bacteria, so the dough rises faster.
made these rolls as a practice run for Easter, my dough was sticky and hard to work with, and I was sure it didn’t overferment! Despite that they rose to fluffy balls and came out great! Im not sure why so sticky, any thoughts??
Thank you for doing a practice run—that’s always such a smart idea! I’m so glad they still turned out fluffy in the end.
A few things can make it feel stickier: higher humidity, a more hydrated starter, or slight variations in flour. It doesn’t necessarily mean anything went wrong, especially since they baked up well.
If I make bake these a day or two before and would like to reheat them the day of for a holiday meal how would you suggest I do that if I leave them in an airtight container or bag at room temperature?
That’s a great question, especially for holiday prep!Yes, you can make them a day or two ahead and store them in an airtight container at room temperature. To reheat, I recommend placing them in a 300–325°F oven for about 8–10 minutes until warmed through. If you want to bring back a little extra softness, you can lightly cover them with foil while reheating, or brush the tops with a bit of melted butter before warming. They come back really nicely this way.
can I use margarine in this recipe instead of butter? I’m lactose free thats why I’m asking.
I personally haven’t tested this, but you should be able to substitute the butter 1:1!
Hi, the comparison in this recipe and the from country roadhouse, what would be the difference? Its the same amount of starter but bigger amount flour. And rise time for dough is longer then 3 hours.
Great question! While both recipes use the same amount of starter, the flour and liquid ratios are different, which changes how the dough behaves. This recipe uses less flour and less milk overall, which creates a slightly softer dough.
Another big difference is temperature. My recipe assumes a room temperature around 70°F, so the rise will naturally take longer. The other recipe bulk ferments closer to 80°F, which speeds fermentation up quite a bit.
In sourdough baking, temperature and hydration both play a big role in how quickly the dough rises. This recipe is a favorite – super soft! Hope this helps and you give it a try.
Thank you yes I love your recipe. But would be interested to see how the other one works. Yes I understand that hydration makes a difference.
Don’t know if I asked before. Can I use a mix of all-purpose and whole wheat in this recipe.?
Yes, you can! I recommend starting with up to 25–30% whole wheat flour, as using more can make the rolls a bit denser and slow fermentation. You may also need a splash more liquid since whole wheat absorbs more moisture. If you give it a try, I would love to hear how they turn out!
If I put them in my fridge overnight, how long should I let them rise again before popping them in the oven? Thanks! My kitchen is about 70 degrees as well.
Hi Evie! Typically, if I’m pulling the rolls out of the fridge for their second rise, I will let them rise for 3-4 hours at 70 degrees. This time could be faster if you place them in a warmer spot. But just be sure not to rush this step, otherwise the rolls will bake up dense and gummy.
Any suggestion if the dough is a play doh texture and not getting shiny/passing the windowpane test? Followed directions exactly but it’s just not working .
Thanks so much for trying the recipe! If the dough feels more like play-doh and isn’t getting smooth or passing the windowpane test, it usually means it just needs more hydration or more kneading time. A couple things to try next time:
Add 5-10 grams of milk at a time while kneading until the dough softens and becomes more elastic.
Knead a bit longer — enriched doughs (with butter, eggs, sugar) can take extra time to come together, especially by hand.
Also double-check that your butter was truly softened — cold or firm butter can keep the dough from getting smooth.
Don’t give up — enriched doughs can be finicky, but once it clicks, it’s magic! Let me know if you want help troubleshooting further.
I have a question: when I use my kitchen aid to mix the dough, it all chunks up. In the hook and just takes a ride around. It’s this what is supposed to happen?
This is totally normal! The dough will often clump around the hook and slap around the bowl before it fully comes together. As the gluten develops, it should gradually become smoother and more cohesive.
Can I shape and put in refrigerator on Tuesday and bake on Thursday? (2 nights cold ferment)
You can, but I usually don’t go beyond 24 hours in the fridge for this recipe, as the rolls can start to overproof and may end up dense or gummy. For a longer cold ferment, I’d recommend shaping and refrigerating on Tuesday, then checking them carefully the next day (Wednesday) to see if they’re still holding their shape and lightly puffed before baking.
What hydration should my starter be for this recipe?
Great question! My recipes are all written for a 100% hydration starter — meaning it’s fed with equal parts flour and water by weight. If your starter is at a different hydration, you can still use it, but you may need to adjust the flour or water slightly to match the dough consistency shown in the recipe.
Hope that helps, and happy baking!